MAINTENANCE
8.14
ThinPrep™ 5000 Processor with AutoLoader Operator’s Manual
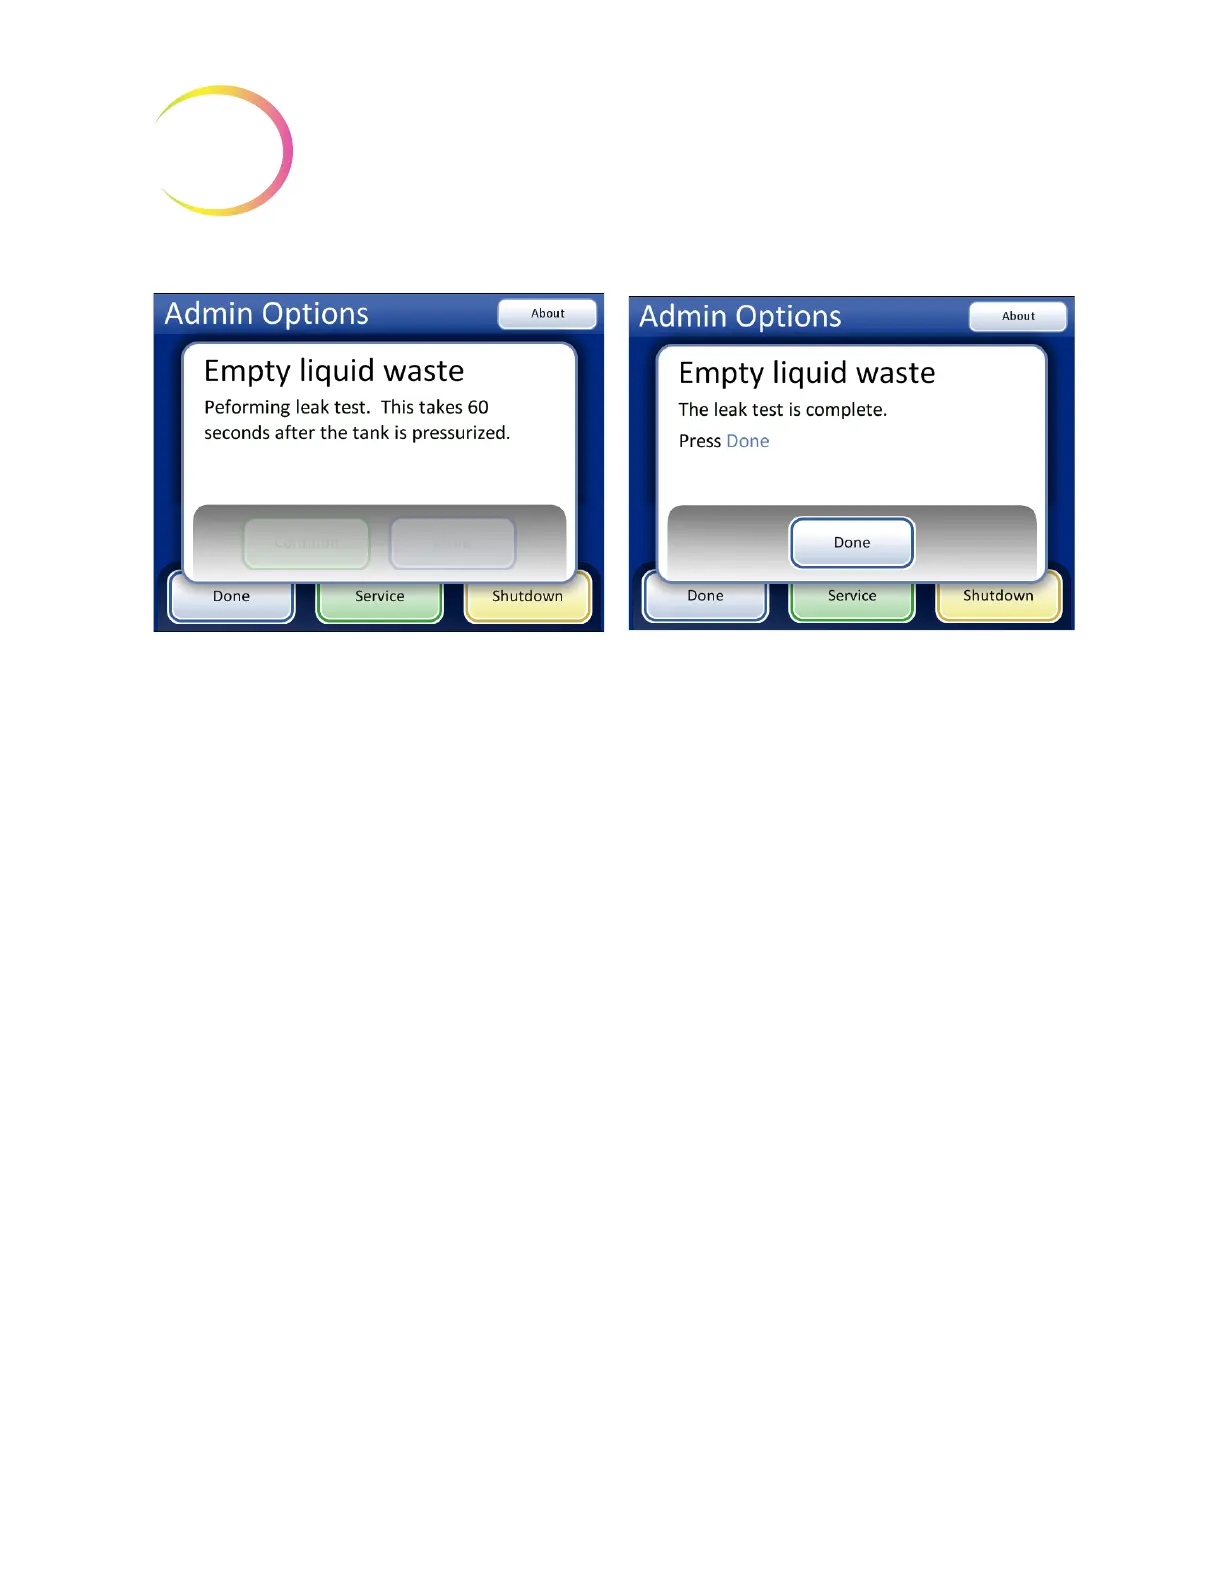
Figure 8-15 Waste System Leak Test
Press the
Done
button when complete.
Waste Bottle Connection
The waste bottle will be connected to the system at the time the instrument is installed. However, if
the waste bottle and the tubing harness should be removed entirely (for overall replacement,
replacement of the waste filter, cleaning, etc.) the following steps describe connecting the tubing
correctly.
1. The waste bottle is located inside the waste cabinet door of the AutoLoader cart. If for some
reason, the waste bottle is relocated outside of the cabinet, the waste bottle should be placed at
the same height or below the ThinPrep 5000 processor. Do not place the waste bottle above the
instrument.
2. Ensure that the waste bottle cap is tightly secured. The waste bottle must rest in an upright
position. Do not allow the waste bottle to lay on its side.
3. Locate the three waste bottle connections at the rear of the ThinPrep 5000 processor. Refer to
Figure 8-16. Ensure that the buttons of the connectors are in the down/inward position.