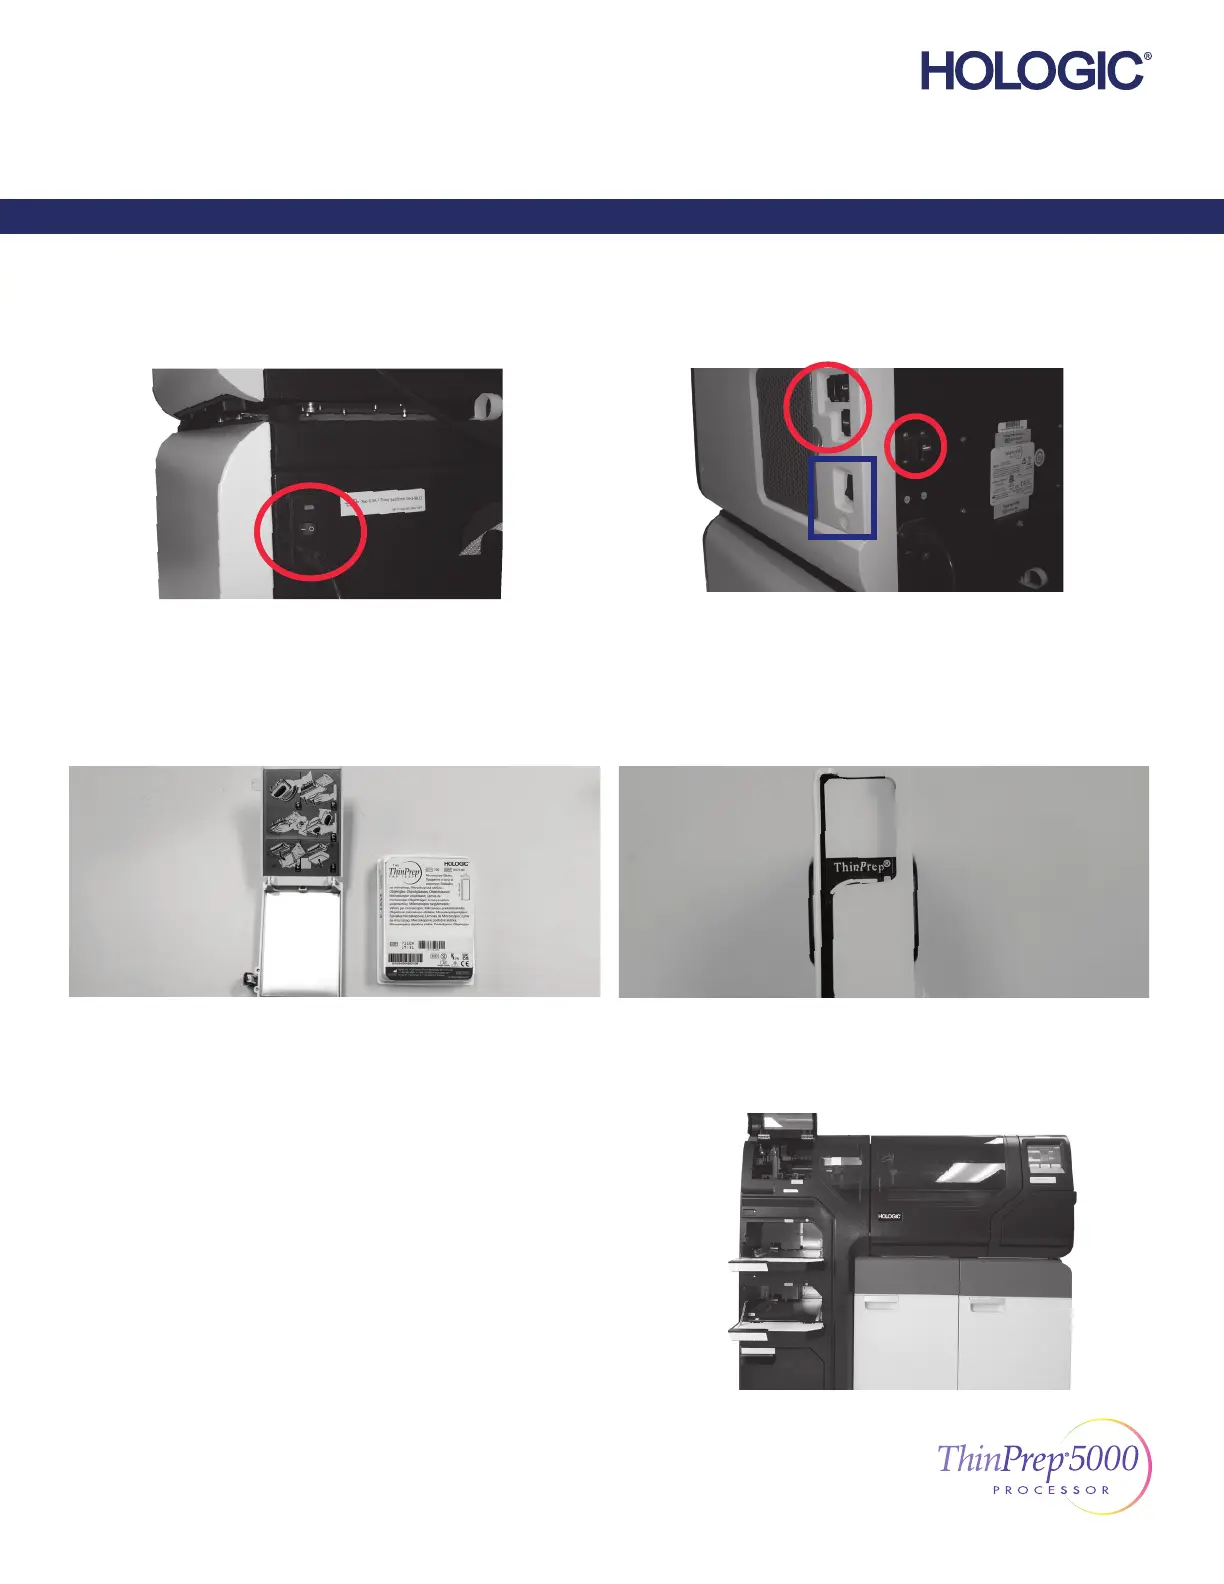
Power On
Load Cassette with Slides
Follow...
the diagram on the slide cassette.
Verify that the power switch on the back right of the AutoLoader, above
the power cord, is turned on.
Leave it on.
Close all doors.
Remove all USB keys from the USB ports on the side and back of the
instrument.
Press the rocker switch located on the lower right side of the processor.
Check for correct slide orientation.
The frosted area of the slides is above the ThinPrep® logo, and “ThinPrep”
reads correctly from left to right.
Load Slide Cassettes into the Instrument
Load Vial Trays into the Instrument
©2021 Hologic, Inc. All rights reserved. This guide is designed to be used
in conjunction with, but not to replace, the ThinPrep® 5000 Processor with
AutoLoader Operator’s Manual. As with all laboratory procedures, universal
precautions should be followed. Prior to using the ThinPrep® 5000 Processor
with AutoLoader, the operator must be trained by Hologic personnel and be
familiar with the full operating instructions, including any warnings, contraindi-
cations and safety information. Contact your local Hologic representative or,
in Canada, call Technical Support at 1-800-442-9892.
1/2
ThinPrep 5000 Processor with AutoLoader Setup Guide
English MAN-03930-001 Rev. 004
Setup Guide
ThinPrep® 5000 Processor with AutoLoader