32 MPA2C3 User Manual
See
Setting Up an Ethernet Port section on page 8.
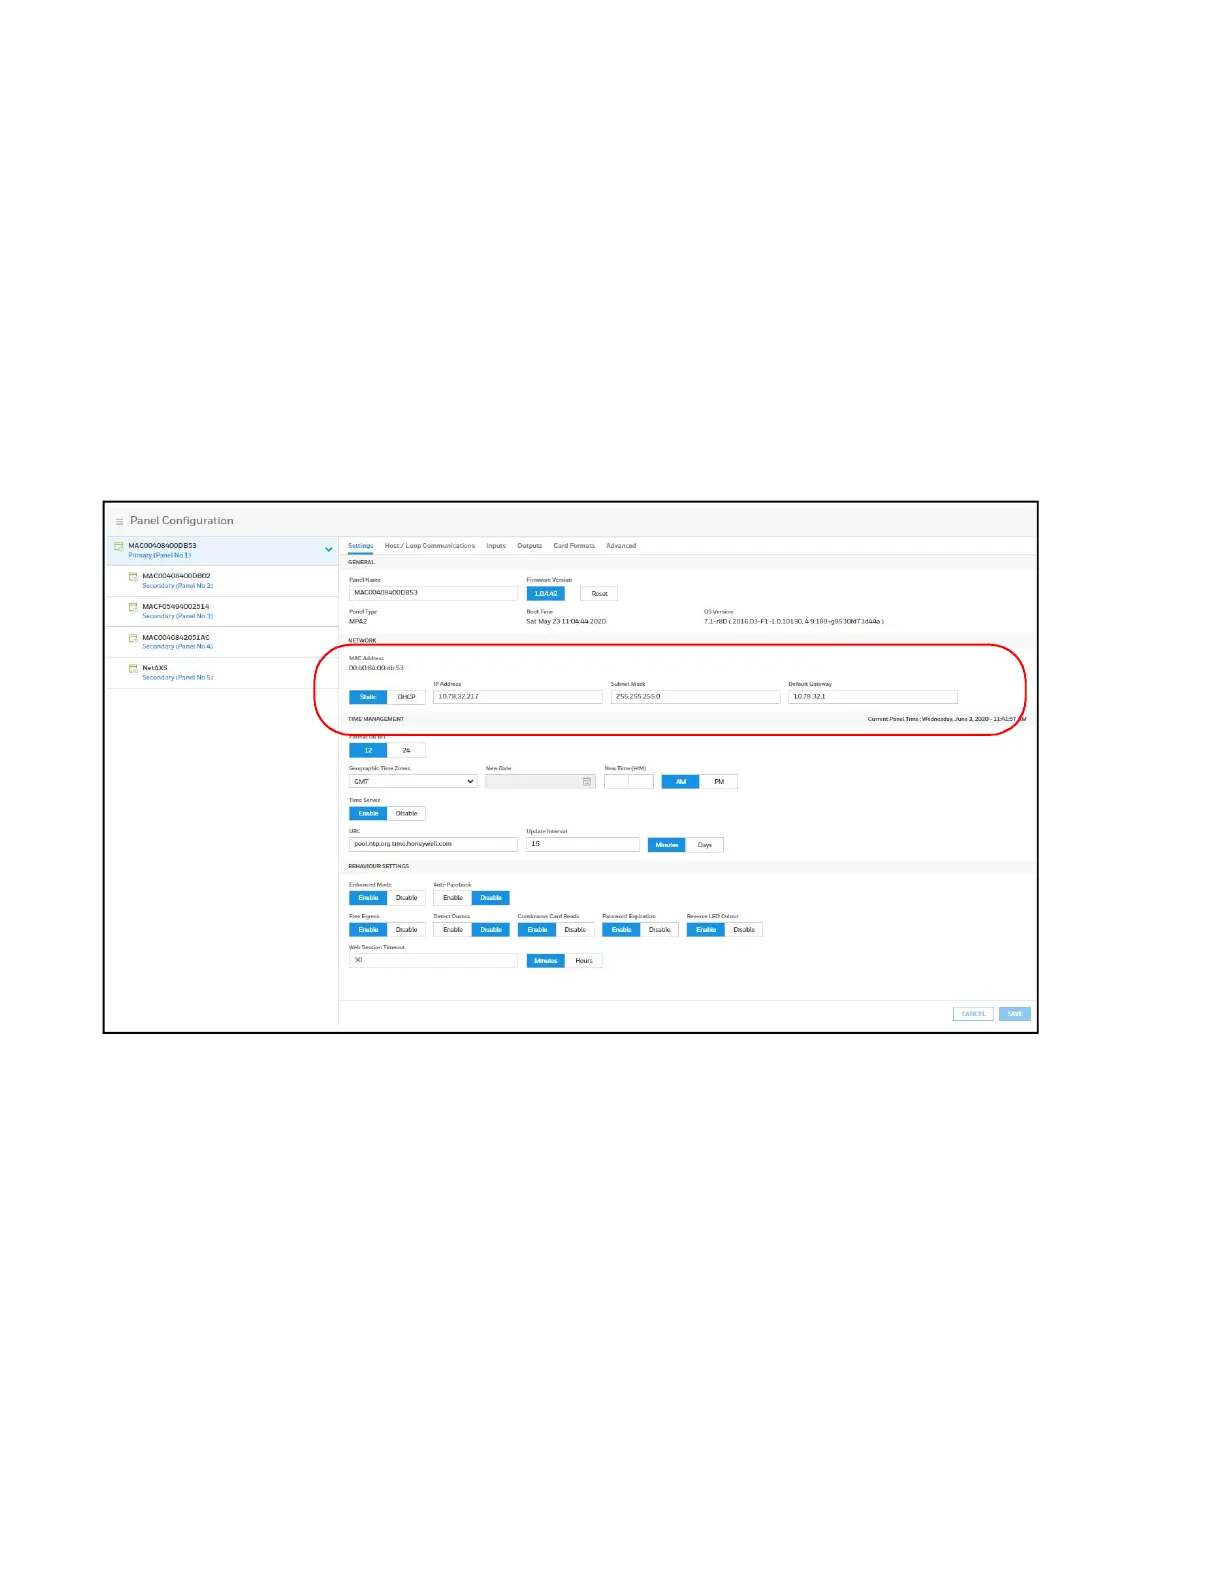
3. Set up Network Configuration (see
figure 2-3):
d. Navigate to the Network field on the Settings tab.
e. Select DHCP or enter Static IP address assigned to Primary panel.
f. Click Save. The panel automatically reboots.
Note: It is recommended to set the Primary panel as a static IP address that is different than
the default address (192.168.1.150) such as 192.168.1.100.
The Primary panel must be set to the same subnet as the Secondary panels in order
for the EVL to work properly (i.e., if DHCP server is assigning Secondary panels to
129.17.27.XXX, then Primary needs to also be set to 129.17.27.XXX).
Figure 2-3 Network Configuration for EVL
1. Log into the Primary controller from a browser.
See
Setting Up an Ethernet Port section on page 8.
2. Register Secondary EVL controllers (see
figure 2-4):
Note: Only secondary panels can be Registered and Unregistered.
c. Navigate to the EVL tab: Menu > Panel Configuration > Advanced > EVL
Discovery.