If a corrupt or incompatible image is downloaded from tape, the Ready LED will remain on steadily
and the Tape Error LED will flash until a tape load is started. The other LEDs will be off.
Replacing the front panel
CAUTION:
At all times please observe ESD precautions as indicated in the installation manual supplied with the
tape drive. Static electricity can damage electronic components. Touch a bare metal part of the
computer, such as a back plate, before you attempt to install or remove the drive.
Parts needed
• Replacement front panel
• Small bladed screwdriver (125x5 slotted or smaller)
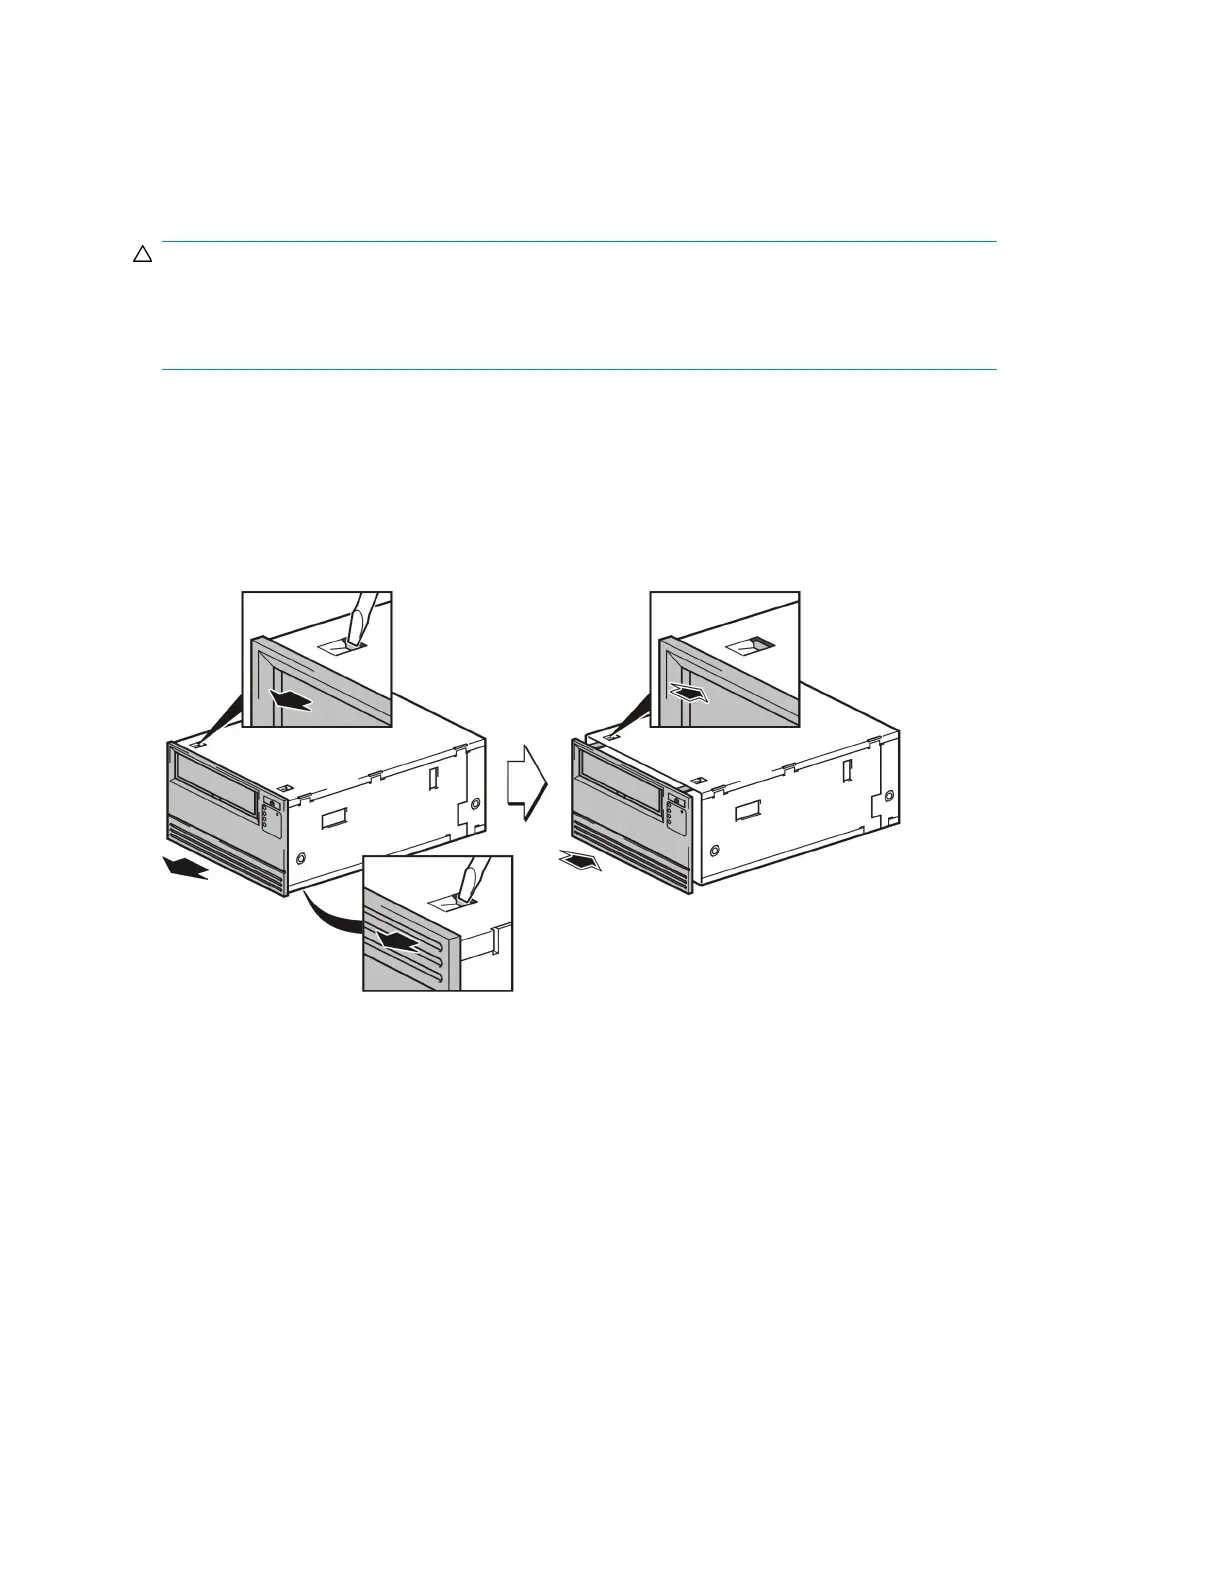
Replacing the front panel on an full-height LTO Ultrium drive
1. Use the screwdriver to release the tabs at the top of the chassis and underneath.
2. Pull the front panel towards you and away from the drive.
To replace the panel, line up the four tabs with the chassis and push the panel firmly into place.
There will be a slight click when the lugs are located in the chassis.
Front panel and LEDs28
 Loading...