170
return
# Start HTTP service software and enable HTTP service. (Details not shown.)
Verifying the configuration
1. Power on Switch A.
2. After Switch A starts up, display assigned IP addresses on Device A.
<DeviceA> display dhcp server ip-in-use
IP address Client identifier/ Lease expiration Type
Hardware address
192.168.1.2 0030-3030-632e-3239- Dec 12 17:41:15 2013 Auto(C)
3035-2e36-3736-622d-
4574-6830-2f30-2f32
3. Telnet to 192.168.1.2 from Device A.
<DeviceA> telnet 192.168.1.2
4. Enter the username user and password abcabc as prompted. (Details not shown.)
You are logged in to Switch A.
Automatic configuration using HTTP server and Python script
Network requirements
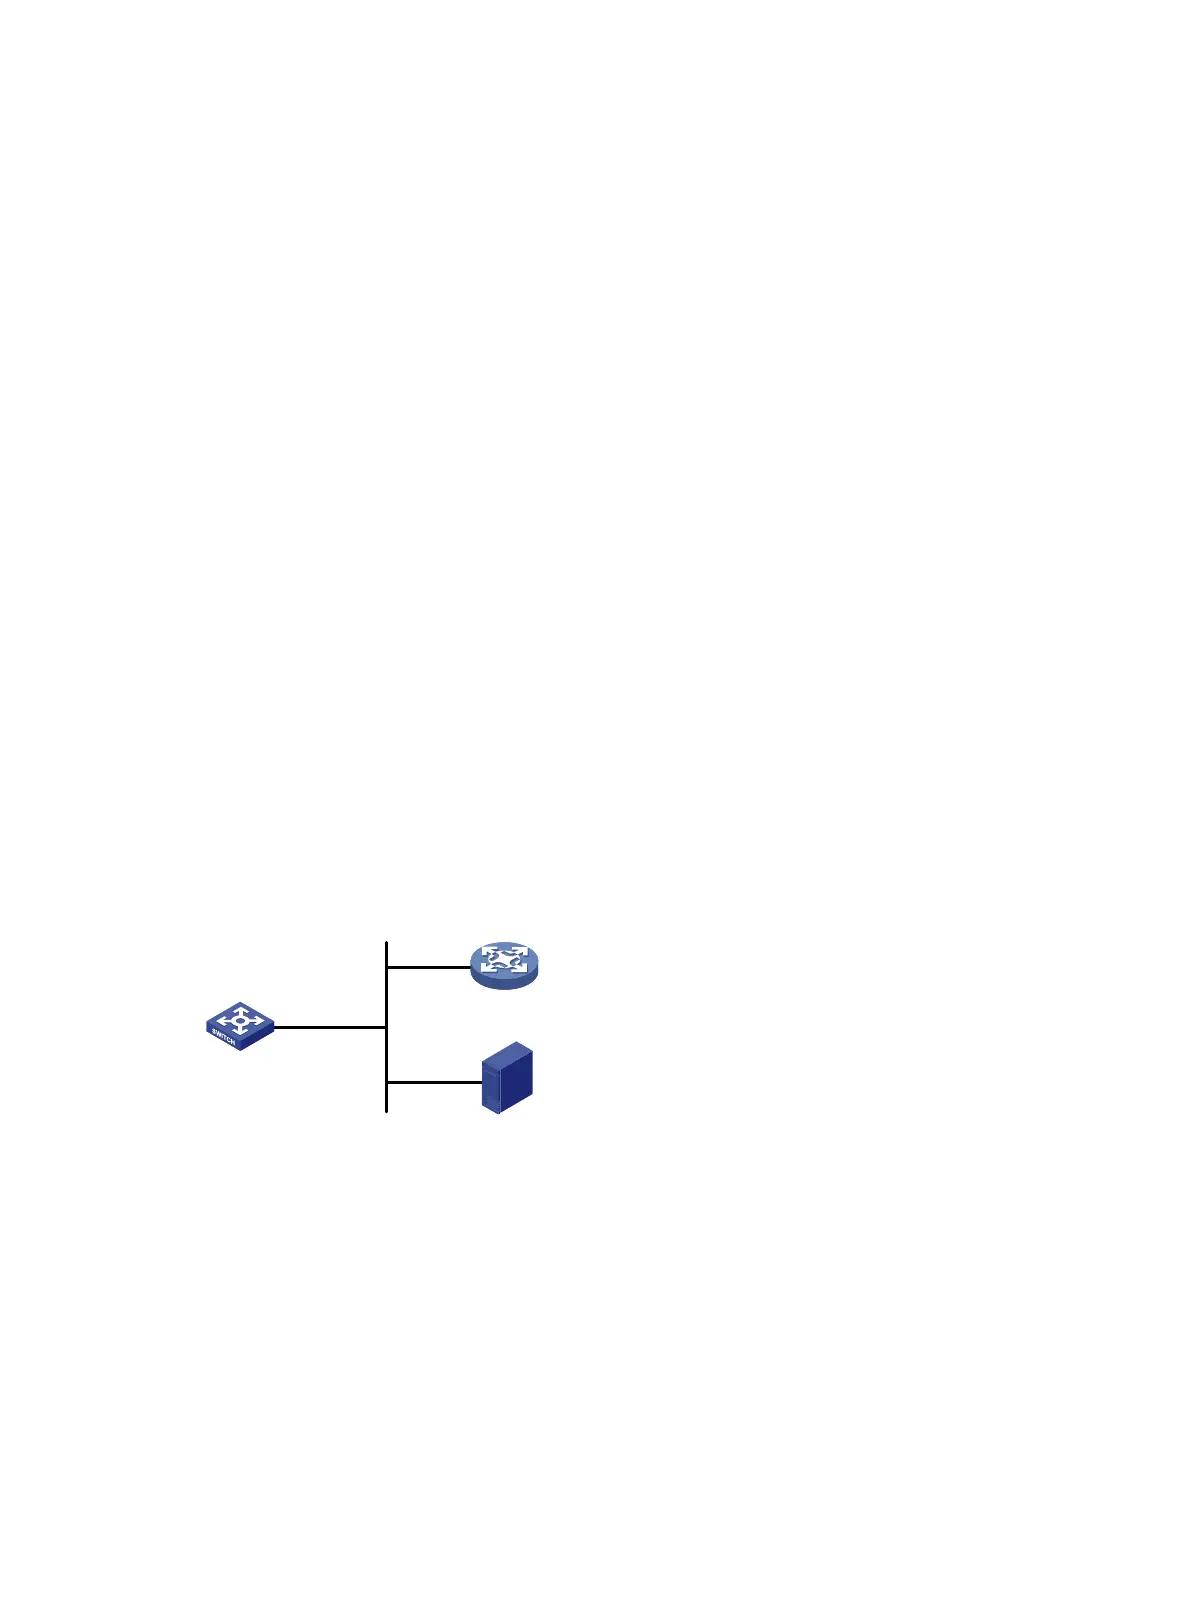
As shown in Figure 53, Switch A does not have a configuration file.
Configure the servers so Switch A can obtain a Python script to complete the following configuration
tasks:
Enable the administrator to Telnet to Switch A to manage Switch A.
Require the administrator to enter the correct username and password at login.
Figure 53 Network diagram
Configuration procedure
1. Configure the DHCP server:
# Enable DHCP.
<DeviceA> system-view
[DeviceA] dhcp enable
# Configure address pool 1 to assign IP addresses on subnet 192.168.1.0/24 to clients.
[DeviceA] dhcp server ip-pool 1
[DeviceA-dhcp-pool-1] network 192.168.1.0 24
# Specify the URL of the script file for the clients.
[DeviceA-dhcp-pool-1] bootfile-name http://192.168.1.40/device.py
Device A
DHCP server
HTTP server
GE1/0/1
192.168.1.1
192.168.1.40
GE1/0/1
Switch A

 Loading...