Step 4 Remove all external cables such as power and network cables.
Step 5 Remove the RH2288H V3 and put it on an ESD desktop. For details, see 3.6
Removing the Server.
Step 6 Remove the chassis cover. For details, see 7.11 Removing the Chassis Cover.
Step 7 Remove the supercapacitor if it is installed. For details, see 7.35 Removing the
Supercapacitor (Screw-in RAID Controller Card).
Step 8 Remove full-height full-length riser cards if they are installed. For details, see 7.19
Removing the Riser Card.
Step 9 Remove the air duct. For details, see 7.13 Removing the Air Duct.
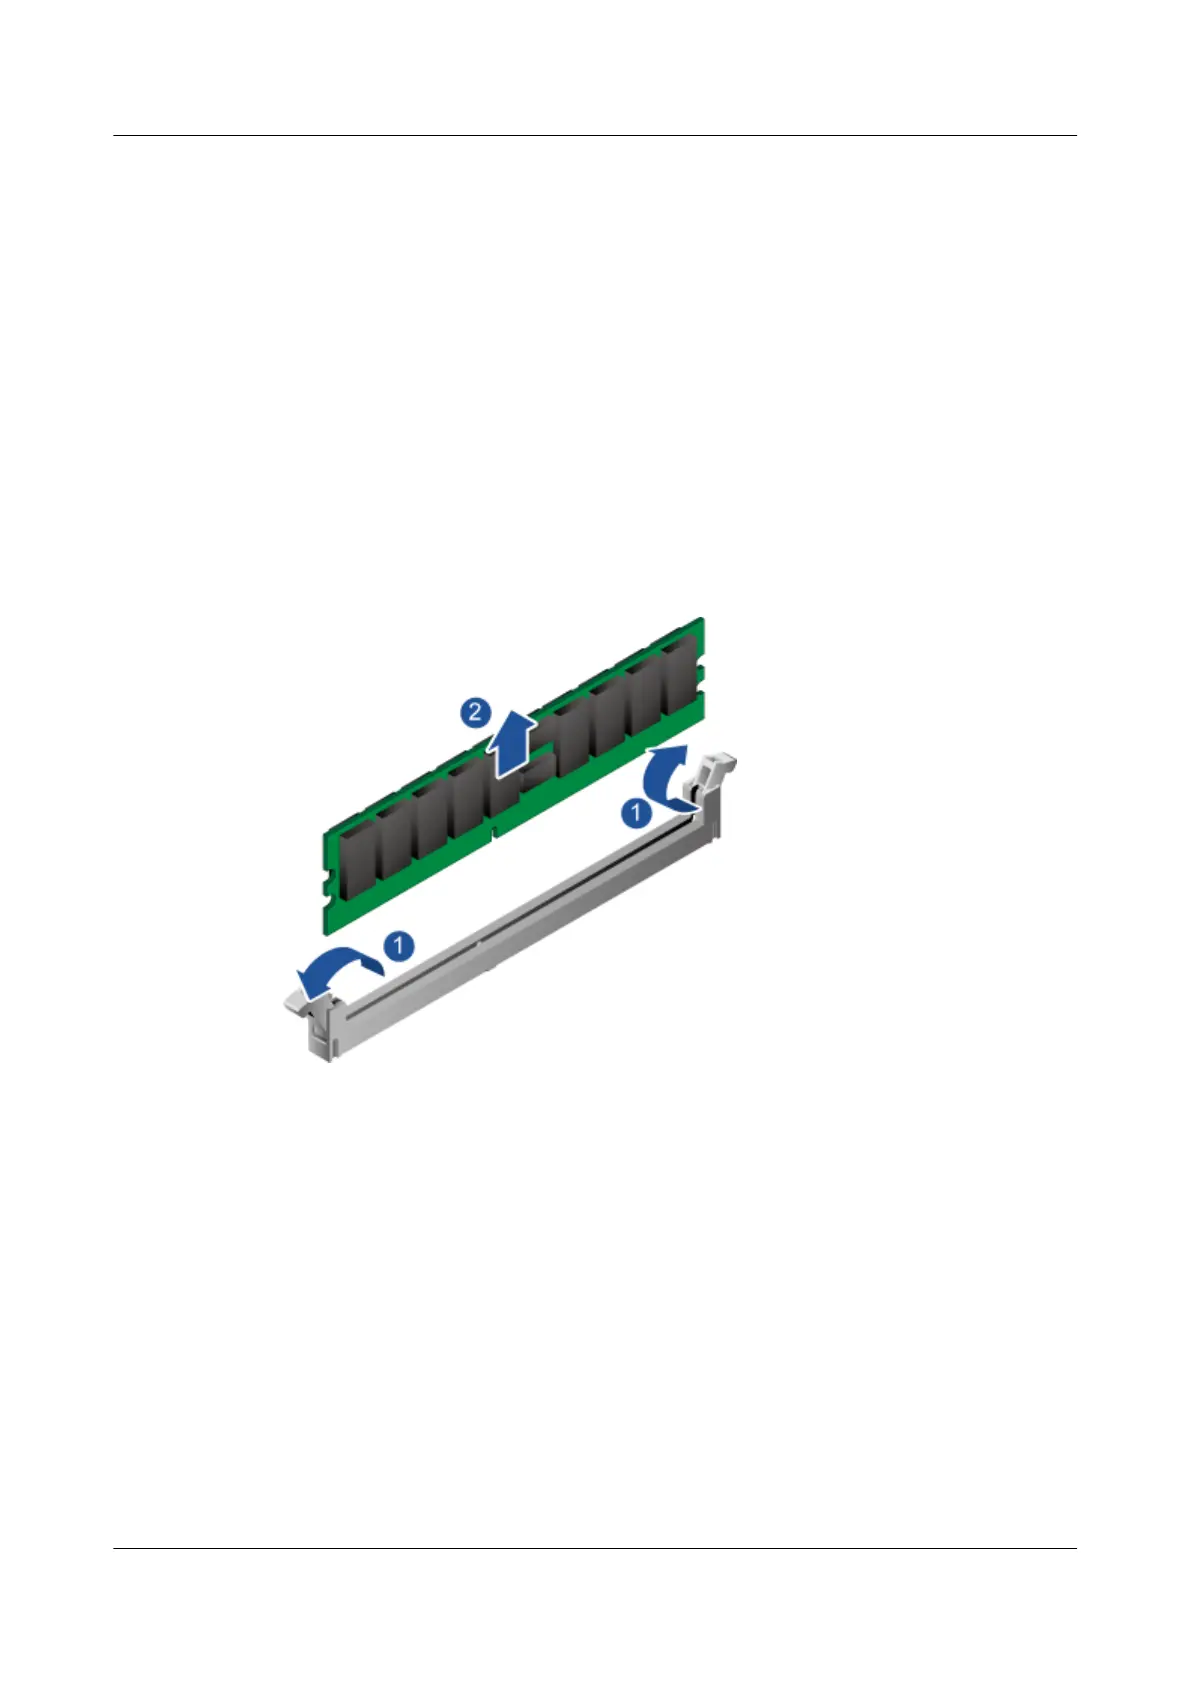
Step 10 Simultaneously press the DIMM ejectors outward to unlock the DIMM. See step
(1) in Figure 7-89.
Figure 7-89 Removing a DIMM
Step 11
Remove the DIMM from the slot. See step (2) in Figure 7-89.
Step 12 Place the removed DIMM in a memory riser box.
----End
7.42 Installing a DIMM
This section describes how to install a DIMM to expand the memory capacity or
replace the faulty DIMM with a new model.
The rules for installing DIMMs are as follows:
● The RH2288H V3 provides 24 DDR4 DIMM slots. Each CPU supports two
integrated memory controllers (IMCs), and each IMC integrates two memory
channels (channel 0 and channel 1). That is, each CPU supports four memory
RH2288H V3 Server
User Guide 7 Replacing Parts
Issue 46 (2022-12-28) Copyright © Huawei Technologies Co., Ltd. 227

 Loading...


