INFICON Routine Operation | 10
074-594-P1H Micro GC Fusion Operating Manual 281 / 319
10.5 Filter Replacement
10.5.1 Replacing the External 10 Micron Sample Inlet Filter Disk
WARNING
Micro GC Fusion has a heated inlet which is hot to the touch.
1
Shut off sample flow to Micro GC Fusion.
2
Reduce the temperature of the sample inlet by loading a method that has low
inlet temperature (below 60°C).
3
Wait for the Micro GC Fusion sample inlet to cool.
4
If applicable, disconnect the sample line to the Micro GC Fusion input fitting
using the 5/16 in. wrench, while holding the sample inlet filter with a 7/16 in.
wrench.
5
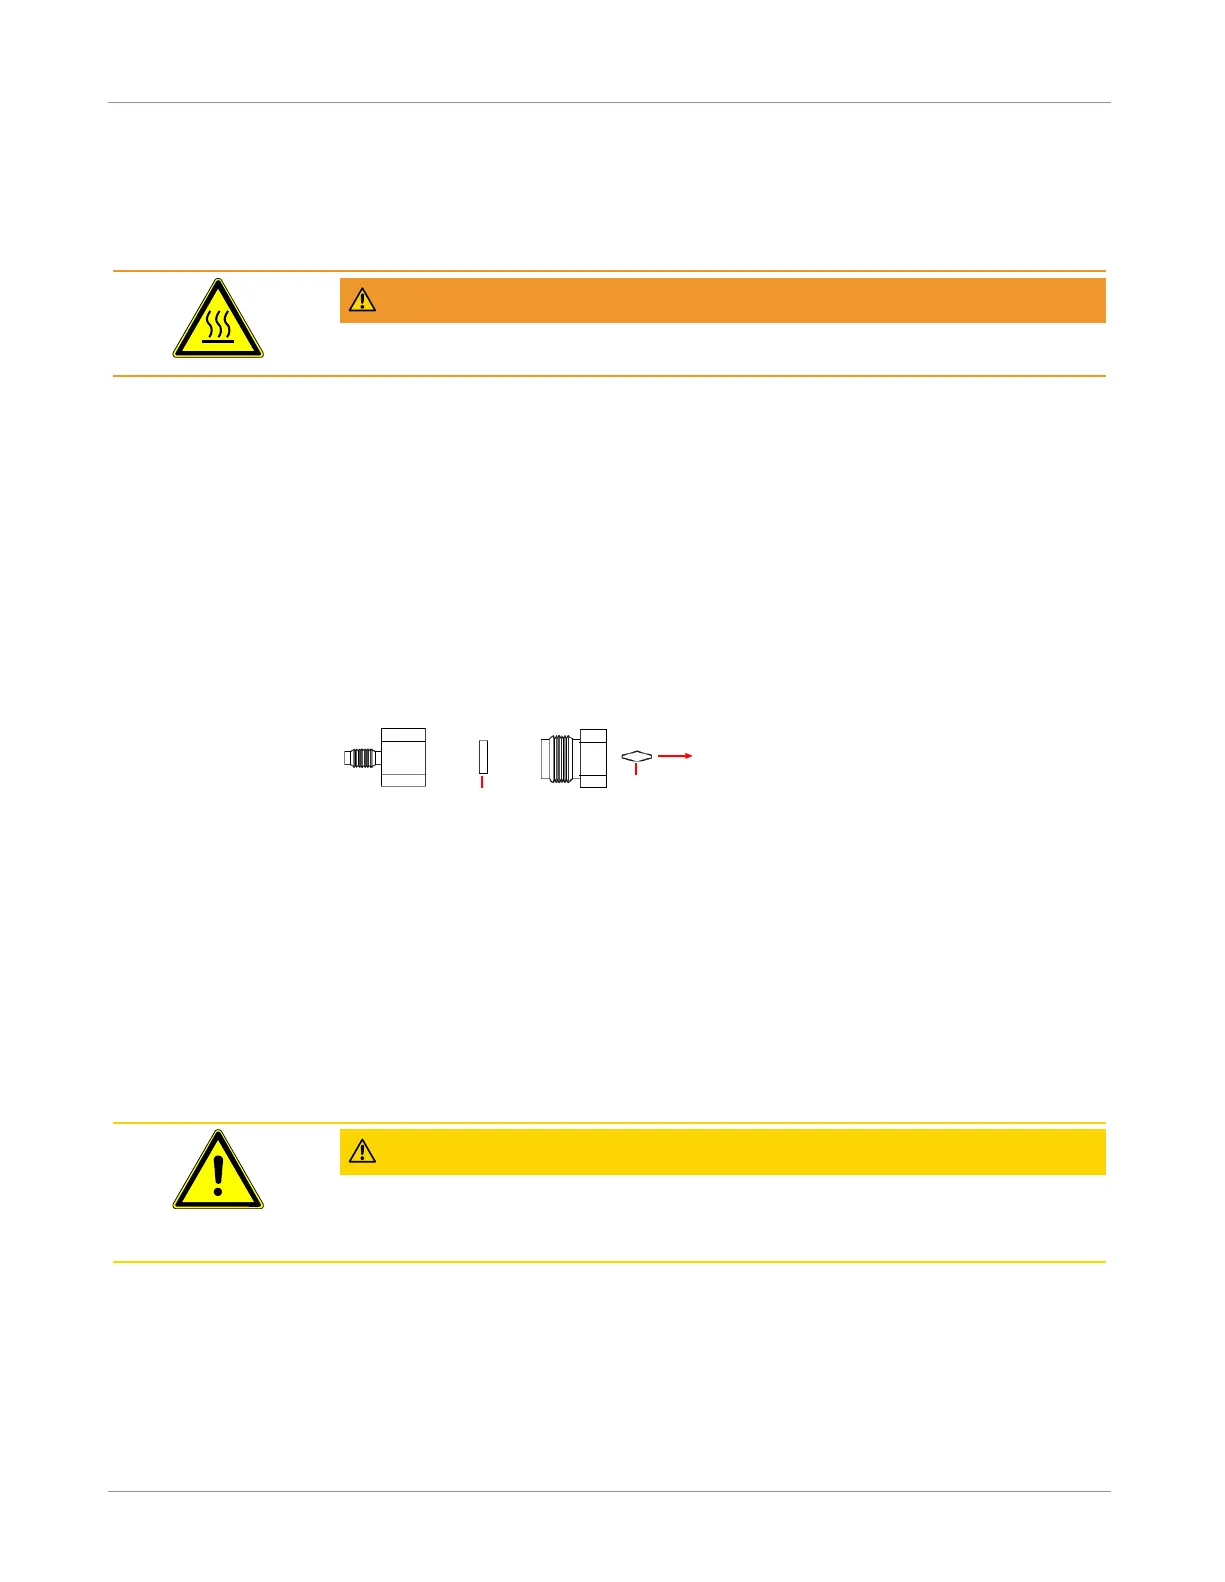
Separate Part A and Part B by using two 7/16 in. wrenches, one holding Part A
steady and another to loosen Part B counterclockwise.
Part B
Part A
To GC
Filter disk
Dual-ended
ferrule
6
Remove and discard the used filter disk from Part A.
7
Insert a new filter disk (PN 5183-4652) into Part A. Avoid handling the
replacement filters. Wear laboratory gloves when performing this procedure.
8
Reassemble the sample inlet filter by using two 7/16 in. wrenches, with one
holding the Part A steady and another to tighten Part B clockwise.
9
Place the dual-ended ferrule inside Part A. Connect the sample inlet filter to the
sample inlet. Turn Part A clockwise until finger tight, then use a 7/16 in. wrench
to tighten an additional 1/4 turn.
CAUTION
Do not over tighten the sample inlet filter assembly to Micro GC Fusion. This
will damage the dual-ended ferrule.
10
Finger tighten the sample line to the male portion of filter Part B and then use a
5/16 in. wrench to tighten an additional 1/4 turn, while stabilizing the sample inlet
filter assembly Part B using a 7/16 in. wrench.
 Loading...