INFICON Installation | 6
074-594-P1H Micro GC Fusion Operating Manual 65 / 319
4
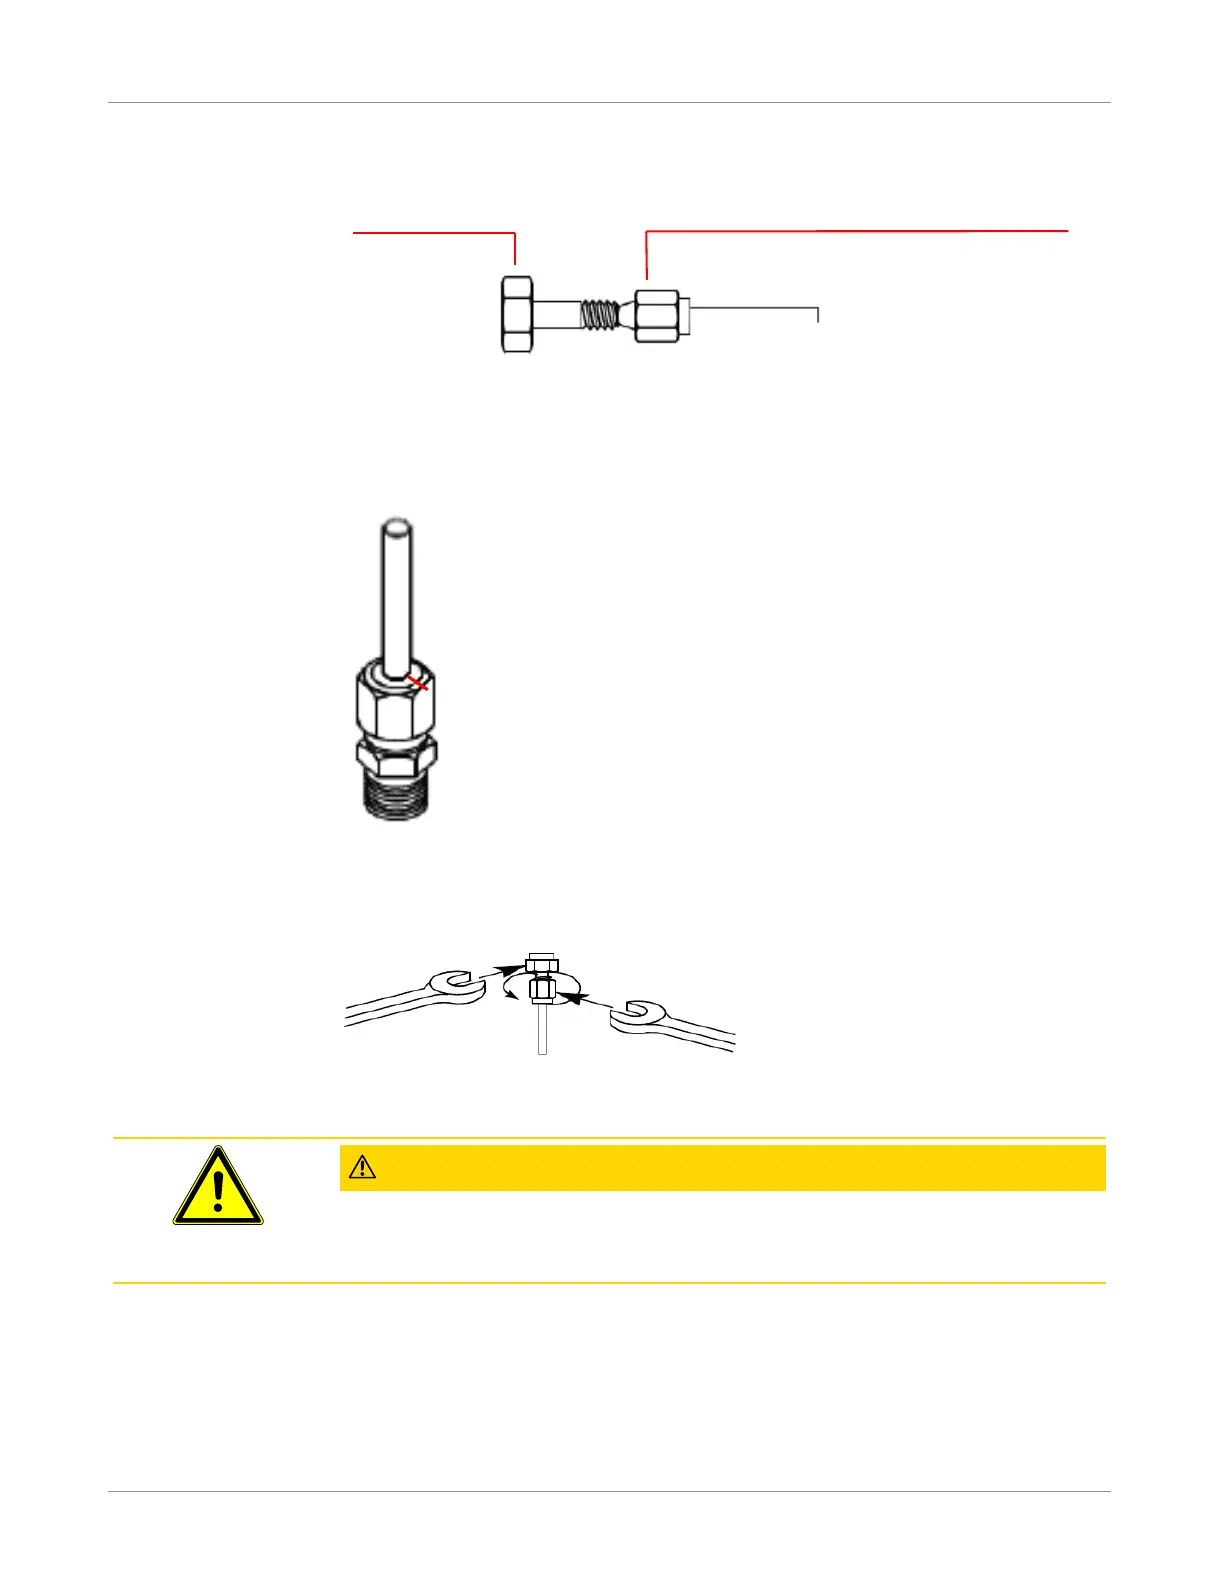
Ensure that the front ferrule makes contact with the female fitting, slide the
Swagelok nut over the ferrule, then finger tighten.
Female fitting
in vise
Front ferrule, back ferrule, and nut
5
Push the tube fully into the female fitting.
6
Mark the Swagelok fitting with a pencil line as shown.
7
Tighten the 1/8 in. fitting 3/4 of a turn, referenced to the pencil line, using one
7/16 in. wrench to hold the female fitting steady, and another 7/16 in. wrench to
turn the Swagelok fitting.
8
Unscrew the Swagelok fitting. Connect the tubing with the Swagelok fitting and
ferrules to the pencil marked location. Tighten the nut 1/4 turn past finger tight.
CAUTION
Do not overtighten.
Overtightening can damage the fitting and restrict gas flow.
Micro GC Fusion is equipped with a 1/16 in. sample inlet Swagelok connector on the
faceplate. Use the same procedure to connect the sample inlet tubing as described for
carrier gas inlet tubing in steps 1-8.
If the Integrated Sample Conditioner is installed, the instrument is outfitted with a 1/8
in. quick connect rather than a 1/16 in. sample inlet Swagelok connector.
 Loading...