CHAPTER 10
Installing the Services Gateway
•
Installing the SRX100 Services Gateway in a Rack on page 51
•
Installing the SRX100 Services Gateway on a Desk on page 52
•
Installing the SRX100 Services Gateway on a Wall on page 54
Installing the SRX100 Services Gateway in a Rack
You can front-mount two SRX100 Services Gateways in a rack. Many types of racks are
acceptable, including four-post (telco) racks, enclosed cabinets, and open-frame racks.
For more information about the type of rack or cabinet the SRX100 Services Gateway
can be installed into, see “SRX100 Services Gateway Rack Requirements” on page 26.
NOTE: If you are installing multiple devices in one rack, install the lowest one
first and proceed upward in the rack.
To install the device in a rack:
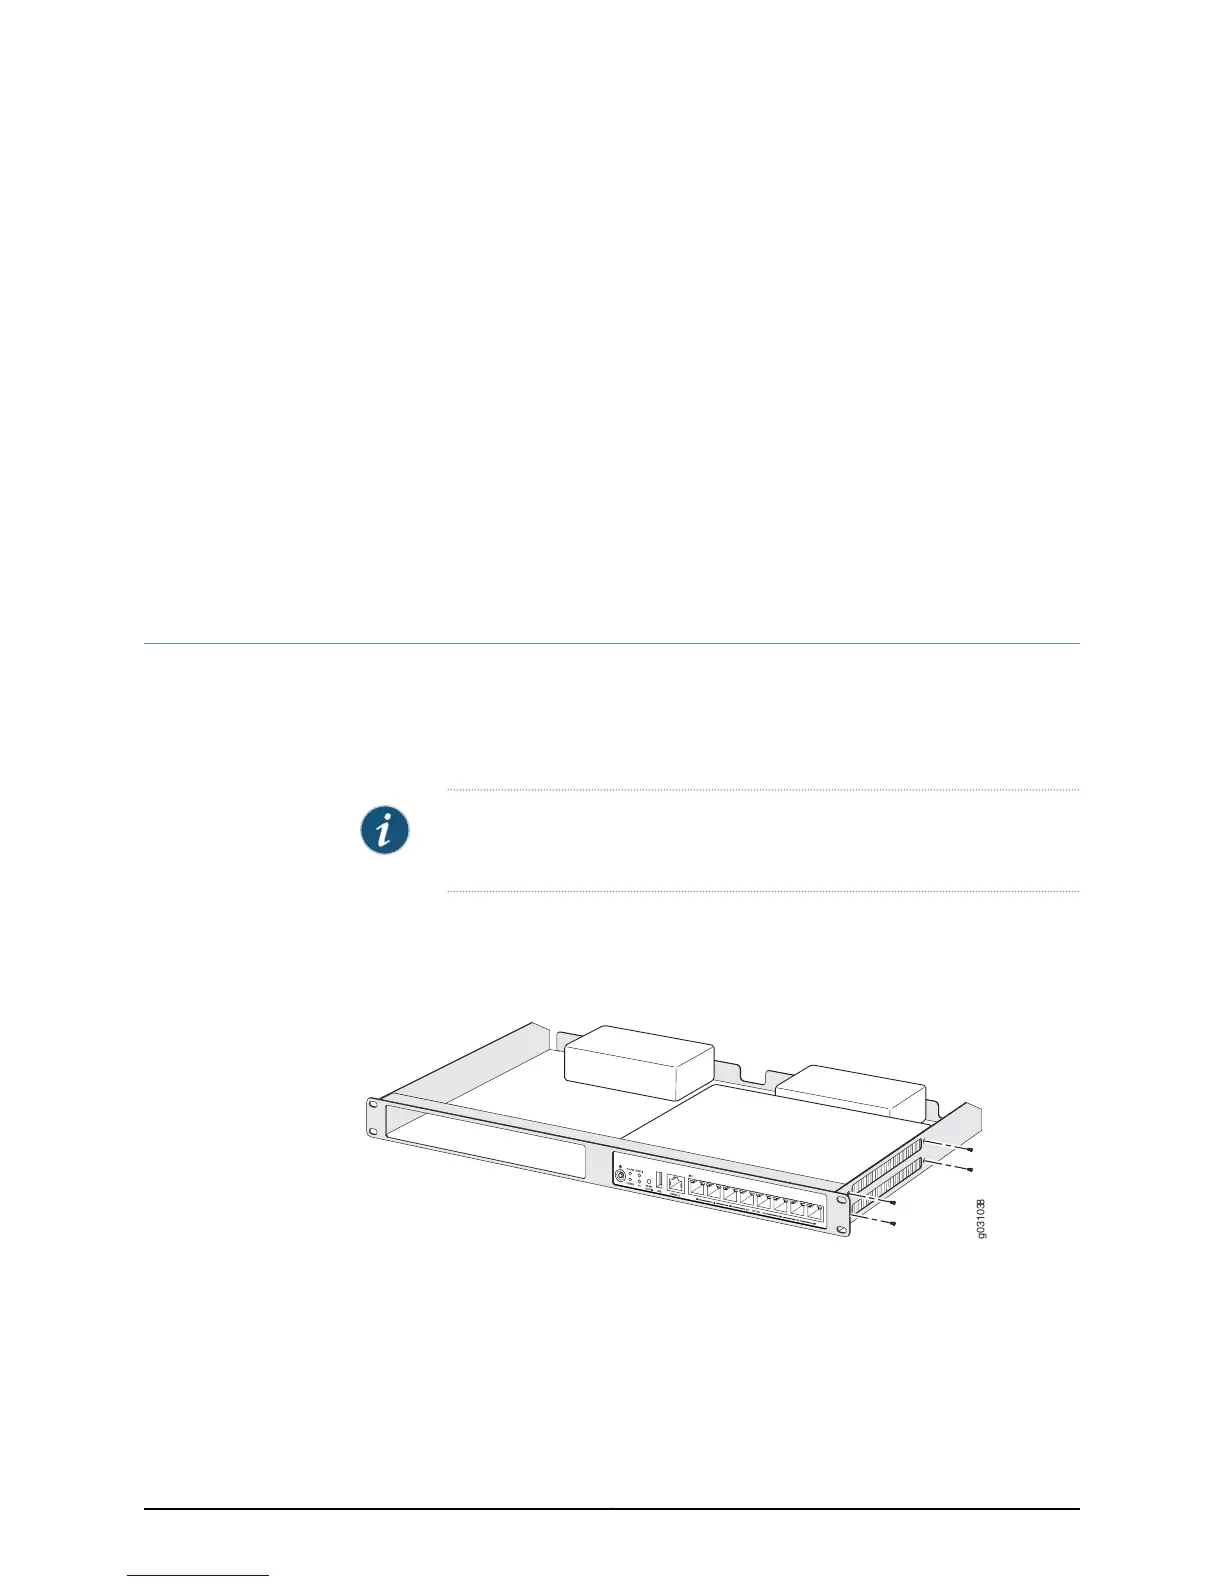
1. Position the two devices in the rack-mount tray as shown in Figure 8 on page 51.
Figure 8: Installing the SRX100 Services Gateway in a Rack
2. Use a number-1 Phillips screwdriver to install the screws that secure the device to the
rack-mount tray.
3. Have one person grasp the sides of the rack-mount tray, lift it, and position it in the
rack.
4. Align the bottom hole in each side of the rack-mount tray with a hole in each rack rail
as shown in Figure 9 on page 52, making sure the rack-mount tray is level.
51Copyright © 2015, Juniper Networks, Inc.