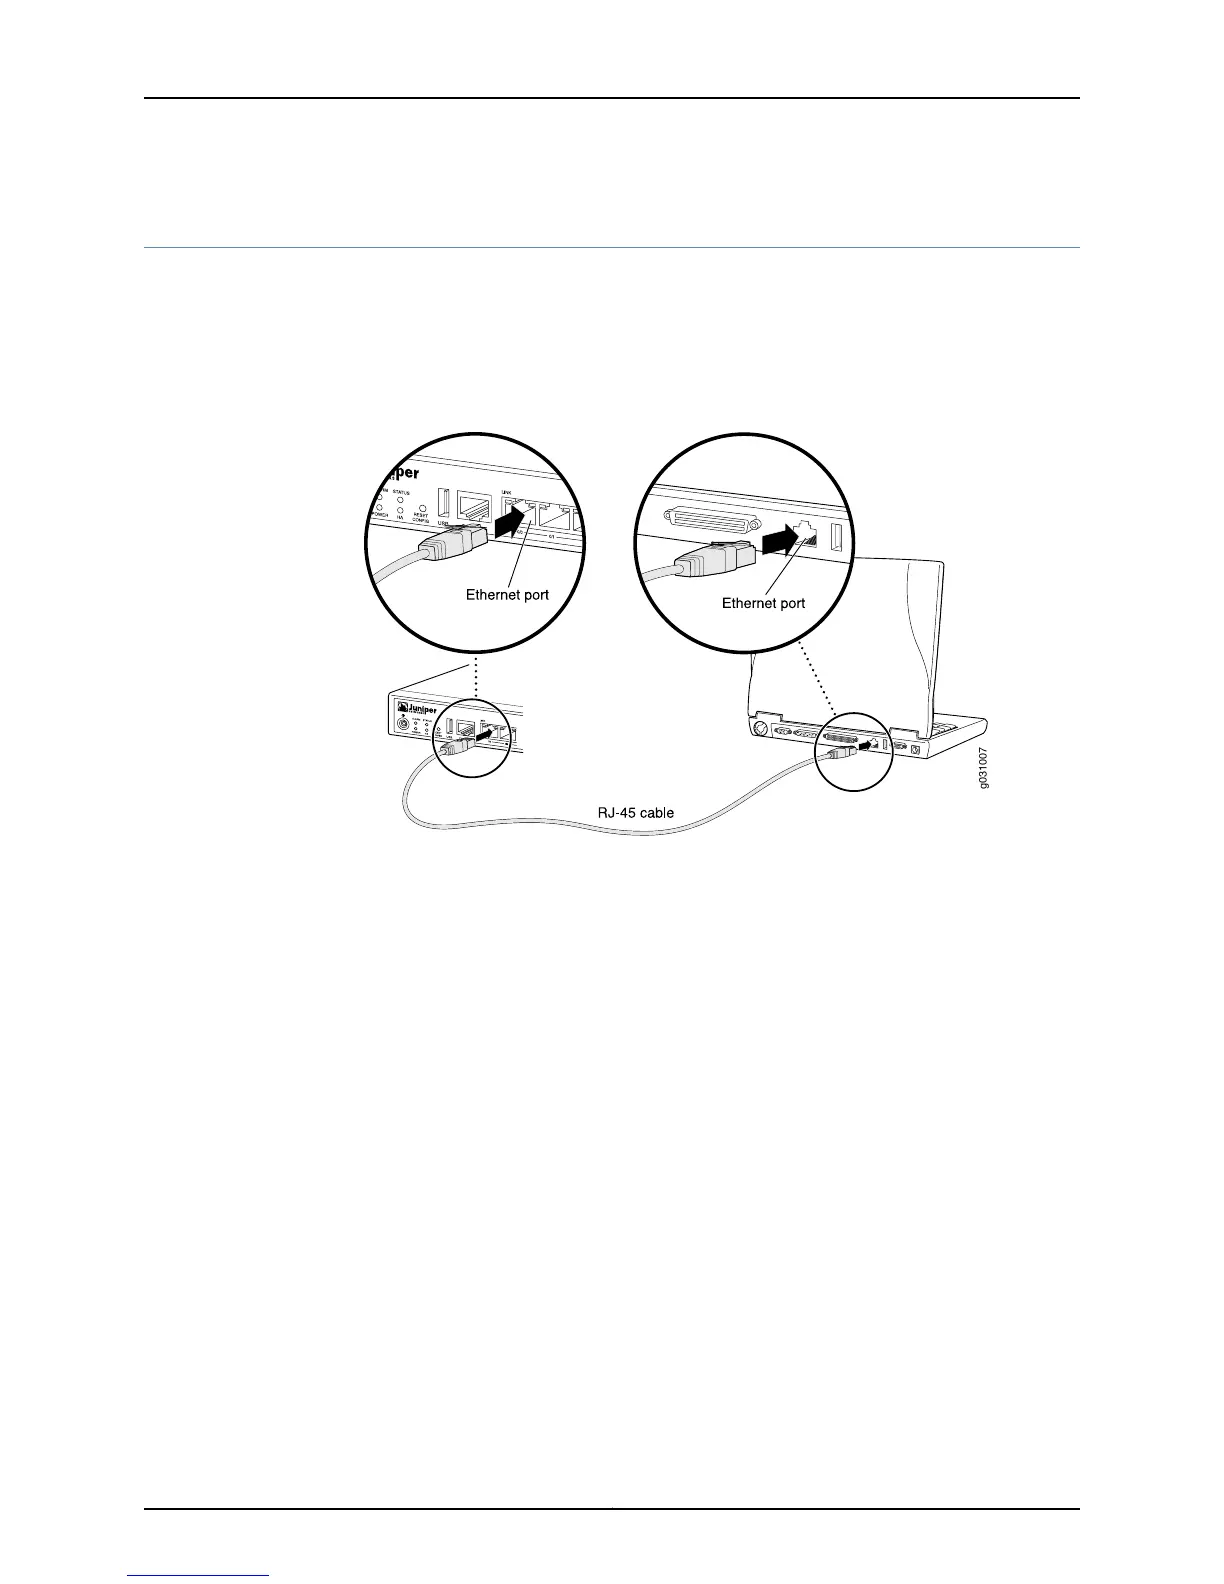
Connecting to the SRX100 Services Gateway Setup Wizard
If you plan to use the setup wizard to perform the initial configuration of the services
gateway, you must connect your management device (such as a laptop or desktop
computer) to one of the built-in Ethernet ports 0/1 through 0/7 on the services gateway
as shown in Figure 15 on page 73. Do not use built-in Ethernet port 0/0.
Figure 15: Connecting to the Ethernet Port on an SRX100 Services Gateway
To enable communication between the management device and the services gateway,
ports 0/1 through 0/7 are preconfigured with the IP address 192.168.1.1 and use DHCP to
assign an IP address in the 192.168.1.0/24 network to any connected device.
To connect a management device to the built-in Ethernet ports:
1. Ensure that the IP address for the Ethernet port on the management device is
configured in one of the following ways:
•
The IP address is assigned by DHCP.
•
The IP address is on the 192.168.1.0/24 subnetwork (but is not 192.168.1.1).
2. Turn off the management device.
3. Plug one end of the CAT-5e (Ethernet cable) into the Ethernet port on the management
device.
4. Connect the other end of the Ethernet cable to a built-in Fast Ethernet port (any of
ports 0/1 through 0/7) on the services gateway. If the services gateway has not already
been powered on, power it on now.
5.
Wait until the Status LED on the front panel of the services gateway turns solid green.
73Copyright © 2015, Juniper Networks, Inc.
Chapter 14: Performing Initial Configuration