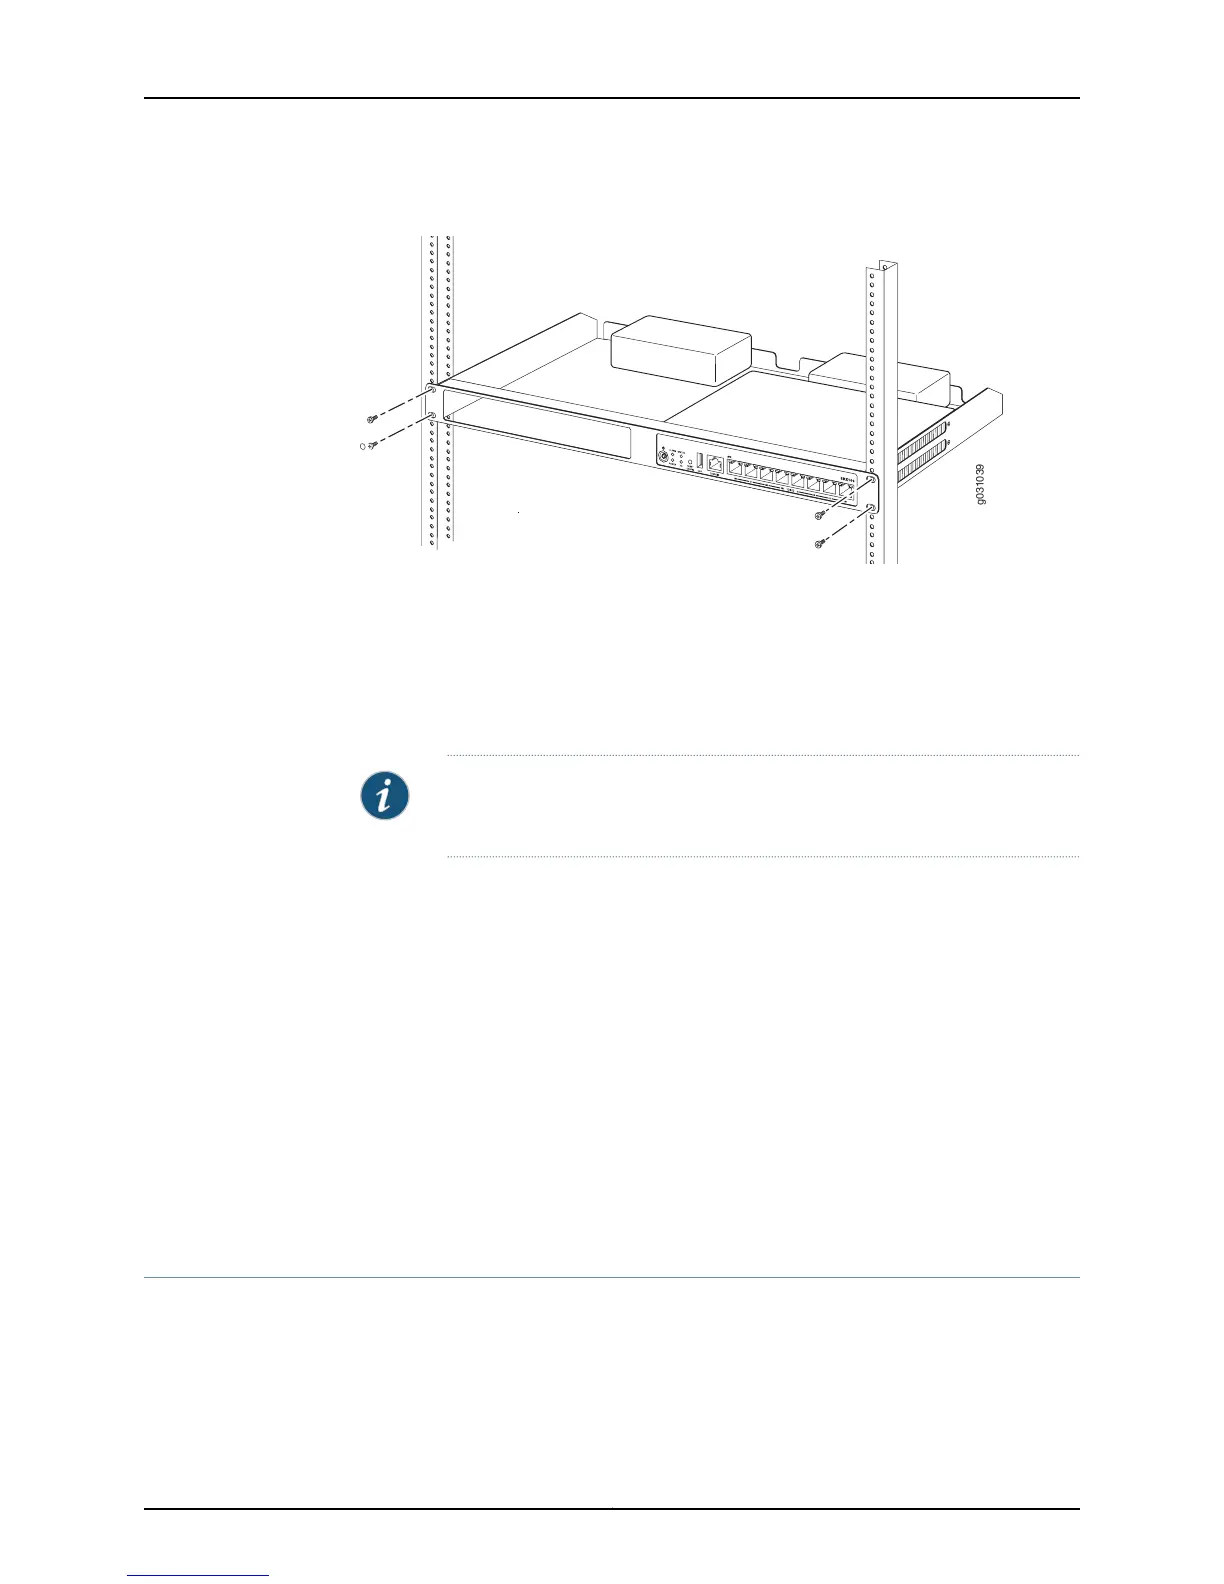
Figure 9: Hanging the SRX100 Services Gateway in a Rack
5. Have a second person install a mounting screw into each of the two aligned holes.
Use a number-3 Phillips screwdriver to install the mounting screws.
6. Install the second screw in each side of the rack-mount tray.
7. Verify that the mounting screws on one side of the rack-mount tray are aligned with
the mounting screws on the opposite side and that the tray is level.
NOTE: The rack-mounting kit is not shipped with the device and must be
ordered separately.
Related
Documentation
Required Tools and Parts for Installing and Maintaining the SRX100 Services Gateway
on page 41
•
• Preparing the SRX100 Services Gateway for Rack-Mount Installation on page 47
• SRX100 Services Gateway Rack Requirements on page 26
• Connecting the SRX100 Services Gateway to the Power Supply on page 65
• Clearance Requirements for Airflow and Hardware Maintenance of the SRX100 Services
Gateway on page 27
• SRX100 Services Gateway Safety Requirements, Warnings, and Guidelines on page 121
• Installing the SRX100 Services Gateway on a Desk on page 52
• Installing the SRX100 Services Gateway on a Wall on page 54
Installing the SRX100 Services Gateway on a Desk
You can install the SRX100 Services Gateway on a desk, table, or other level surface. The
device is shipped with the rubber feet attached. The rubber feet are necessary to stabilize
the device on the desk.
You can install the device in a horizontal or vertical position.
Copyright © 2015, Juniper Networks, Inc.52
SRX100 Services Gateway Hardware Guide for B and H Model Numbers