Zero Offset Verification
This procedure checks the instrument’s zero offset performance. Verification checks are only performed
for those functions and ranges with unique offset calibration constants. Measurements are checked for
each function and range as described below.
1.
Make sure you have read Test Considerations.
2.
Install the 34172B Calibration Short (or equivalent) on the front panel input terminals. Select the
Front input terminals with the Front/Rear switch.
3.
Configure each function and range in the order shown in the table below corresponding to the DMM
model number. Make a measurement and return the result. Compare measurement results to the test
limits shown below.
4.
Install the 34172B Calibration Short (or equivalent) on the rear-panel input terminals. Select the Rear
input terminals with the Front/Rear switch.
5.
Configure each function and range in the order shown in the table below corresponding to the DMM
model number. Make a measurement and return the result. Compare measurement results to the test
limits shown below.
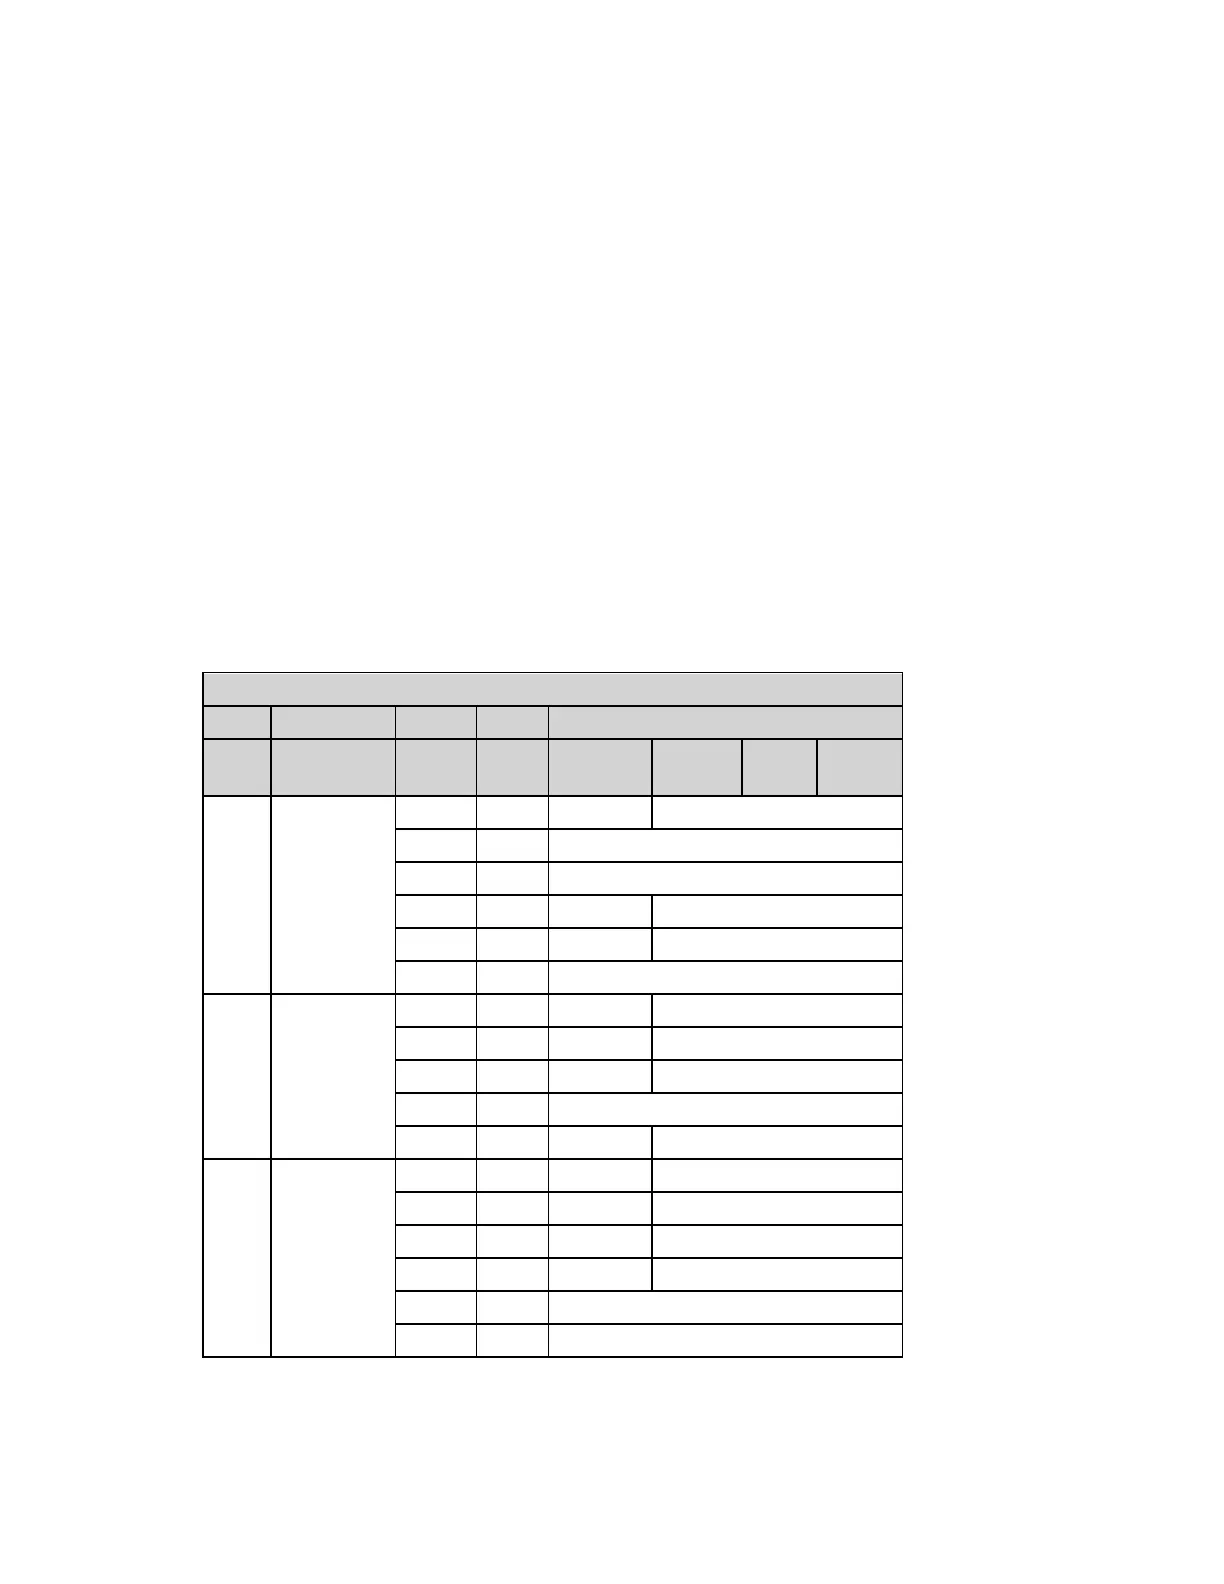
Values for 34460A DMM
Error from Nominal
Input Function
[1]
Range
Quick
Check
24 hours 90 days 1 year 2 years
Open DC Current
100 µA Q ± 0.02 µA ± 0.025 µA
1 mA ± 0.060 µA
10 mA ± 2 µA
100 mA ± 4 µA ± 5 µA
1 A ± 60 µA ± 100 µA
3 A ± 600 µA
Short DC Volts
100 mV Q ± 6 µV ± 6.5 µV
1 V ± 9 µV ± 10 µV
10 V ± 40 µV ± 50 µV
100 V ± 600 µV
1000 V ± 6 mV ± 10 mV
Short 4-wire Ohms
100 Ω ± 6 mΩ ± 7 mΩ
1 kΩ ± 8 mΩ ± 10 mΩ
10 kΩ Q ± 50 mΩ ± 100 mΩ
100 kΩ ± 500 mΩ ± 1 Ω
1 MΩ ± 10 Ω
10 MΩ ± 100 Ω
[1]
Select 10 PLC.
Q: Quick performance verification test point.
Performance Verification
506
Keysight Truevolt Series Operating and Service Guide
 Loading...