INFORMATION FOR DISASSEMBLY
7
81
EN
7 INFORMATION FOR DISASSEMBLY
7.1 Recommendations for disassembly
Important
• The mark ( ) after the title of a paragraph, indicates that the procedure is not required in order to
disassemble the engine, however the procedures are featured in order to illustrate the disassembly
of components.
• The operator should prepare all equipment and tools in order to enable him to carry out the
operations correctly and safely.
• Before disassembly, perform the operation described in Chap. 5.
• Before proceeding with operation, carefully read Chap. 3.
• In order to operate safely and easily, we recommend positioning the engine on a rotating stand for
engine overhauling.
• eal all injection component unions as illustrated in Par. 2.9.7 during assembly.
• Protect all disassembled components and coupling surfaces subject to oxidation with lubricant.
• Where necessary, reference to special tools to use during disassembly operations is indicated (es.
ST_05), identified in Tab. 13.1 - 13.2 - 13.3.
7.2 Electric components disassembly
1.
Disconnect and remove the engine wiring.
NOTE
: refer to
Par. 2.13.1.3
to disconnect all connectors.
Important
•
The motor is not repairable.
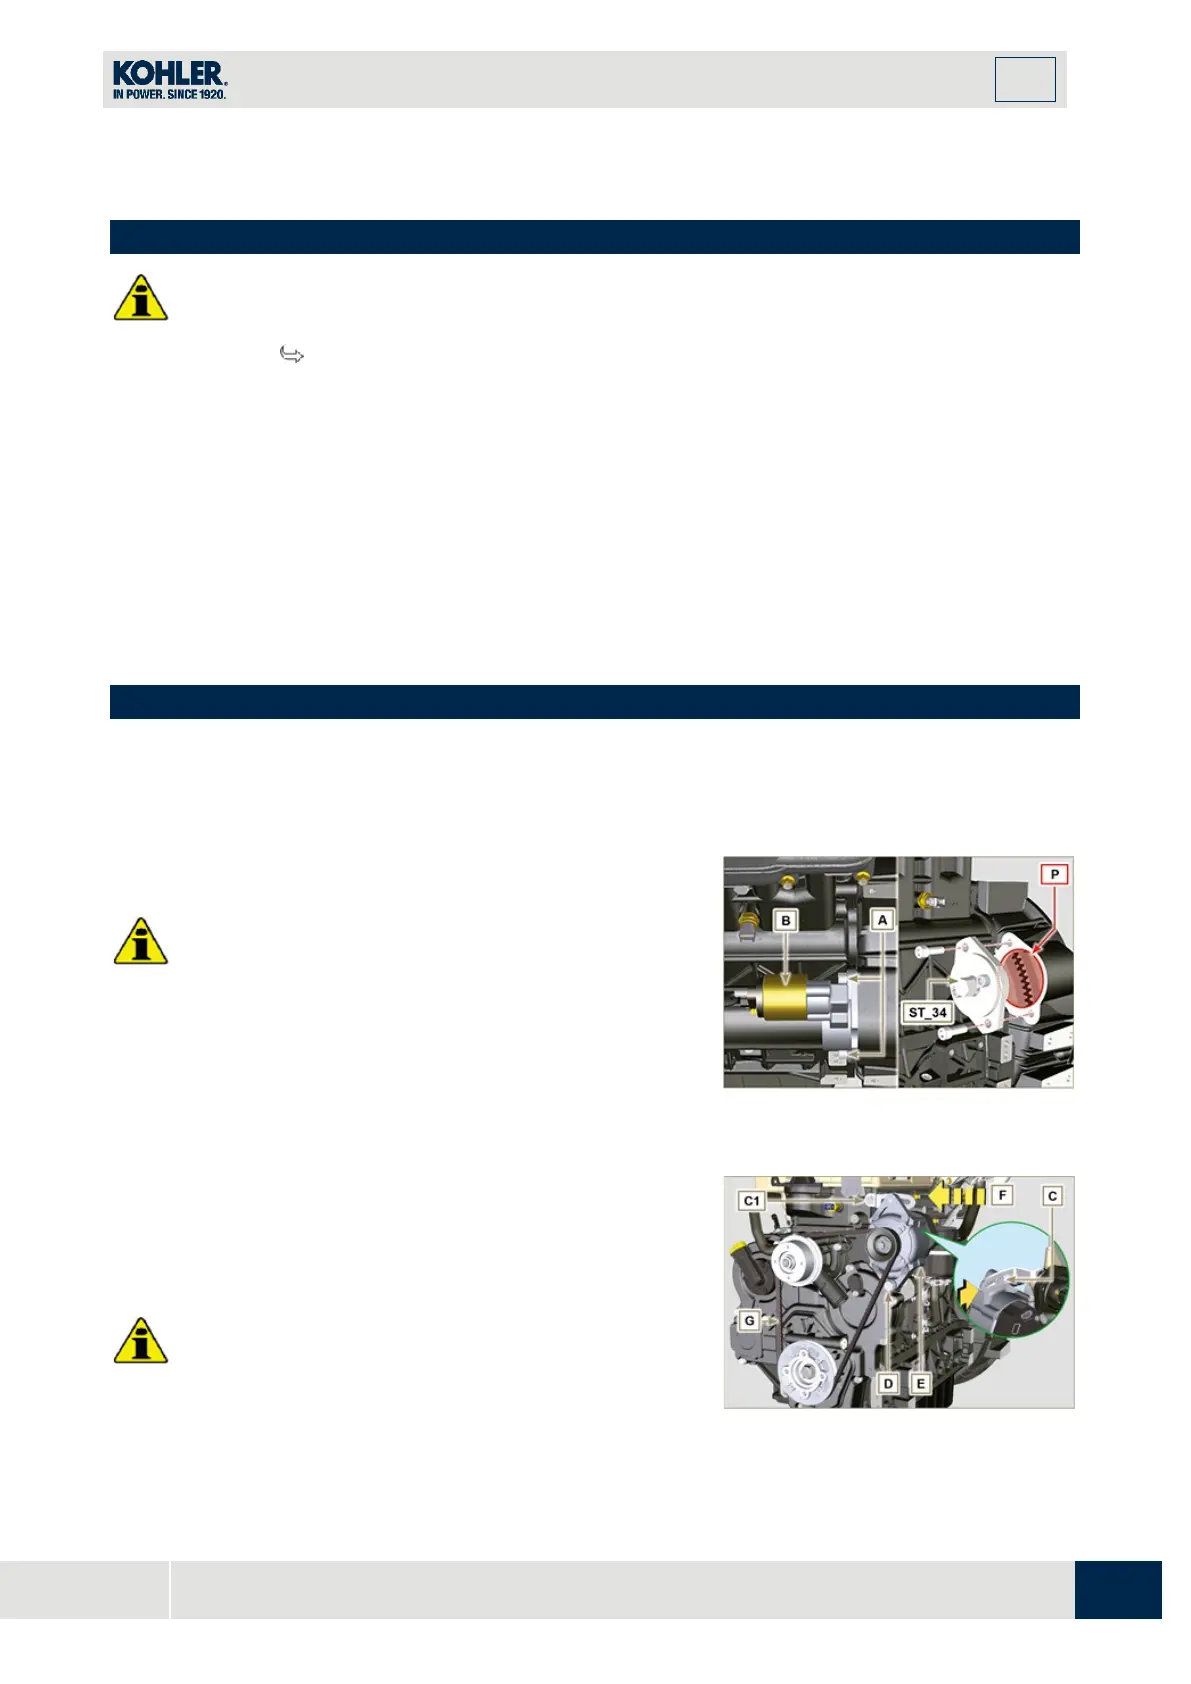
1.
Undo the screws A and remove the starter motor B.
2.
Mount the tool ST_34 in the seat of the starter motor P
and fit it with the two starter motor fixing screws to
block the flywheel.
Fig 7.1
7.2.3 Belt and alternator
1.
Loosen the screws C and D.
2.
Push the alternator E in the direction of the arrow F.
3.
Remove the belt G from the pulleys.
I
mportant
•
The belt must always be replaced every time it is
disassembled, even if it has not reached the scheduled
hours for replacement
4.
Undo the screws C1 and D and remove the alternator E.
Fig 7.2

 Loading...


