4-22 LeeBoy 8515E Conveyor Paver
Operation
Once the heating function has been enabled, the dis-
tribution/control box will apply electrical power to the
heating elements and the heating cycle will begin. The
heating cycle is timed to optimize the heat generated at
the screed plates.
NOTE: Allow the screed (and screed extension) to
heat 15 minutes before beginning to pave.
Lower the screed two inches off the ground
while heating to prevent cold air and wind
from affecting the heating process.
Overheating the screed can warp the
screed plate and possibly cause damage. If screed
extensions lock, allow the machine to cool before
attempting to extend or retract. Replace a warped
screed plate immediately.
To operate the electric screed heating system:
1. Start the paver and idle until the engine reaches
normal operating temperature.
2. Raise the screed plate one or two inches off the
ground.
3. Turn the electric heat control box power on.
• Push the switch UP to select MANUAL screed
heat operation.
• Push the switch DOWN to select AUTO screed
heat operation (if equipped with the Automatic
Temperature Control option).
4. Set the throttle on the PV480 display to PAVE (1800
RPMs). Do not exceed 1800 RPMs.
5. Press the Start Heat button.
• The HEAT ON indicator light will illuminate and
stay on as long as the element is heating the
screed. The left light illuminates when the left
screed elements are heating; the right light
illuminates when the right screed elements are
heating.
• While joysticks are in neutral, both sides of the
screed are heating.
• When joysticks are out of neutral, the elements
automatically cycle every two minutes from side
to side to decrease the load to half.
6. If the heat cycle has completed but the screed
plates still require heating, restart the cycle by
repeating Step 5.
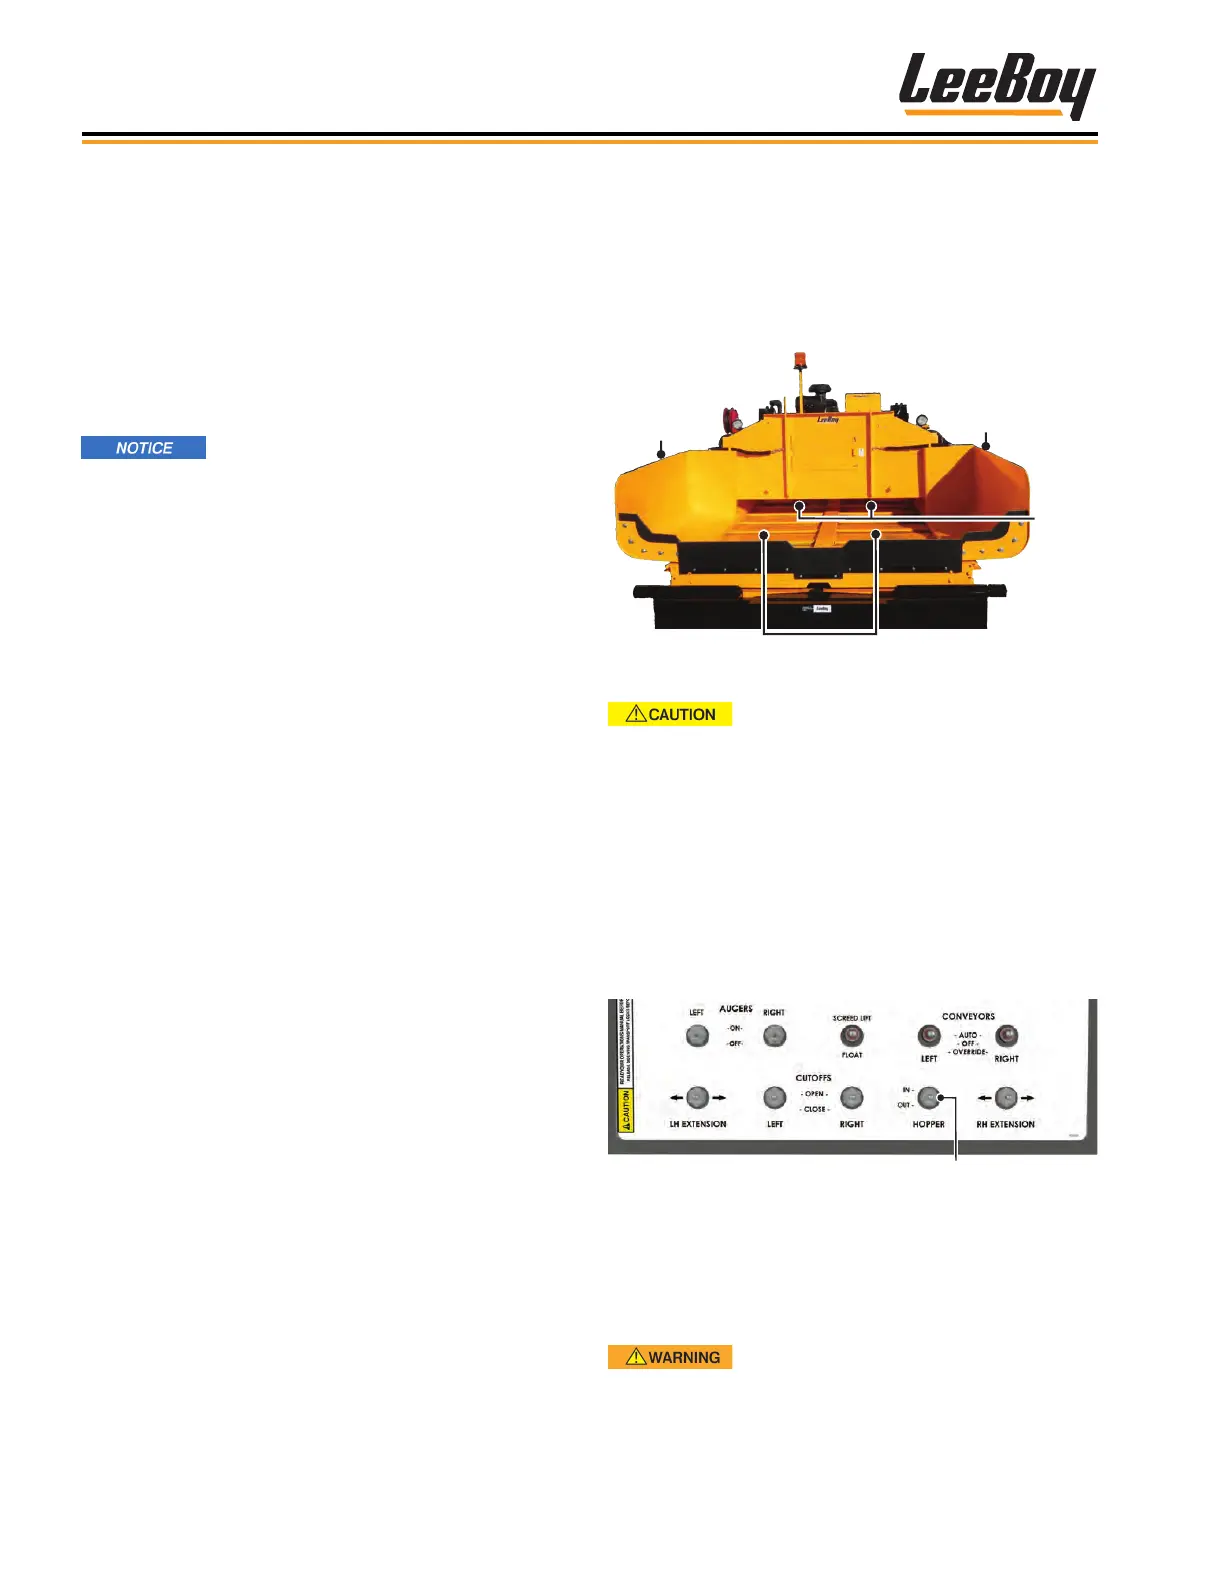
Hopper WingsHopper Wings
The hopper wings are hydraulically opened so the
hopper can be lled with paving material. (Figure 4-42)
Conveyors move the asphalt back to the auger, where
the mix ows through the Under Auger Cut-Offs to the
screed.
Augers
Right
Hopper Wing
Conveyors
Left
Hopper Wing
Figure 4-42. Hopper
Be sure the hopper wings are
unlocked before opening (or closing when in use).
To operate the hopper wings:
1. Ensure the hopper cylinder lock valves, one on each
side of the hopper wings, are unlocked. (Figure
4-44)
2. Push and hold the hopper wings switch OUT on the
operator control panel to open the hopper wings.
(Figure 4-43)
Hopper Switch
Figure 4-43. Hopper Switch
3. Ensure the hopper wings are completely extended
before receiving paving material from the truck.
4. Push the hopper wings switch to IN to close the
hopper wings.
DO NOT close the hopper wings when
the hopper is full of asphalt. DO NOT close the
hopper until the material truck has moved
completely away from the paver. NEVER raise the
conveyor bed with asphalt in the hopper.