4-30 LeeBoy 8515E Conveyor Paver
Operation
Mat Texture AdjustmentMat Texture Adjustment
There are three adjusters in each screed extension,
however the adjusters at each end are preset by the
dealer and do not need adjustment.
Adjust the mat texture using the Angle-of-Attack (AOA)
adjustment screw in the center to produce a smoother
or coarser mat texture. (Figure 4-62)
• The screed extension should be hot before making
any adjustments.
• Spray the bottom of the screed with cleaning solvent
BEFORE heating the screed.
NEVER spray cleaning solvent or
release agent on or near a hot screed heating or near
open ame. Cleaning solvent and release agents are
ammable and could cause serious personal injury.
NOTE: Do not allow release agent chemicals to run
onto the ground.
Angle-of-Attack
(AOA)
Figure 4-62. AOA Adjustment
1. Spray down the screed.
2. Turn on the screed heat.
3. Turn the AOA adjuster in the direction for desired
result:
• Turning the AOA adjuster counterclockwise
will increase the pressure on the back of the
extension, which gives a smoother, slicker
nish.
• Turning the adjusters clockwise will decrease
the pressure on the back of the extension,
resulting in a coarser nish.
NOTE: Too much pressure on the back of the
screed extension will take the weight off the
screed wear plate and cause poor material
compacting, resulting in a poor nish.
• For increased positive crown push down on
adjuster.
• For increased negative crown pull up on
adjuster.
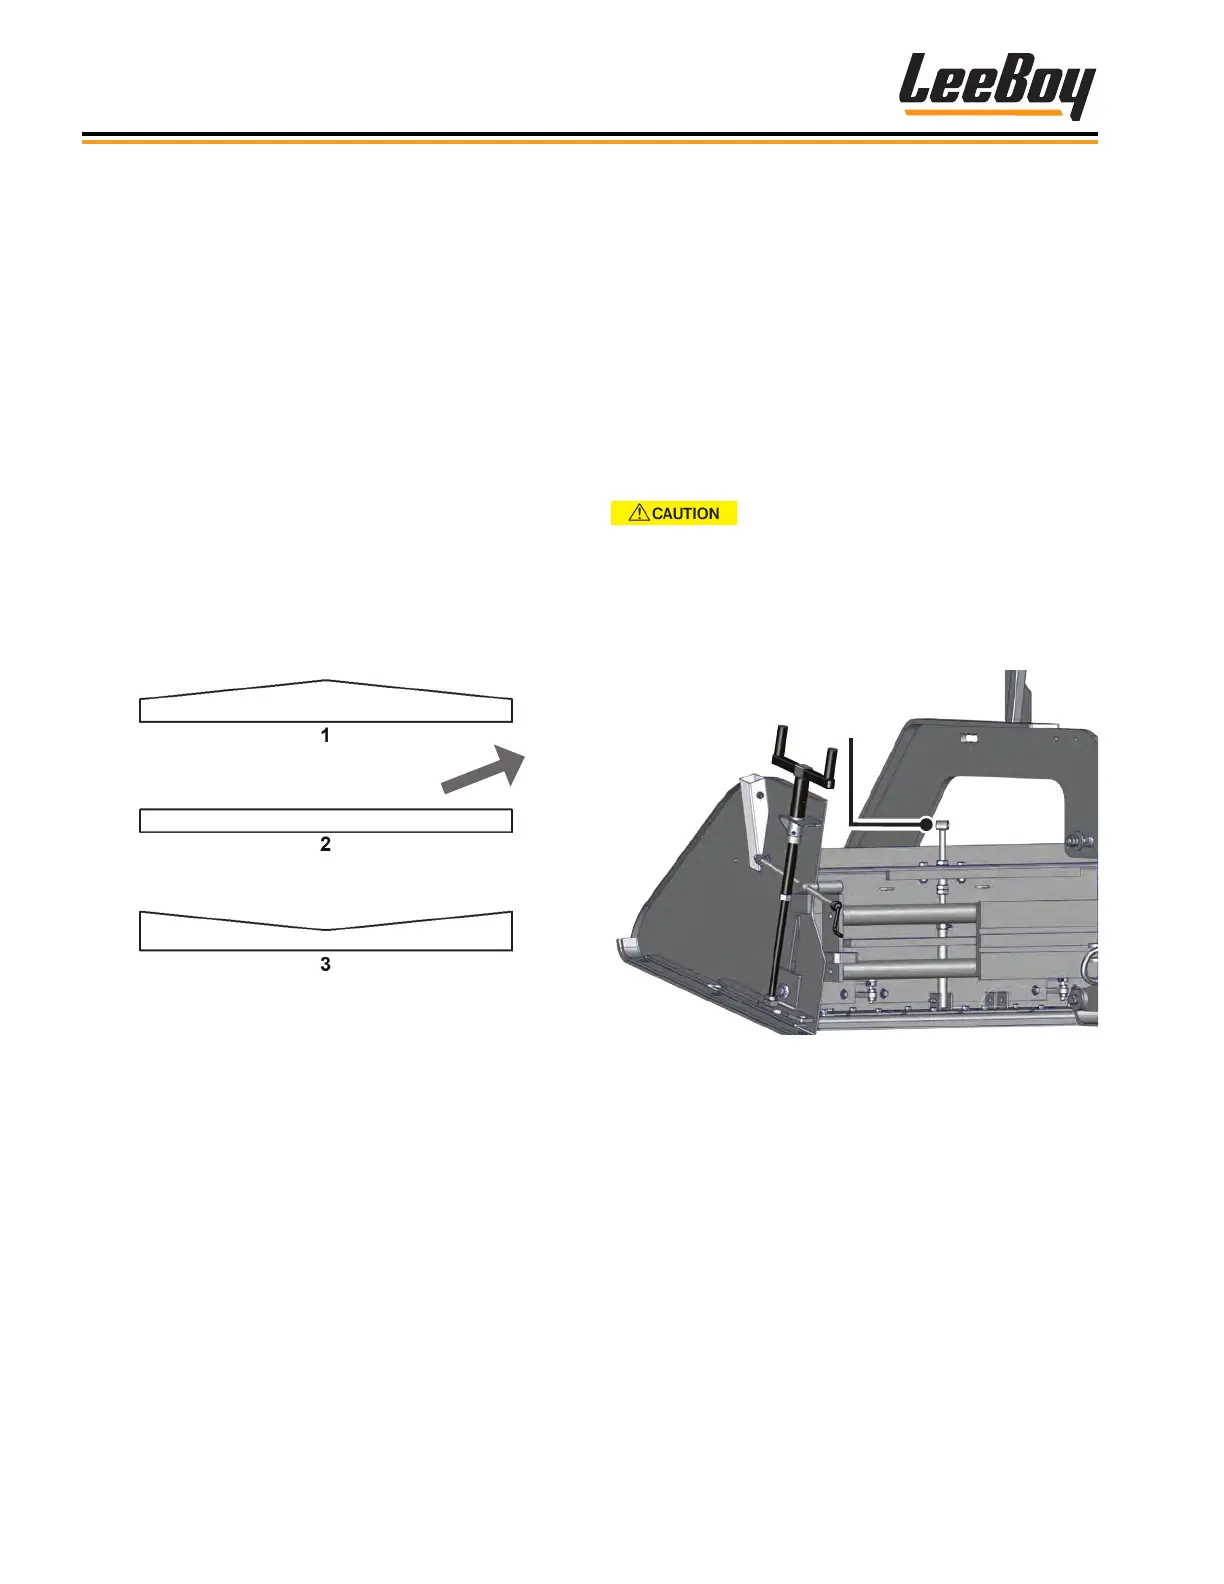
3. Use the gauge at the center of the screed above the
standing platform. If the needle is above the zero,
you will have positive crown. If the needle is below
the zero, you will have negative crown.
4. To get exact crown or valley, measure the distance
between a at level surface to the center bottom
portion of screed. Make adjustments with crown and
valley control.
• Positive crown is when the middle of the mat
is raised to permit water to drain to each side.
(Figure 4-61)
• Negative crown is the lower in the center of
the screed plate, often used in an alley where
drainage is necessary.
Figure 4-61. Crown Settings
1 - Positive (+)
2 - Zero (0)
3 - Negative (-)
NOTE: Crown may be placed in the leading edge and/
or the trailing edge of the screed plate. Crown
in the leading edge aids material ow under
the screed plate only. Trailing edge crown
puts a crown in the mat.
Example: The trailing edge crown is 0 and the
leading edge crown is 1/8 inch. There will not be
any crown in the mat, but the material ow under the
screed plate will be improved.