5555
LeeBoy 8515E Conveyor Paver 5-13
Maintenance
5. Remove the safety prop then lower the conveyor
bed to make adjustment.
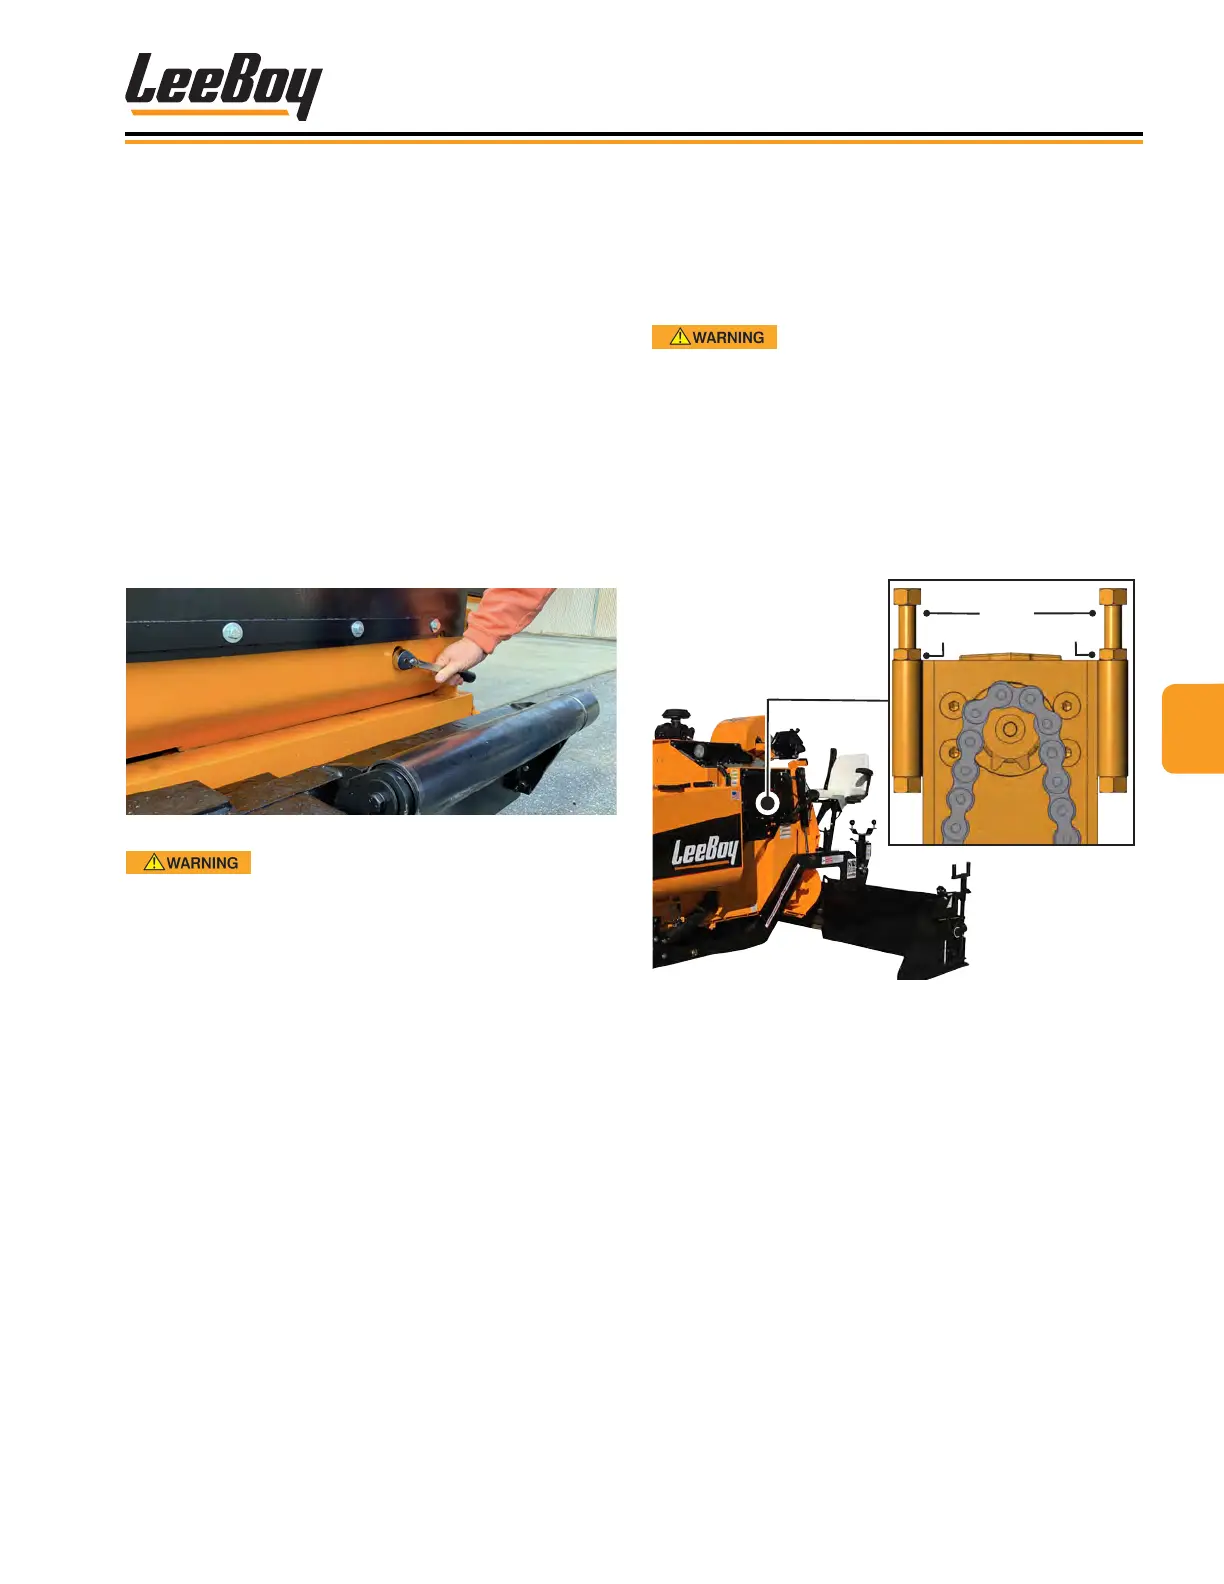
6. Using the same ratchet, alternate turning each
adjustment bolt 1/4 turn at the front of the paver (two
for each conveyor). (Figure 5-8)
• Turn the adjustment bolts clockwise to tighten
the chains or counterclockwise to loosen the
chains.
• Alternate between the left and right adjuster to
ensure the idler is pulled forward evenly. It is
critical that the idler remains parallel with the
front of the deck.
7. Measure the slack and continue alternating the
tightening, if needed, until the ight chains are
properly adjusted to 1 - 1-1/2 inch.
Figure 5-8. Flight Chain Adjustment
DO NOT leave ratchet inserted into the
adjuster holes during conveyor operation.
8. Start the engine to operate the conveyor, checking
that the conveyor chains are not binding, making
noise or trying to climb the front sprockets. Verify
the ight bars are tracking straight, then turn off
conveyor.
9. Raise the conveyor again and insert safety prop.
10. Tighten the two idler mount bolts on the left and right
side (4 bolts total) under the conveyor bed. (Figure
5-8)
11. Clean asphalt under the deck and spray down with
citrus throughout including up inside the conveyor
pans. Operate the conveyor again, spraying the
chains, bars and deck with citrus release agent.
12. Start the engine to lower the conveyor.
13. Push hopper wings back into position and reinstall
the four wing bolts on each side.
Conveyor Drive ChainsConveyor Drive Chains
Inspect drive chains on both sides of the paver, located
just inside the engine access panels toward rear of
paver. (See Page 5-49 for slack tension adjustment.)
If the chains are loose, adjustment is necessary.
NEVER perform any adjustments on
the paver while the engine is running.
If the chains are loose, adjustment is necessary.
1. Shut off paver.
2. Open the engine access door (either side) and
locate the conveyor drive chain bolts (toward rear of
paver). (Figure 5-9)
3. Loosen the jam nuts on the chain adjuster.
Drive
Chain
Jam Nut
Jam Nut
Adjustment
Bolts
Figure 5-9. Conveyor Drive Chain Adjust
4. Turn the chain adjuster to loosen or tighten the
chain, leaving approximately 1/4-inch of slack. DO
NOT overtighten.
5. Retighten jam nuts.
6. Repeat steps on the other side.