4-26 LeeBoy 8515E Conveyor Paver
Operation
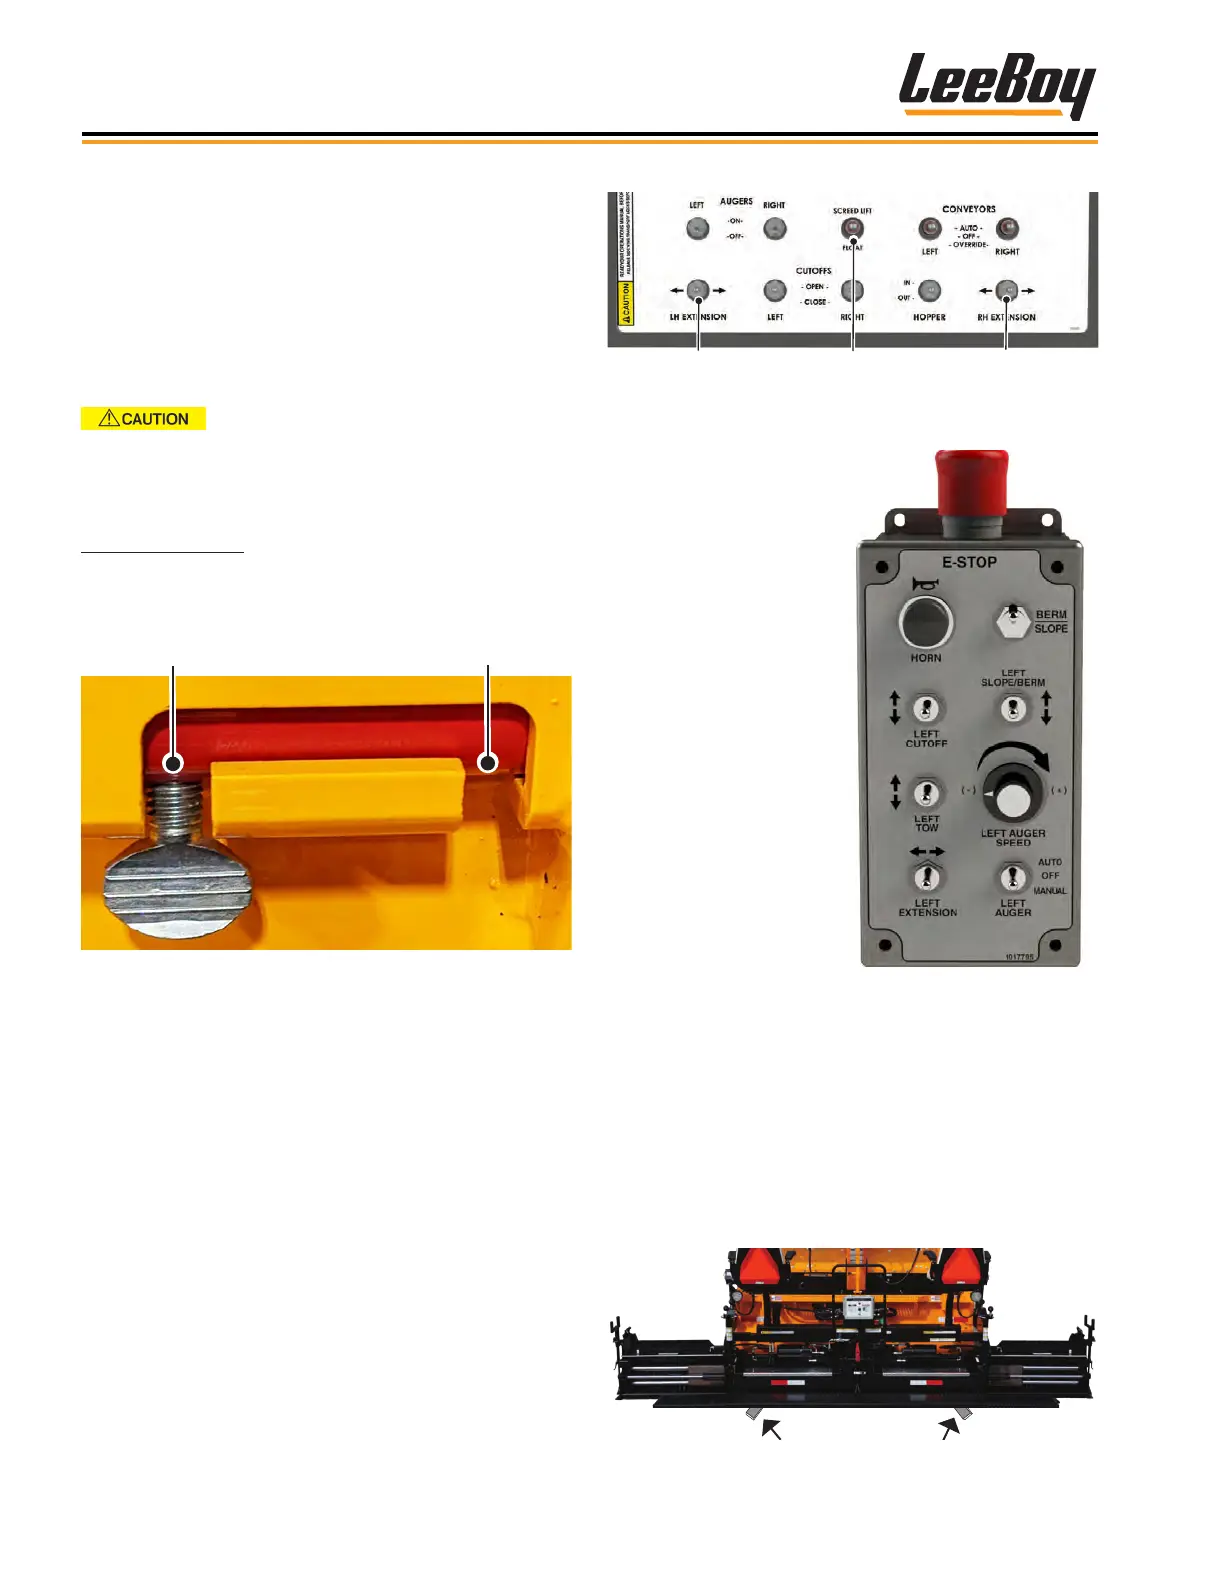
A 9-function remote
screed control box is pro-
vided on both sides of the
main screed with switches
to extend or retract the
screed, set the slope,
open/close the cut-offs
and turn the auger on and
off while paving. (Figure
4-53) Additional func-
tions on the 9-Function
control box include berm
and slope controls, horn,
E-Stop button, auger dial,
and tow switch (left box
shown).
Left Screed
Extension
Right Screed
Extension
Screed
Lift/Float
Figure 4-52. Screed Extension Switches
Figure 4-53. 9-Function
Screed Control Box
Set the Screed Extension, Flight Set the Screed Extension, Flight
Screw and End GateScrew and End Gate
The main screed and screed extensions are heated
by heating elements and equipped with replaceable,
heavy-duty wear plates. Use the screed extensions
when paving widths exceeding eight (8) feet. The
screed extensions should be heated before making any
adjustments using the wrench provided.
Ensure screed lock pins are unlocked
before extending or retracting the screed or hopper
wings.
Screed Lock Pins
Screed lock pins (one on each side) adds additional
safety and stability during operation and transport.
(Figure 4-51)
Figure 4-51. Screed Lock Pin
When adjusted correctly, pressure on the rear edge of
the extended screed is the same as the rear edge of the
main screed, resulting in a smooth mat the length of the
screed.
You can extend or retract the screed extension using
the extension switch on the main control panel. (Pages
3-6 to 3-7)
• Follow the instructions for heating the screed and
screed extensions. (Page 4-21)
• Extend or retract the screed extension(s) using the
screed extension switches on the main control panel
or remote screed control box. (Figures 4-50 and
4-52)
Adjust the screed extension while paving using the fol-
lowing procedures:
1. Move paver to the starting position for paving.
2. Extend the screed to the desired width.
• To set the depth, you can place small starter
blocks (Figure 4-54)
Figure 4-54. Starter Blocks Location