Maintenance
LeeBoy 8608 Commercial Paver5-12
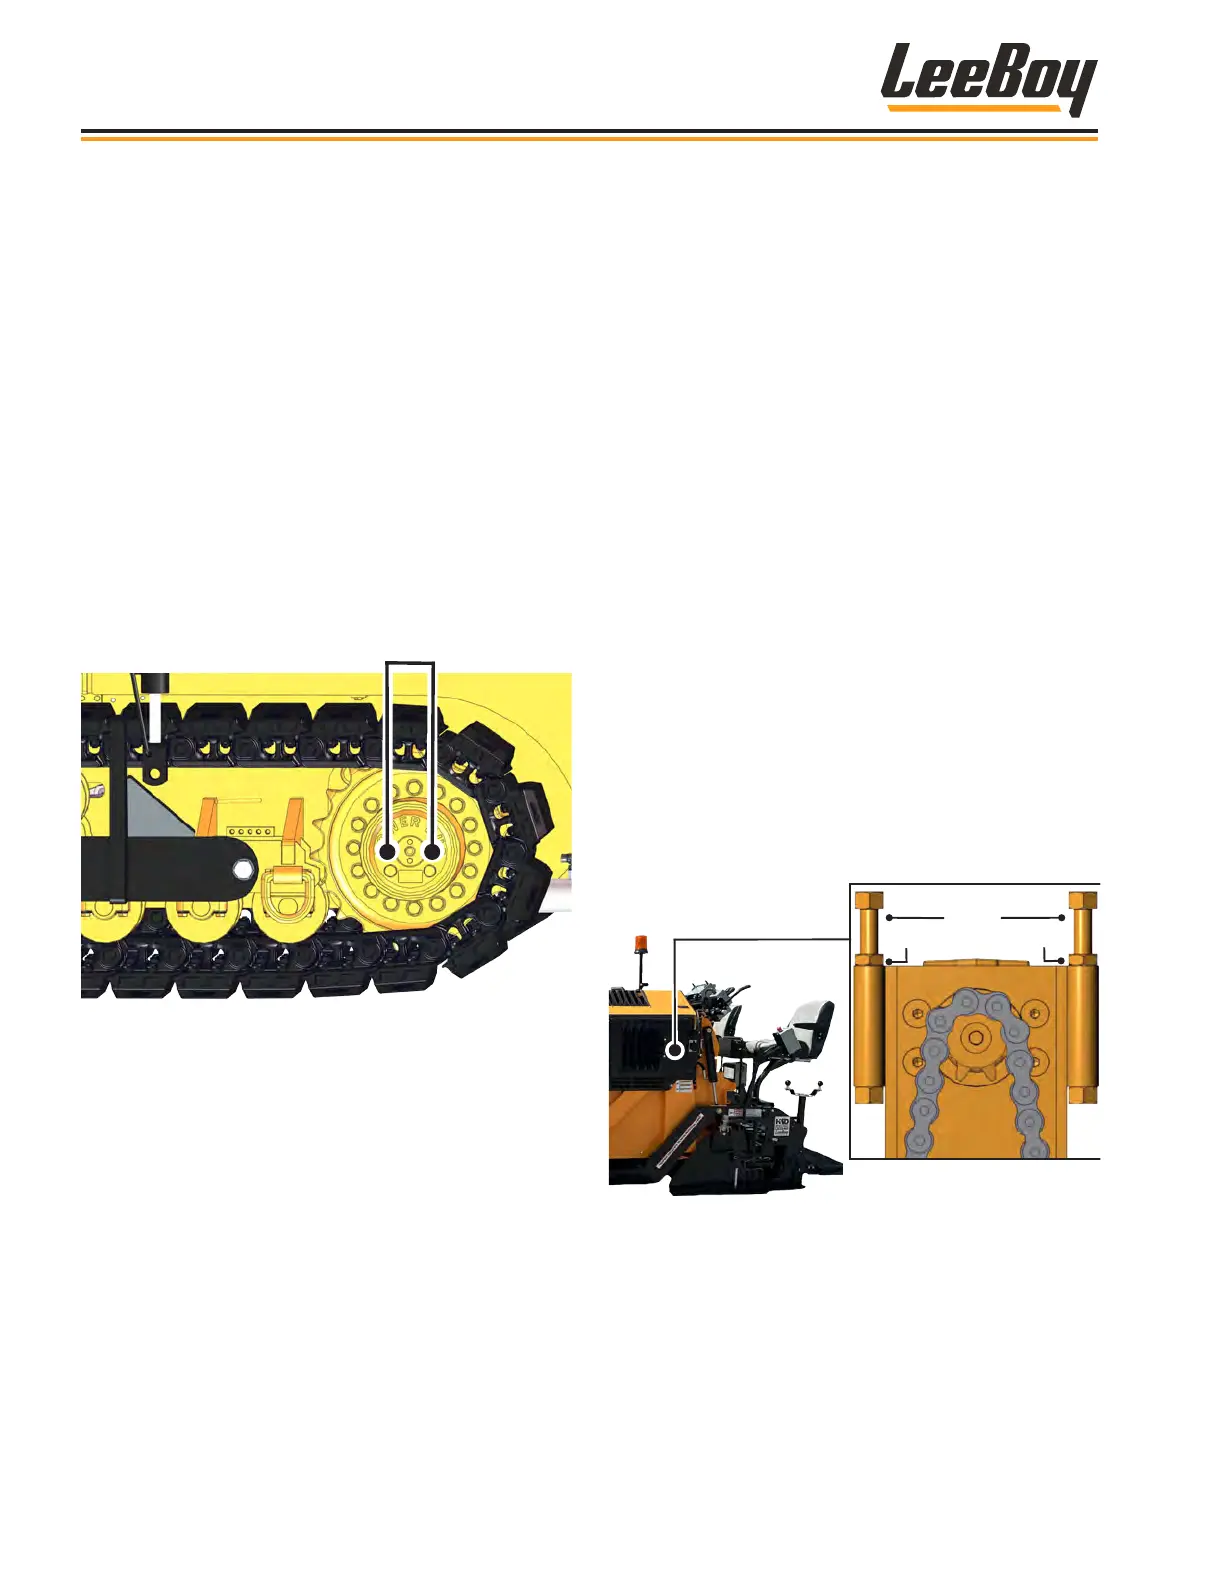
Torque Hub LubricationTorque Hub Lubrication
Check the torque hub oil level at the rear of the tracks
weekly to ensure optimum operation. To check the
torque hub oil level:
1. Move paver so that one of the torque hub plugs is in
the 12 o’clock position and the other is in the 3 or 9
o’clock position as shown in Figure 5-4.
2. Remove the plug in the 3 (or 9) o’clock position.
3. If oil comes out, no oil is needed. Reinsert the plug
and tighten.
4. If oil does not come out, remove the top plug and ll
with SAE 90 WT gear oil until oil starts to appear at
the plug.
5. Replace plug and repeat process on the other
torque hub.
Figure 5-4. Torque Hub Plugs
MAINTENANCE ADJUSTMENTS
Certain components of the paver need adjustments
for optimum performance, operation and general
maintenance. Keep chains clean, lubricated and
properly adjusted.
Conveyor Drive ChainsConveyor Drive Chains
Maintaining proper conveyor drive chain alignment is
essential for conveyor performance and maximizing
chain and sprocket life. You can access the conveyor
drive chains via the engine access panels on each side
of the paver.
Keep chains clean, lubricated, and properly adjusted.
Inspect the drive chain tension on each side of the
paver regularly. There should only be 1/4-inch of
slack on each chain. If you notice any slippage on
either conveyor, the drive chain(s) may be loose and
adjustment is necessary. (See Page 5-51 for slack
tension adjustment.)
Use the following procedure to adjust the conveyor drive
chains:
1. Shut off engine.
2. Loosen the jam nuts on the chain adjuster. (Figure
5-5)
Drive
Chain
Jam Nut
Jam Nut
Adjustment
Bolts
Figure 5-5. Conveyor Drive Chain Bolts
3. Turn the chain adjuster to loosen or tighten the
chain, leaving approximately 1/4-inch of slack. DO
NOT overtighten.
4. Retighten jam nuts.
5. Repeat steps on the opposite drive chain.