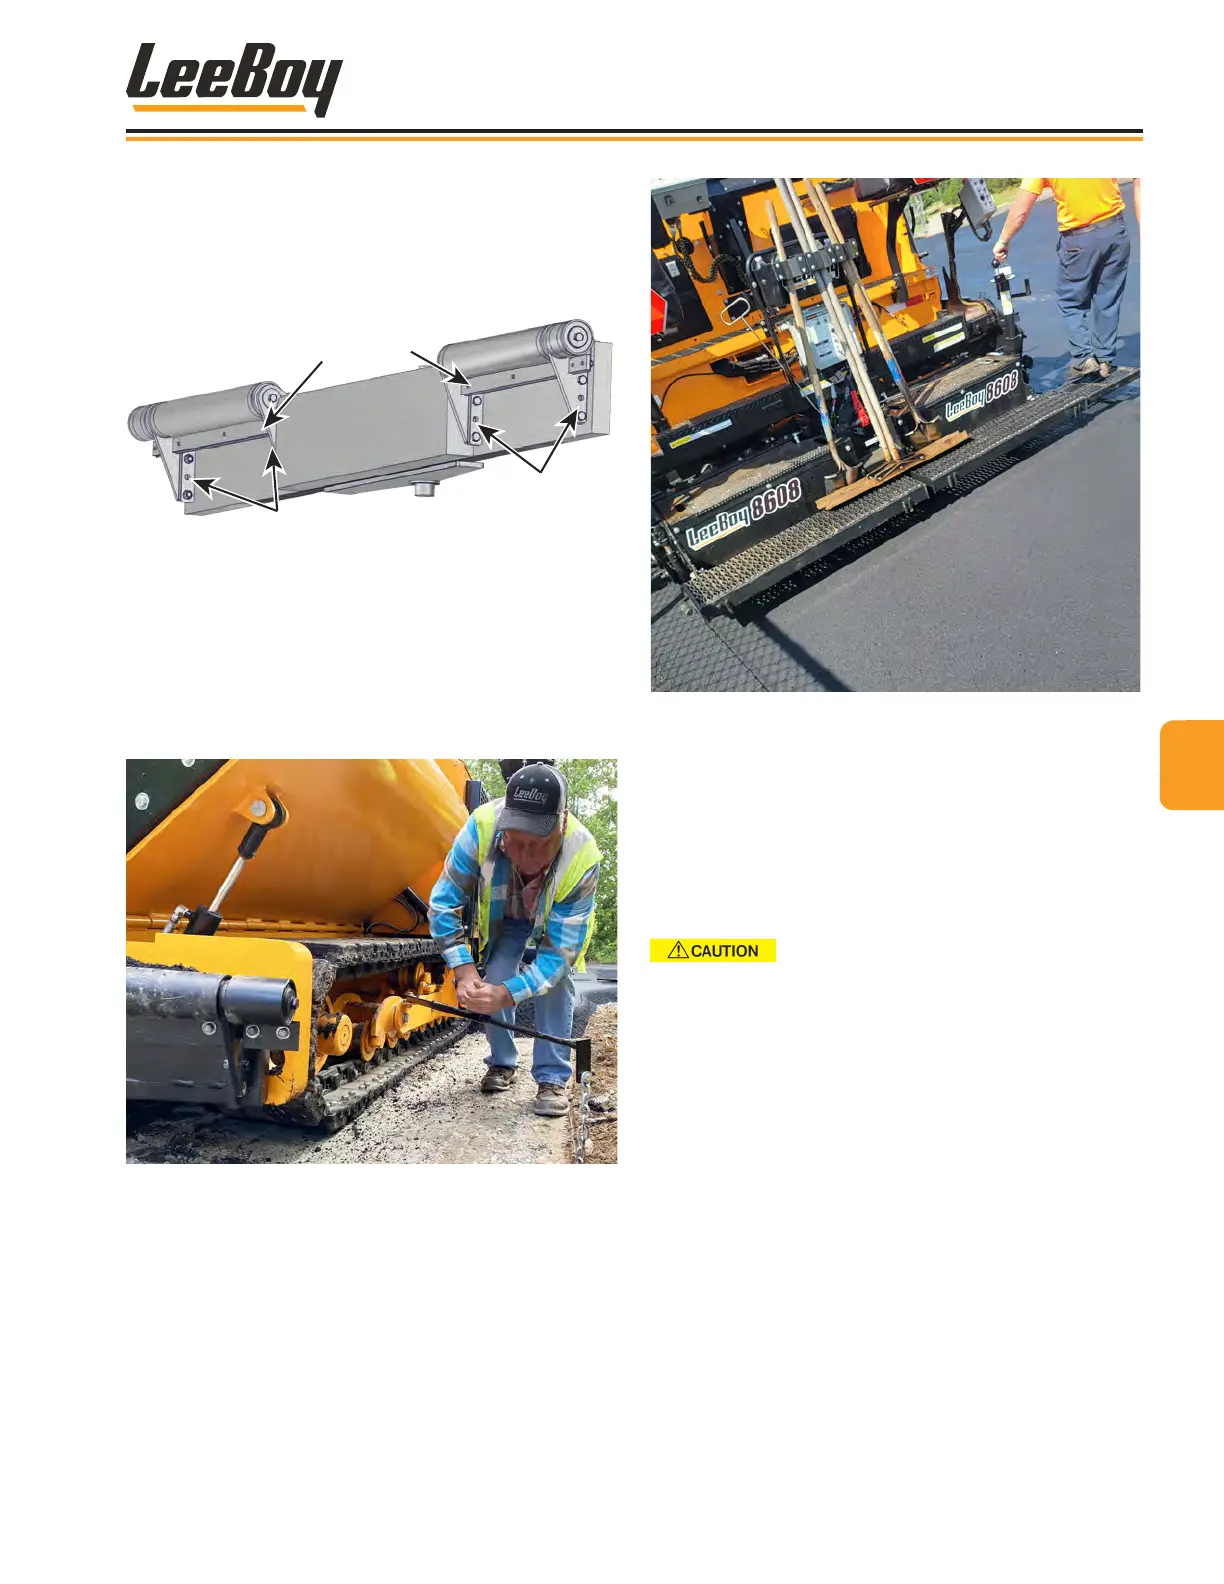
• Remove bolts on both sides of each push roller,
align with either of the ve slots on the frame at
desired height, and reinstall bolts.
• Both push rollers should be at the same height
to prevent damage.
Bolt Slots
Bolt Slots
Scraper
Figure 4-72. Adjustable Push Rollers
• Extend the lower guide bar gauge to further assist
you in paving a straight line from the operator’s
platform. (Figure 4-73) Use a reference guide
such as a curb, gutter, adjacent mat or string line.
• It is very important that the rst pass be straight as it
will serve as your guideline for the following passes.
Figure 4-73. Using the Guide Bar with String Line
Basic PavingBasic Paving
1. Spray down the machine. (Pages 4-26 to 4-27)
2. Heat screed and end gates. (Pages 4-27 to 4-28)
3. Position paver at the starting point for the mat.
4. Open the Under Auger Material Cut-Offs. (Page
4-31)
Never back up with cut-offs open.
5. Adjust screed as needed. (Pages 4-32 to 4-34)
6. Adjust push rollers to the appropriate height needed
for the asphalt truck. (Figure 4-72)
• Or use truck hitch or extendable push roller
controls if equipped with either option. (Page
4-41)
7. Open hopper wings to accept asphalt from the
material truck. (Page 4-29)
NOTE: Allow only a partial load of asphalt to enter the
hopper when rst starting to pave.
6. Turn the left and right conveyors on to the AUTO
position. (Page 4-30)
7. When the material begins to discharge from under
the screed, set the screed lift switch to the FLOAT
position. (Page 4-33)
44
Operation
8608 Commercial Paver 4-35