55
Maintenance
LeeBoy 8608 Commercial Paver 5-43
8. Using a small propane torch, heat the inner auger
set screw on the side for replacement for a few
seconds to release the loctite. (Figure 5-51)
9. Insert an allen wrench into the appropriate set
screw and turn counterclockwise to release the
auger for replacement.
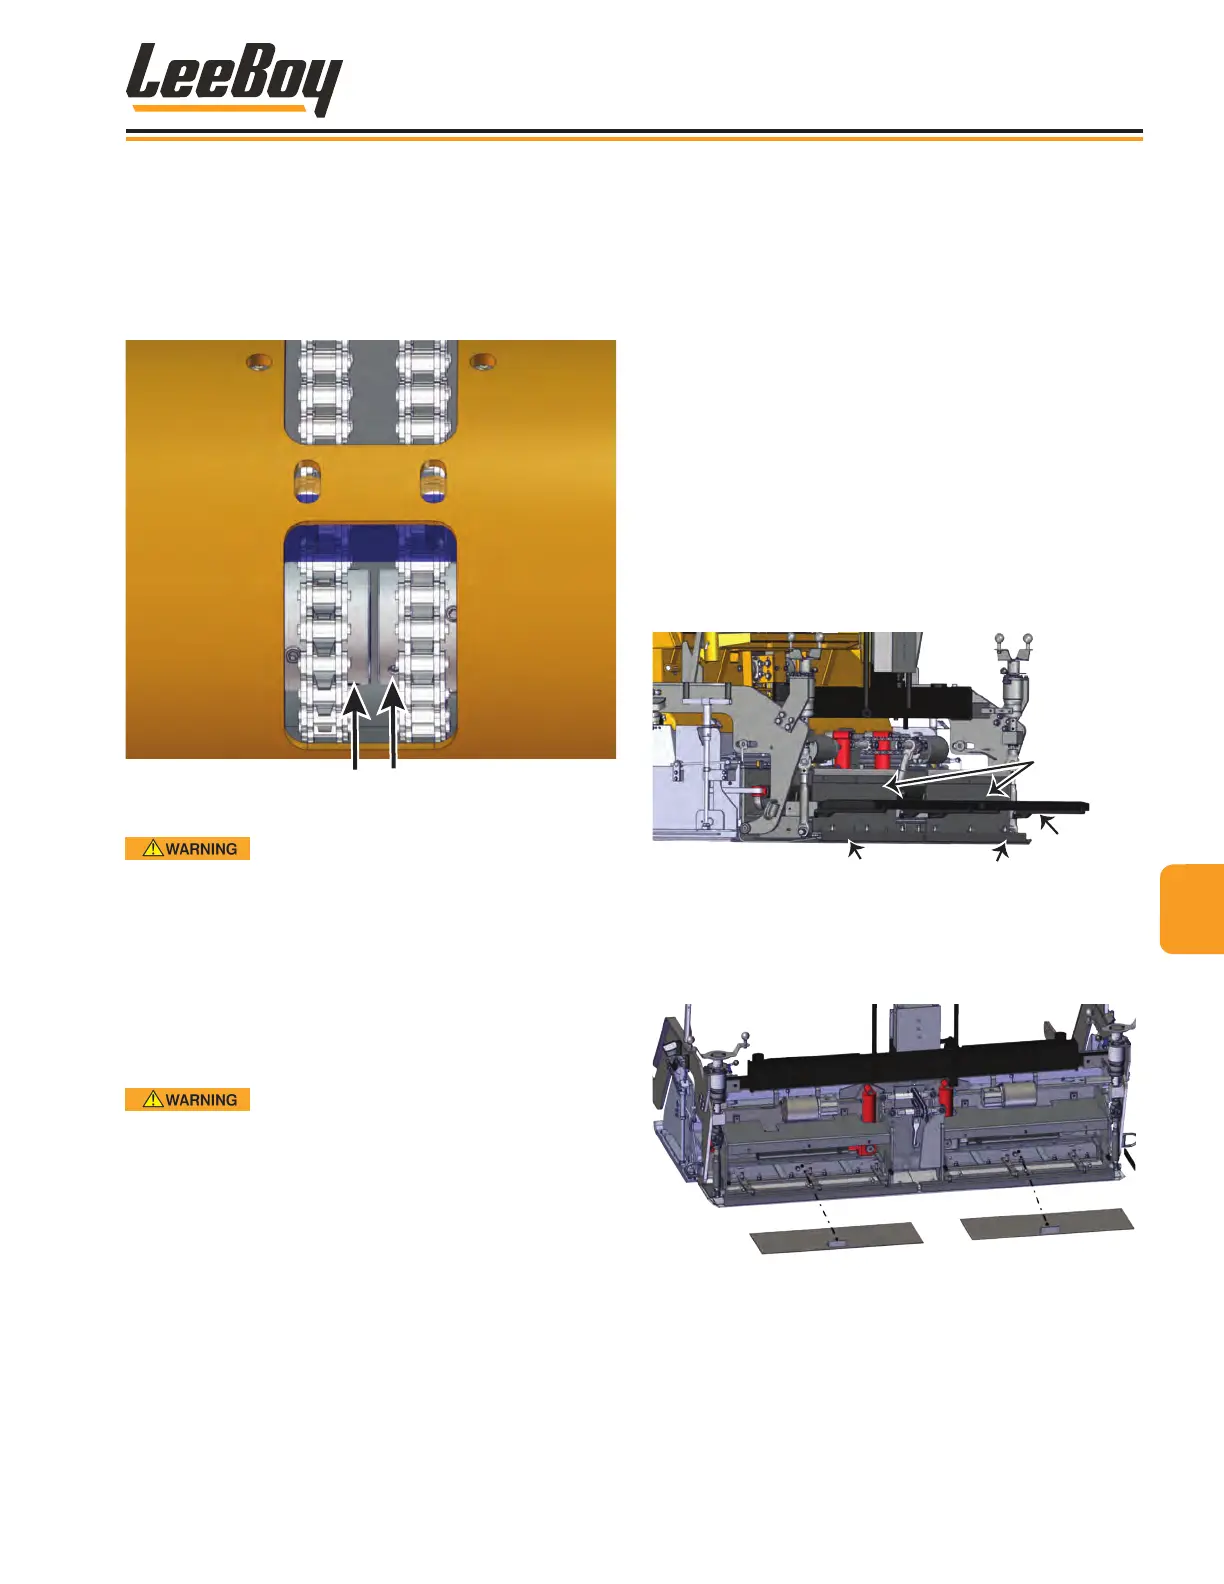
Right Set Screw
Left Set Screw
Figure 5-51. Inner Auger Set Screws
DO NOT perform this procedure
without using a sling to prevent injury. Augers are
heavy and extra care must be taken to remove and
replace.
10. Use a sling to support the inner auger. While
standing beside the paver, rmly grasp the outer
auger end and carefully pull out.
NOTE: The sling will need to be repositioned as you
carefully slide out the auger.
Be extra careful and mindful of the
paver frame and screed endgate position when
moving the auger away from the machine to prevent
falling or tripping while carrying the heavy auger.
11. Reinsert the new auger into place, aligning the inner
auger end with the set screw.
12. Insert allen wrench and turn clockwise to secure
auger into place.
13. Reinstall auger cover and reconnect grease hoses.
(Figures 5-59 and 5-60 on the previous page.)
14. Start the engine and idle for a few minutes, then turn
on the auger and check for proper operation.
Main Screed Wear PlateMain Screed Wear Plate
The screed wear plates can wear out over time and
must be replaced if the plate has worn to less than
1/4-inch thick. Poor maintenance, paver cleaning,
asphalt mixes containing hard aggregate and improper
material ow can contribute to excessive wear on the
main screed and extension wear plates. Correct screed
heating also helps prevent excessive material build-up.
An uneven, worn screed plate will produce an inferior
mat
1. Retract screed extension completely.
2. Unbolt and remove the rear walk boards. (Figure
5-52)
3. Unbolt and remove upper and lower screed covers.
4. Remove bolts on the heating element covers and
remove. Disconnect wiring.
Walkboards
Element Covers
Screed
Covers
Figure 5-52. Walk Boards and Covers
5. Grasp handle and slide out inner screed elements
covers as shown in Figure 5-53 to access wear
plate bolts.
Figure 5-53. Inner Screed Element Covers
6. Remove both rows of bolts holding the wear plate to
the bottom of the screed. (Figure 5-54)
NOTE: Clamp the center portion of the screed frame
to hold the frame in place before lifting it
from the worn wear plate.