Steering and Speed ControlSteering and Speed Control
Use the dual joysticks for steering and speed control. It
is important to move the joysticks SLOWLY. Lift up on
the joystick collar and move joystick either FORWARD
or REVERSE. The joystick collar will lock back into
place in the NEUTRAL position. The RUN/STOP switch
applies parking brake when set to the STOP position.
(Figure 4-51 on the previous page.)
Be aware of the terrain and driving
conditions. Adjust speed accordingly.
NOTE: To slow the paver, move joysticks closer to
the neutral position.
NOTE: To stop the paver, pull joysticks back to the
neutral position.
• To drive the paver forward, lift up on the joysticks’
collar and push joystick forward to reach the
desired speed.
• To move in reverse, lift up on the joysticks’ collar
and move joystick backwards to reach desired
speed.
• Return joysticks to the neutral position to stop
paver.
• To steer the unit to the left, SLOWLY push the right
joystick farther forward than the left joystick. The
farther the joystick is pushed, the more the paver
turns. Slow and easy adjustments are required for
safe operation.
• To steer the unit to the right, SLOWLY push the left
joystick farther forward than the right joystick. The
farther the joystick is pushed, the more the paver
turns. Slow and easy adjustments are required for
safe operation.
NOTE: If the joysticks are in the forward position
and the Run/Stop switch is set to the STOP
position, the system will time-out after 30
minutes. You must put joysticks back into
neutral and toggle the Run/Stop switch from
RUN to STOP and back to RUN again to
regain control.
NOTE: If equipped with the optional steering wheel
control box: If the joystick steering function
is not being used, the Run/Stop switch must
be in the OFF position.
Before leaving the operator platform,
the operator must return joysticks to the neutral
position and switch the Run/Stop (on the Steering
and Speed Control Box) to the STOP position.
PAVER OPERATION
Spray DownSpray Down
Always spray down the machine to clean it before and
after paving. Spray solvent or release agent on any part
of the paver that comes into contact with asphalt to pre-
vent buildup that will damage the machine over time.
When using solvents and release
agents, DO NOT allow cleaning solvent to run onto
the ground. Only spray down the machine in a
designated area away from the paving site.
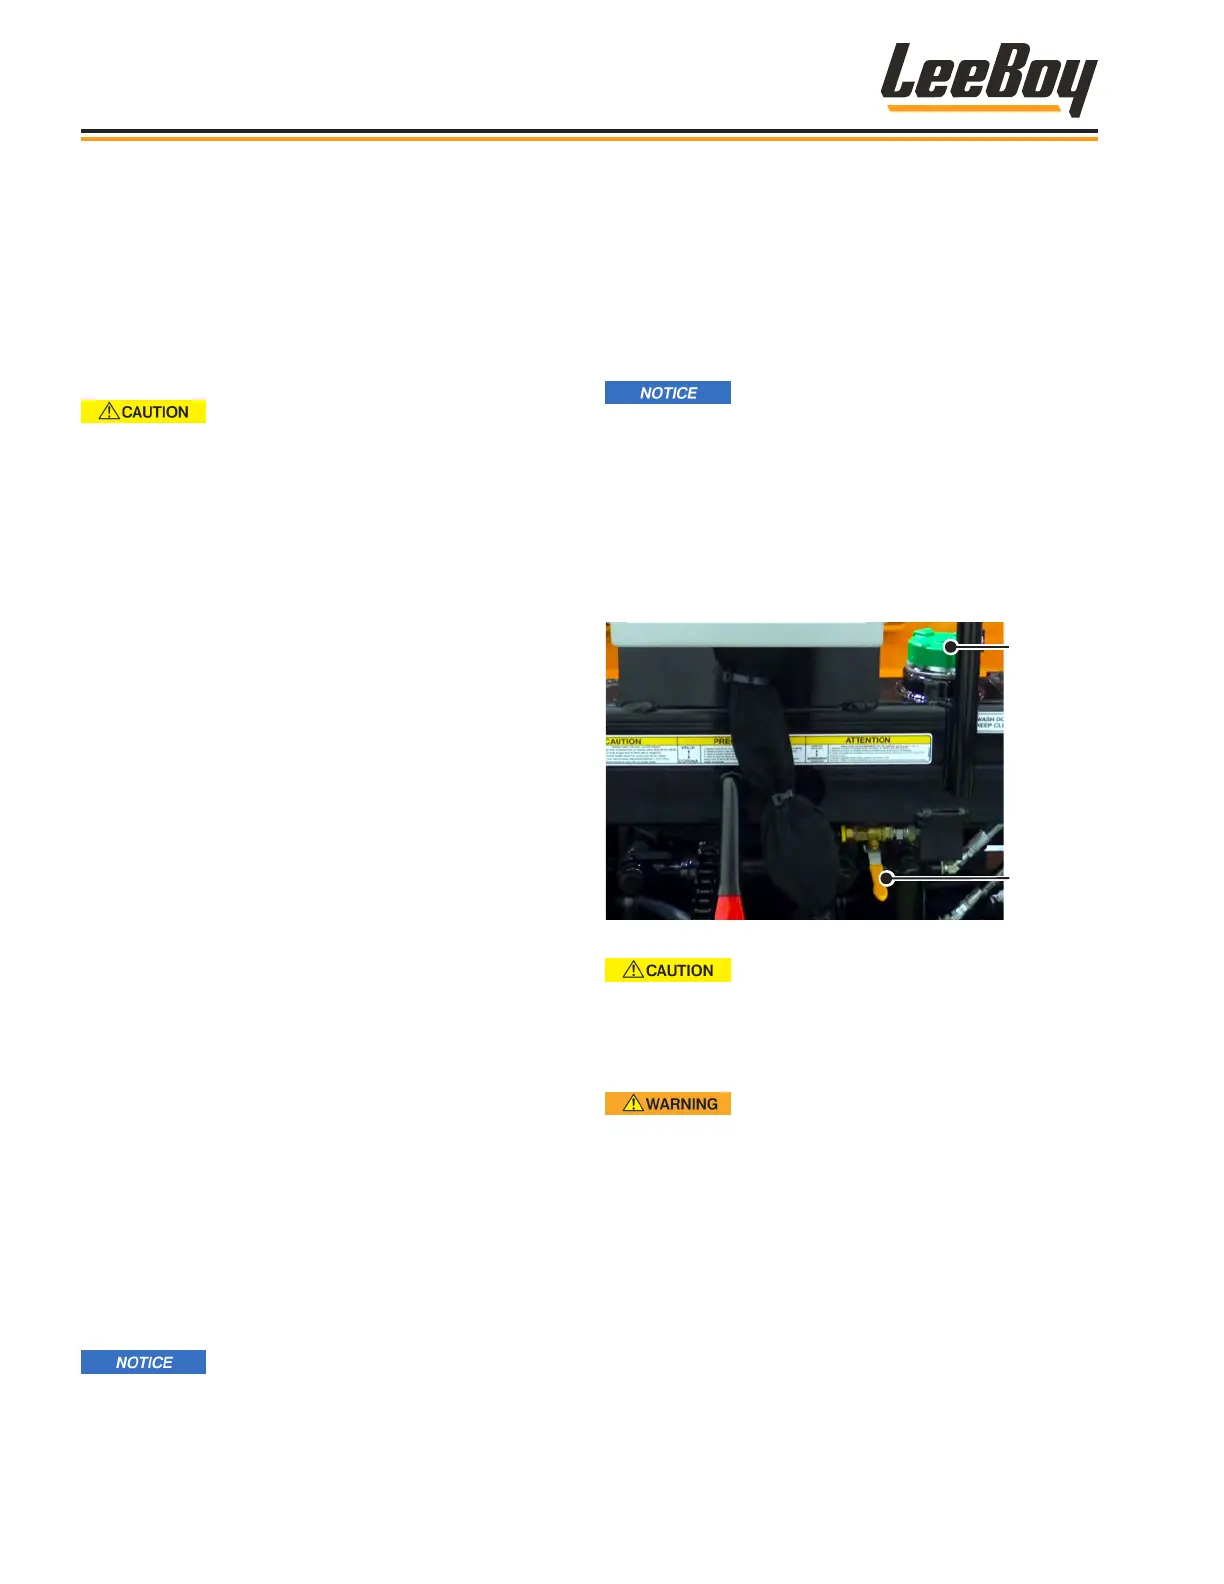
The green citrus tank ller cap is located on the screed
(right of the heat control box). The yellow valve lever is
just below the ller cap. (Figure 4-52) Turn the valve
clockwise to spray. Be sure to close the valve by turning
it counterclockwise when nished cleaning.
Filler Cap
Valve
Figure 4-52. Citrus Tank Filler Cap and Valve
Ensure the area is clear of others
and ammable materials before spraying. Allow the
screed to cool at least 10 minutes before spraying to
prevent possible burns from solvent spray on a hot
screed. The screed should be warm, but not hot.
Never spray cleaning solvent or
release agent near the screed heating element or
near open ame. These agents are highly ammable
and can ignite, causing serious personal injury.
• Ensure the area is clear of others before spraying.
• Open the hopper wings and raise the screed.
• Allow the screed to cool at least 10 minutes before
spraying to prevent possible burns from solvent
spray on a hot screed. The screed should be warm,
but not hot.
Operation
8608 Commercial Paver4-26