Heated End GateHeated End Gate
The heated end gate also
heats the edge of the end gate,
producing a smoother joint
as you pave. (Figure 4-89)
(When the heated endgate is
turned on, the leading heating
element turns off on the side
you’re heating.) The heated
end gate switches are located
on the electric heat control
box.
Figure 4-89. Heated
Endgate
To operate the heated end gates:
1. Start the paver and idle until the engine reaches
normal operating temperature.
2. Raise the screed plate one or two inches off the
ground.
3. Turn the electric heat control box power ON by
turning the power switch up.
4. Press the Start Heat button. The HEAT ON indicator
light will illuminate and stay on as long as the ele-
ment is heating (approximately 20 minutes).
5. Turn the left or right end gate switch up to the ON
position.
6. You can restart the cycle by repeating Step 4 if
needed.
Screed Single-Point Lube Screed Single-Point Lube
SystemSystem
The screed single-point lube system combines all
screed lubrication points into one. When you pump
grease into the central point, valves distribute the
grease evenly to all the screed grease points.
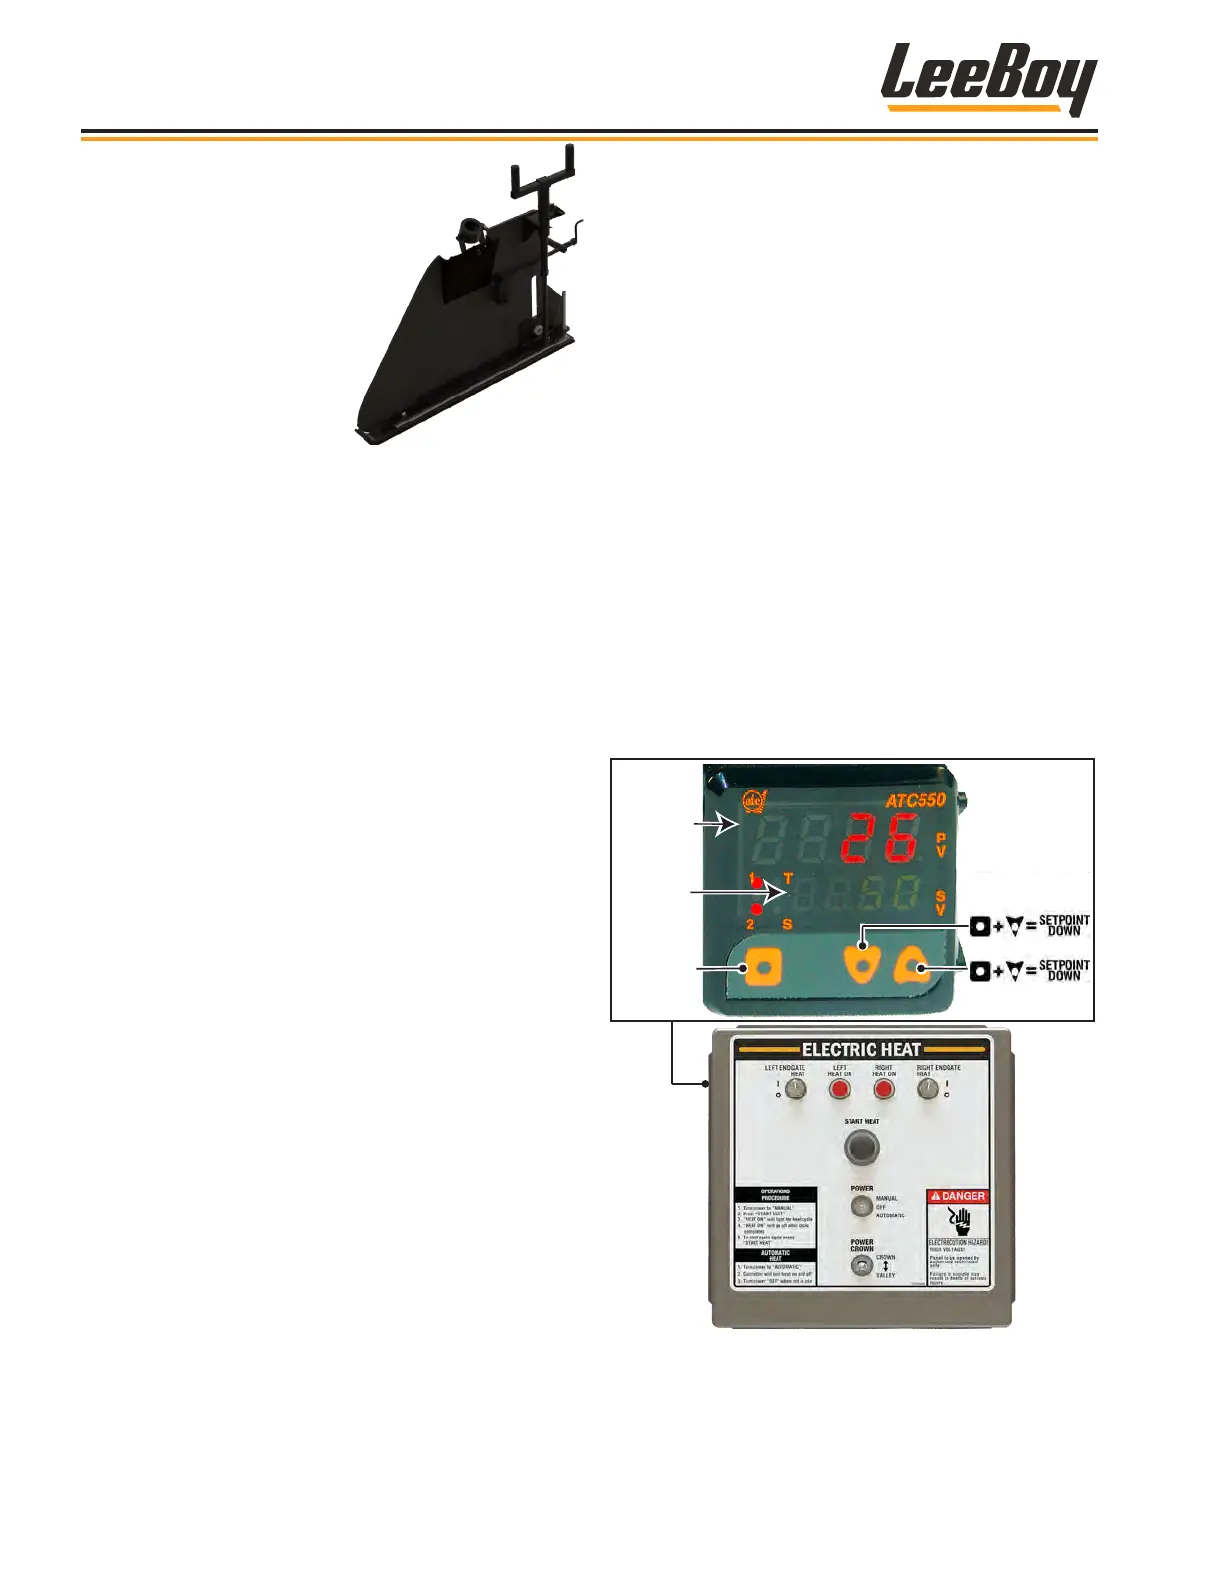
Automatic Temperature ControlAutomatic Temperature Control
Automatic temperature control (ATC) for heating the
screed is an option that offers additional convenience
for operators, automatically turning the heating elements
on and off to maintain desired screed temperature.
The ATC is located on the side of the heat control box.
(Figure 4-90)
To operate:
1. Turn the screed electric heat box Power switch
DOWN to the automatic setting to turn ON the auto-
matic temperature control.
2. Green numbers illuminate to display the set point
temperature. The screed temperature appears in
red numbers above the set point temperature.
3. To change the temperature:
• Press the Select button and DOWN arrow to
decrease the set point temperature.
• Press the Select button and UP arrow to
increase the set point temperature.
Temperature
Set Point
Temperature
(Decrease Heat)
(Increase Heat)
Select
Figure 4-90. Automatic Temperature Control
Operation
8608 Commercial Paver4-44