3. Installation VINX-1x0-HDMI Extenders – User's Manual 23
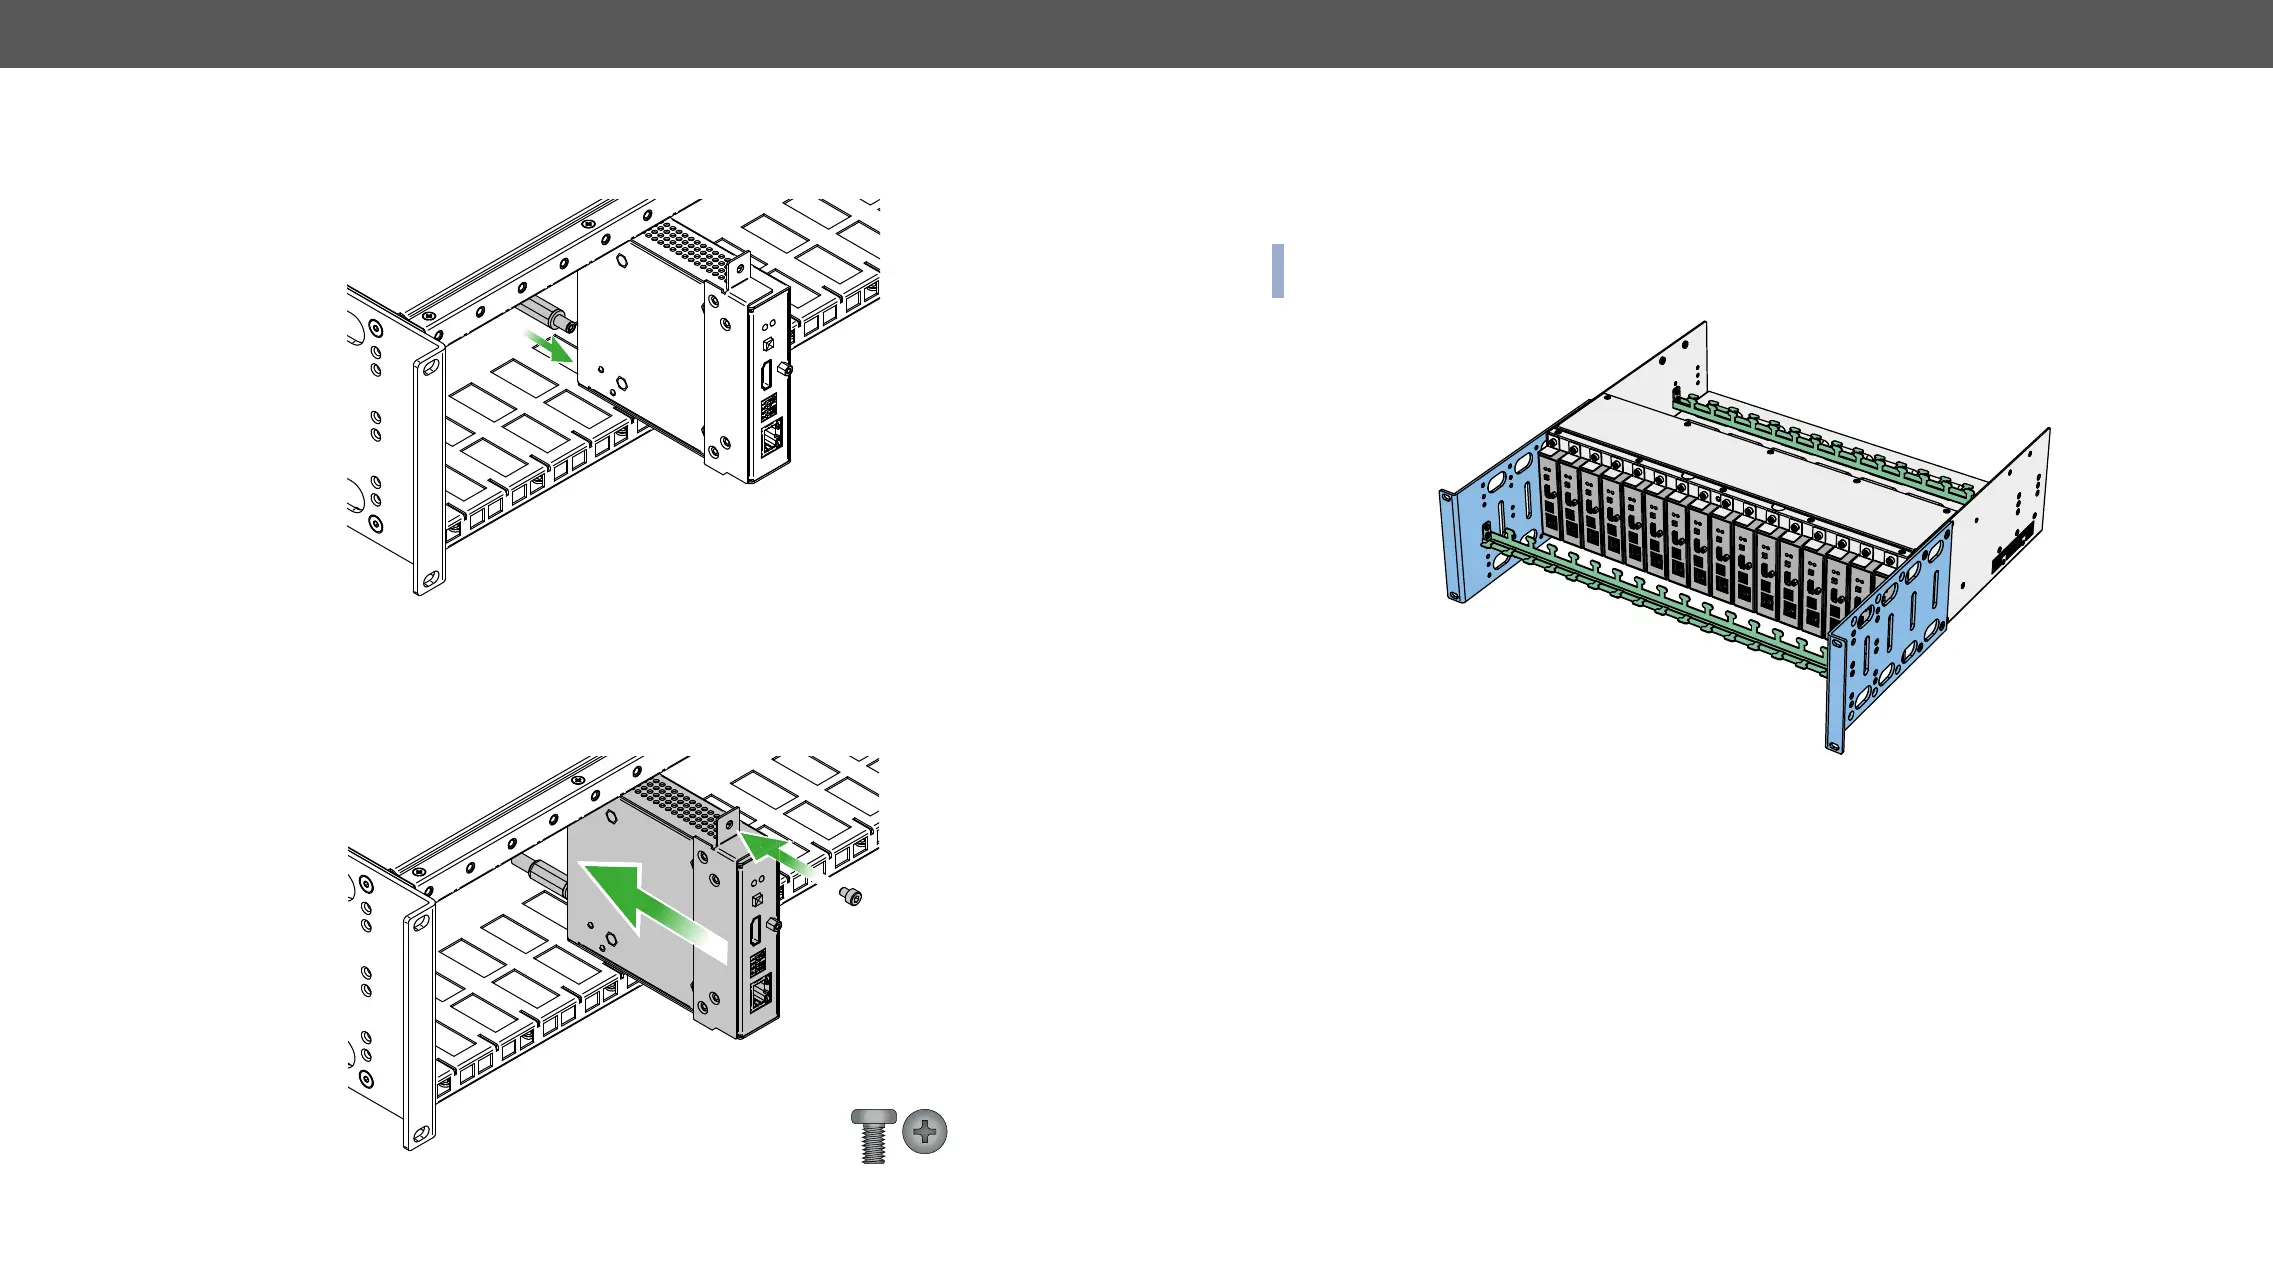
Step 2.
and connect it to the power connector of the extender.
Step 3. Fastening the extender in the mounting slot.
Place the extender (highlighted with grey) to the desired mounting slot and fasten the extender
guide rails of the cage when placing the extender.
Required screw:
Step 4. Assembly of the Rack Ears and the Cable Guides.
The structure of the rack ears and the cable guides allow three kinds of installations in the Powered
Rackmount Cage. The rack ears (highlighted with blue) are assembled to the front side in foremost
position. Two cable guides (highlighted with green) are assembled to the device, one is to the front
side in the middle position, the second one is to the rear side in lower position.
INFO: Below example is recommended if you have a deep rack and you need cabling on the front and the
rear side as well.
Other Compatible Devices
▪ HDMI-OPT-TX100
▪ HDMI-OPT-TX100R
▪ HDMI-OPT-TX200R
▪ HDMI-OPT-RX100
▪ HDMI-OPT-RX100R
▪ HDMI-OPT-RX200R
▪
Power inlet
Air intake
 Loading...