1.23. DUAL EXTRUSION
• Update your Esteps for the rear extruder and E1steps for the front
extruder through your LCD screen. Configuration > Advanced
Settings > E/E1 Steps > New Number. Push in on the knob to
exit out of the Esteps entry.
• Store your new Esteps Configuration > Store Memory.
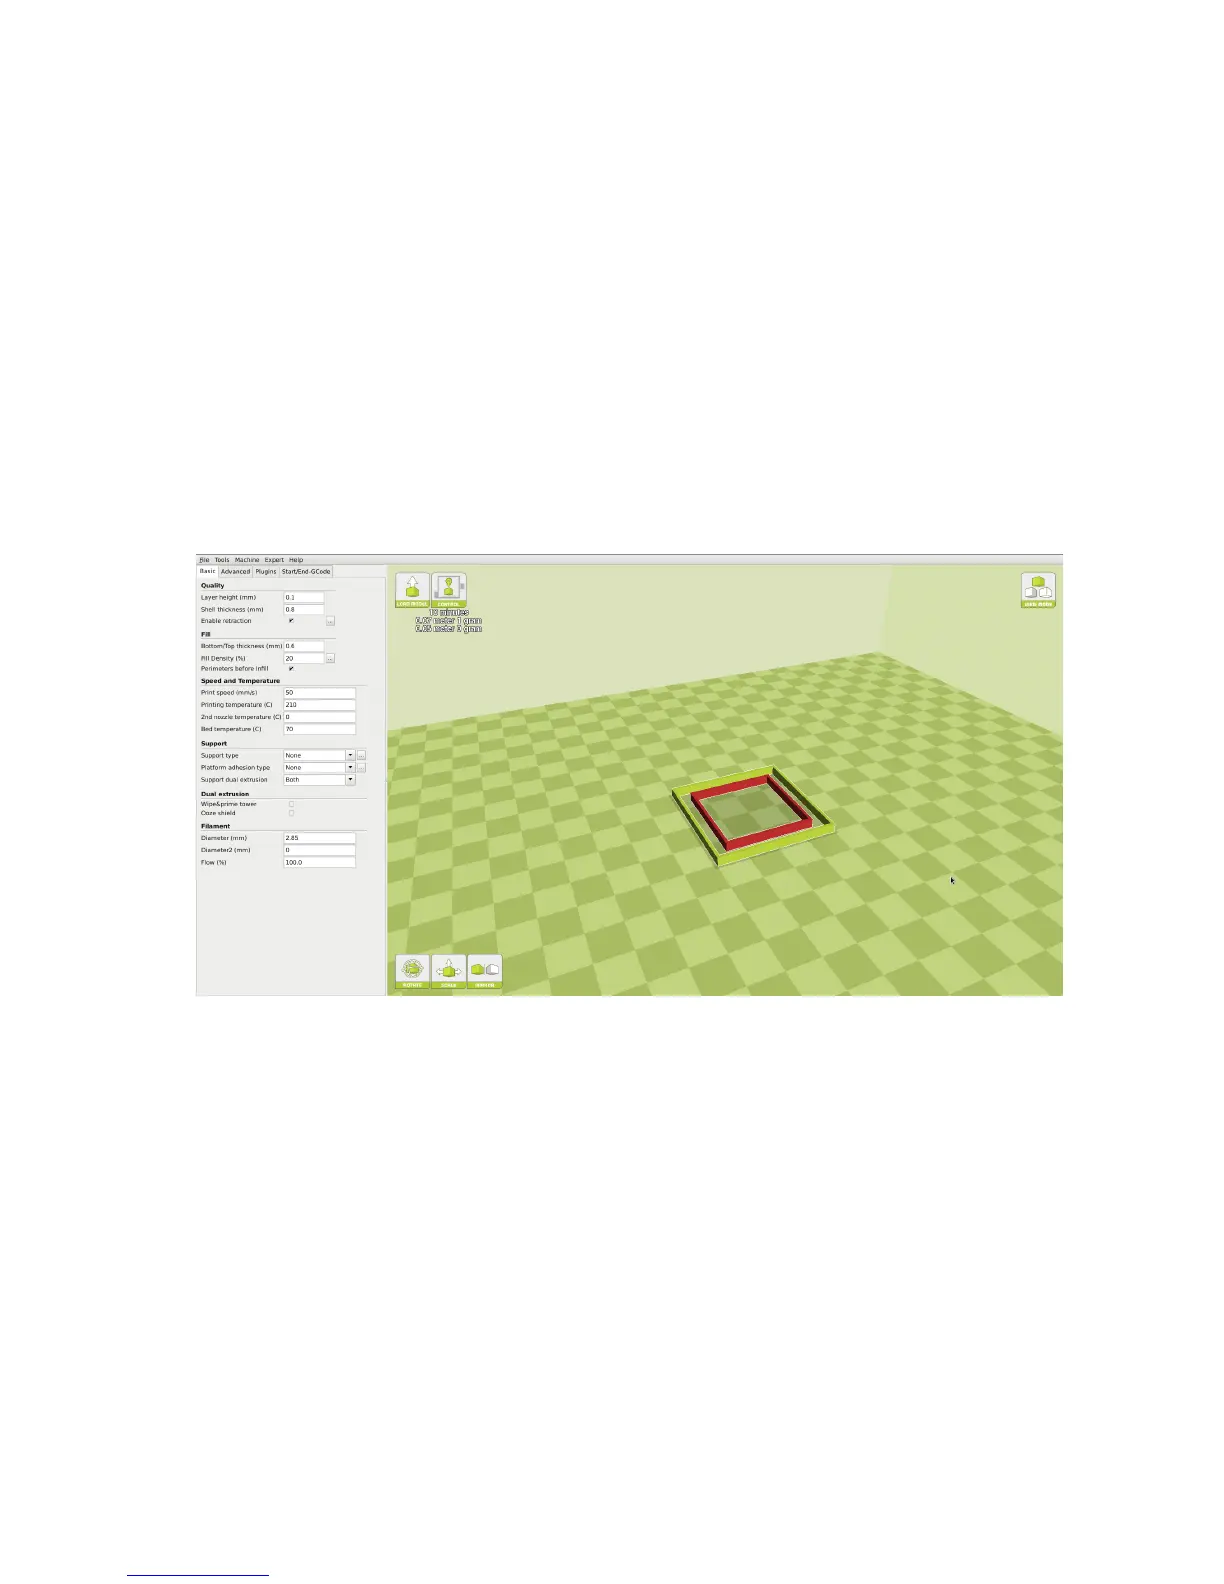
Defining Second Extruder Offset
To get crisper looking prints, you will want to really dial in your osets.
With the outer and inner square on your build platform, right click and
select Dual Extrusion Merge. The red square will be printed with your
front extruder, and the yellow square will be printed with the rear extruder.
After printing the squares, you will want to measure Top, Bottom, Left,
and Right gap. Enter these numbers into our oset calculator found here:
https://www.lulzbot.com/dual-extruder-calibration-calculator
This will produce new osets, that will need to be updated in the Machine
Settings menu. Repeat as many times as desired to truly ne tune the
oset.
First Dual Print
When you are ready to produce your rst dual extrusion print, you will
need to combine the two separate STL les. One STL le will be for each
print head. Left Click on whichever STL you would like printed with the
47