Using your Edger...Usual procedure
3-44
LTO
3.2.5.1.1 PROCEDURE / REMARKS
The current hole is shown by a red cross.
To position a hole measured from another hole, your entered value should be within [-15 mm, +15 mm].
Elongated holes are defined between the currently edited point and the previous point.
3.2.5.1.2 FACTS WORTH KNOWING
Drilling, if it is selected, is the last step in the edging process.
If you do not want holes, ensure that no hole has been entered in the drilling tab.
Elongated holes and notches are always machined from the edge of the lens towards the centre.
Only CR39, polycarbonate, high index (HI) and Trivex™ materials can be drilled.
A mineral lens cannot be drilled.
The total number of holes and notches is limited.
The limit is twenty holes per lens, for all types of holes.
Characteristics of the diameter of a hole:
The diameter of a drilled hole is always greater or equal to that of the mill bit which is fitted.
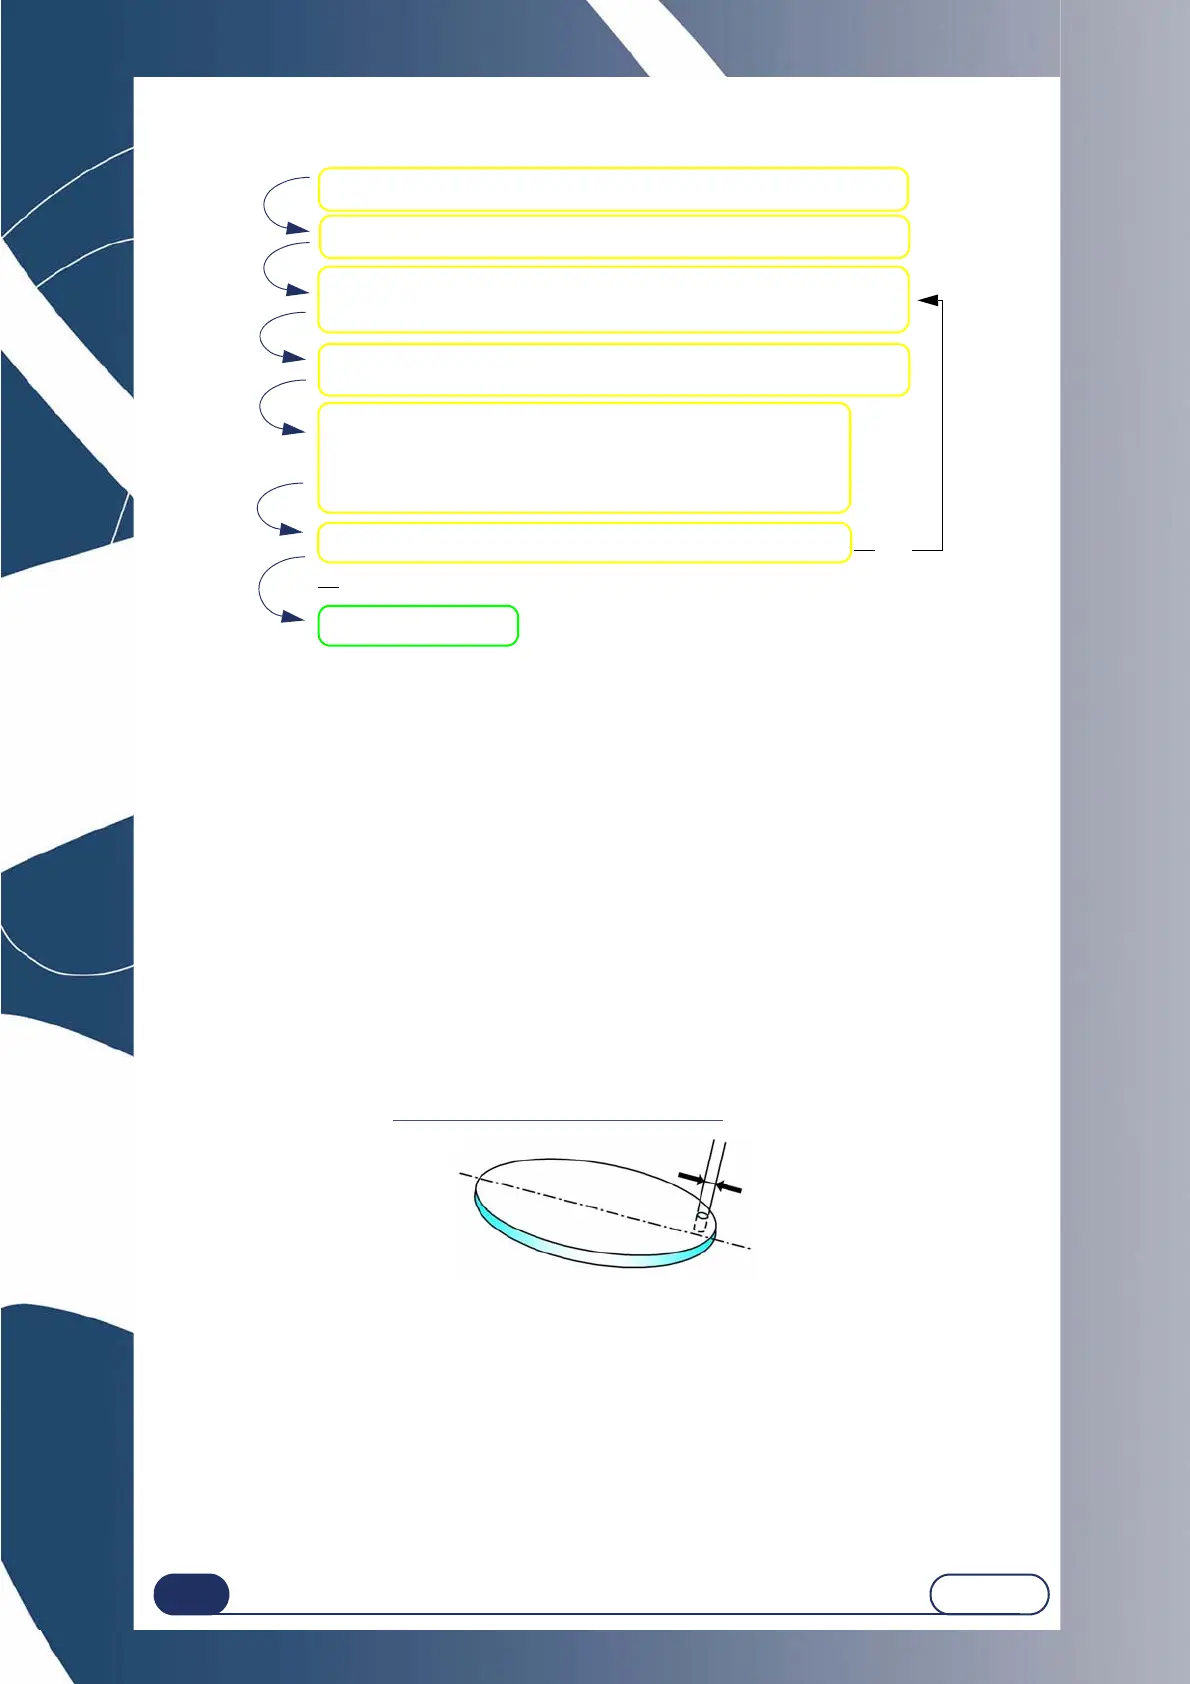
Lenses are always drilled at a 10° angle from the front face.
The smallest hole diameter that can be drilled with the mill bit is 1 mm..
Note : When the job is received on the edger, if it includes at least one hole whose diameter
is smaller than that of the bit, the machine will display the following warning mes-
sage:"Bit diameter > hole diameter.Do you want to drill?"
If you reply Yes: The minimum diameter of the holes will be equal to the bit dia-
meter.
If you reply No: the entire drilling plan will be ignored and no hole will be
drilled.The lens will be finished in rimless.
3.2.5.1.3 HINTS
When the edging cycle is finished, remove the edged lens without removing the block so as to be able to
retouch it if necessary.
Load a job number (from the JOB tab).
Add a drilling hole.
NOTE: This appears at coordinates X=15; Y = 15.
Position the hole using the navigation arrows of the zoom or en-
ter the values.
Enter the desired drilling diameter value:
- using the calculator,
- using the increment up / increment down keys.
Note: No increment: 0.05mm
Du you want to drill another hole?
Confirm the step.
Yes
No
Access the Drilling menu (from the Digiform tab).
Min. hole diameter = 1 mm (bit dia.)