Using your Edger...Special case
3-72
LTO
3.3.3.4 PLACE A FINISHING MANUALLY
3.3.3.4.1 SITUATION
You wish to visualise the lens thickness and adjust the finishing position.
3.3.3.4.2 PROCEDURE
After opening the job and entering the characteristics, proceed as follows:
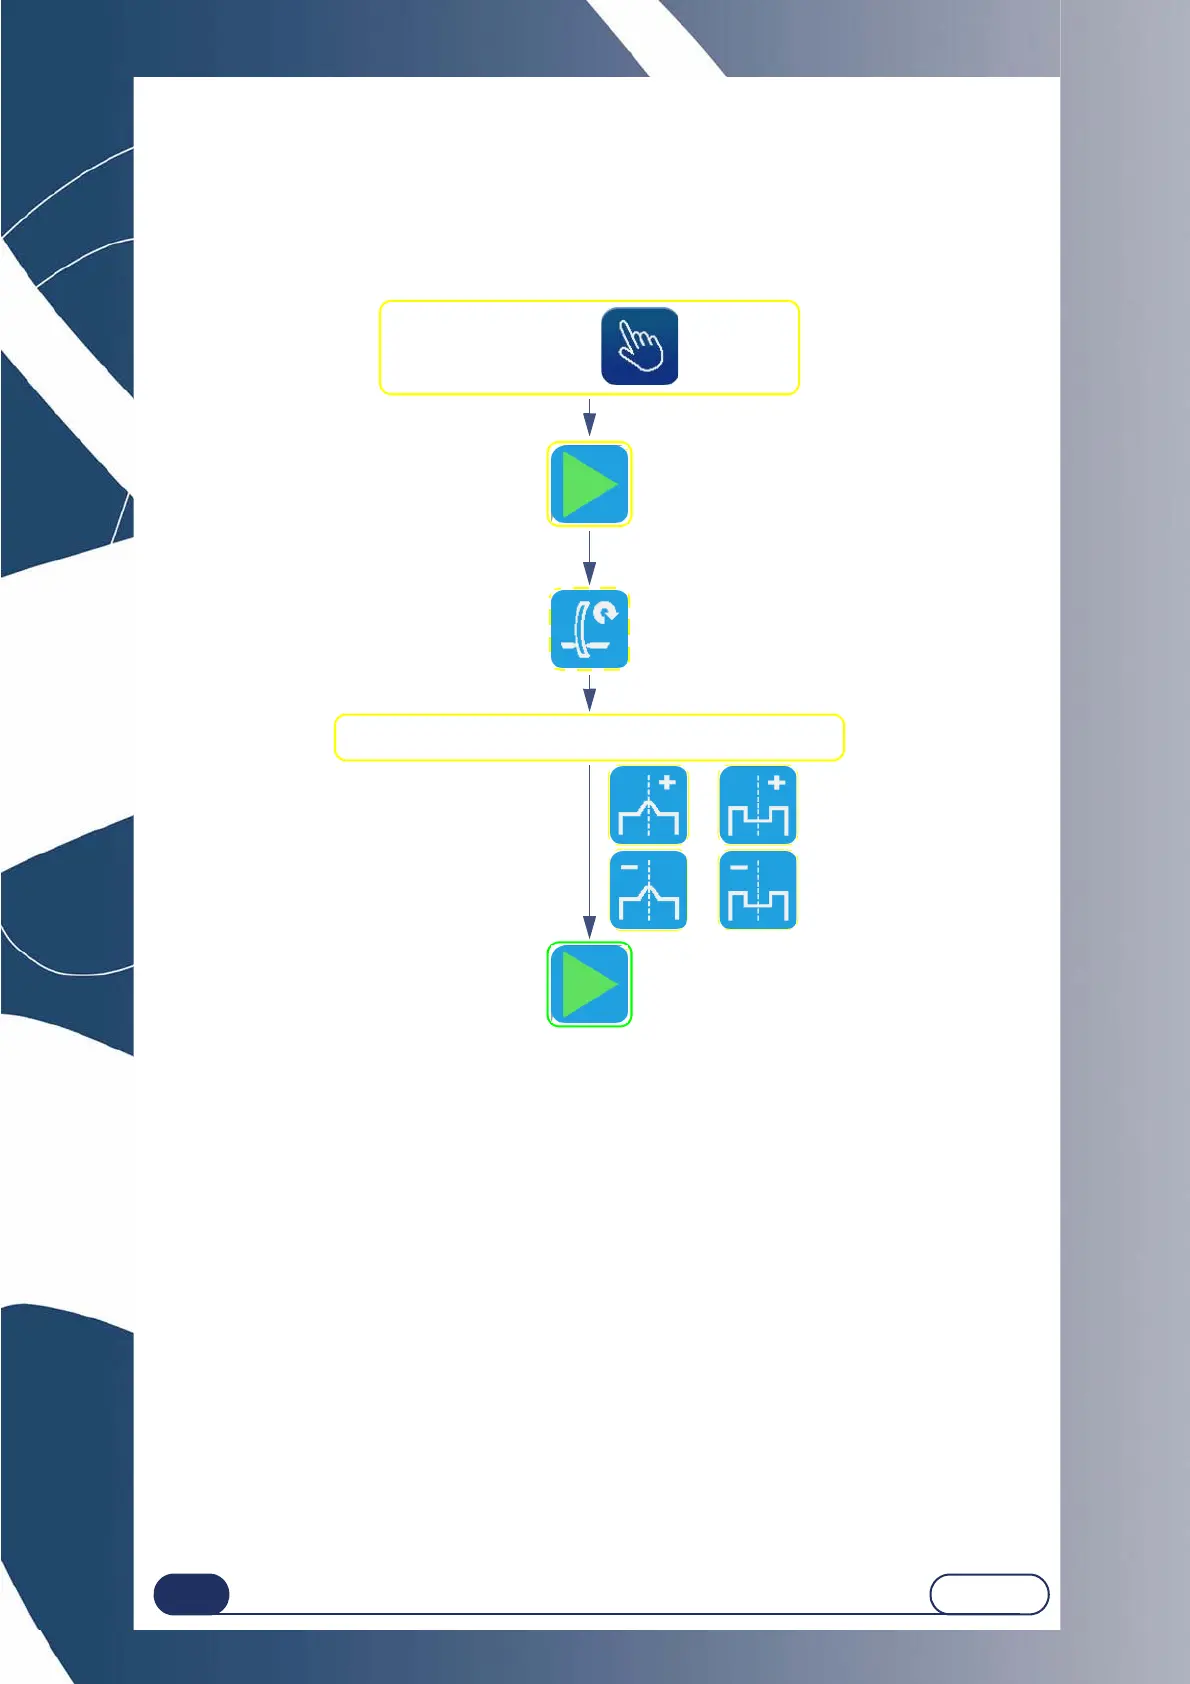
Flow chart 3-8 : Placing a finishing manually
IMPORTANT NOTES
The finishing position can be modified in 2 ways: front/rear movement, width and depth modification (for
grooves).
Only the apex of the bevel (or the middle of the groove) is displaced.
The opposite side remains fixed and the curve of the finishing is unchanged.
If you wish to reposition the whole finishing, move it in one direction to the required position.
Then do the same from the opposite point.
3.3.3.4.3 SPECIAL CASES
After the lens feeling, you may have been redirected automatically to the manual finishing screen for the following
reasons:
The bevel or the groove are outside the lens;
The bevel is too far back;
Irregular points were detected during feeling.
You may then reposition the finishing as shown in the flow chart above.
Move the finishing and position it as you wish.
Restart of feeling,
if necessary
At the end of the second lens feeling cycle,
the manual finishing screen is displayed.
[To the rear]
[To the front]
Or
Or
Check that finishing =
After lens roughing and feeling, the manual
finishing screen is displayed.
Starting the finishing cycle once
the position has been defined