262335 13 Revision A
3.3 Installing Gauge Rollers
If the Gauge Rollers kit is NOT supplied, proceed to 3.4 Tilting the Header into Field Position, page 15. Otherwise, proceed
as follows.
NOTE:
This kit may be installed later in the header assembly sequence, but it may be easier prior to laying the header down.
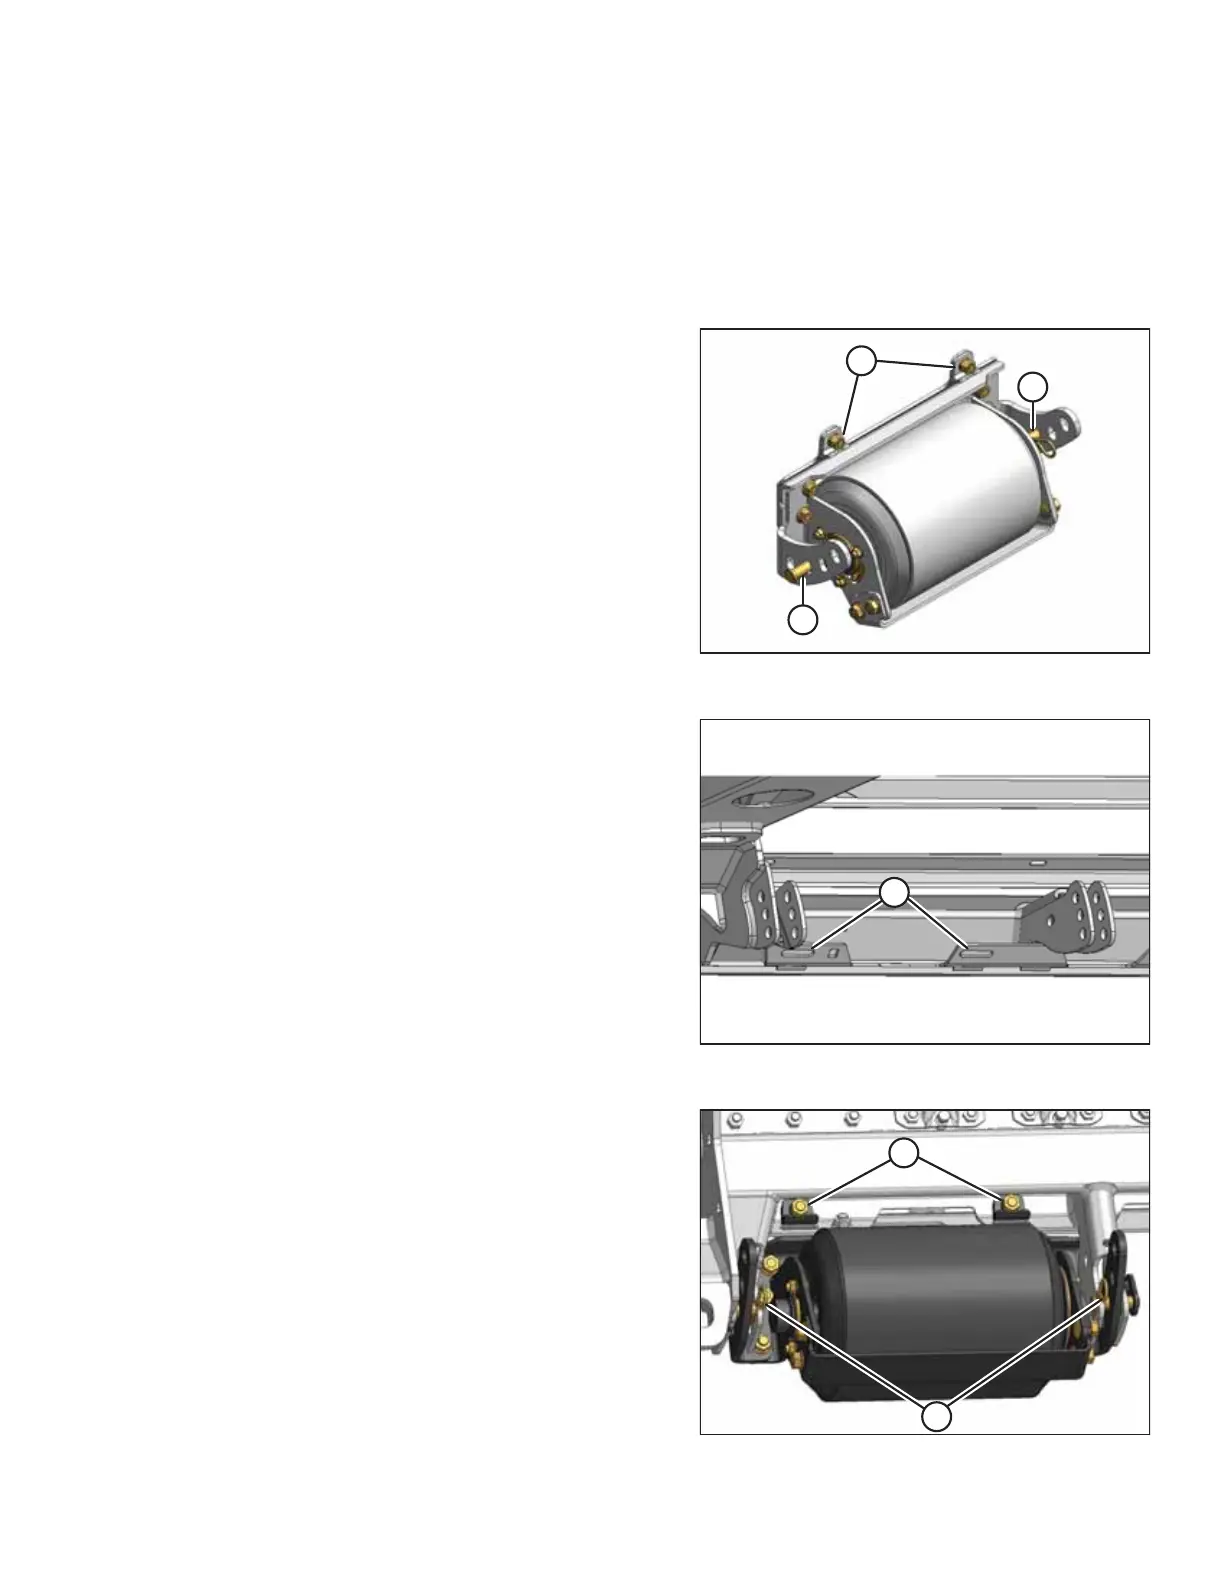
Figure 3.5: Gauge Roller in Shipping Configuration
1. Unpack gauge roller bundle.
2. Remove two locking pins (A) from each assembly.
3. Remove nuts, bolts, and clips (B) from assembly.
Figure 3.6: Gauge Roller Mounting Location
4. Insert tabs on roller assembly into slots (A) on cutterbar at
outboard mounting locations on frame.
Figure 3.7: Gauge Roller
5. Secure the gauge roller assembly to support bracket with
locking pin (B) at lowest position.
6. Attach clips (A) with bolts and nuts removed earlier in this
procedure to secure roller assembly to cutterbar.
7. Tighten nuts.
NOTE:
Use a socket and ratchet wrench to access the nuts.
ASSEMBLING THE MACHINE