262335 23 Revision A
3.6 Installing Tall Crop Divider Kit
If the Tall Crop Divider kit is NOT supplied, proceed to 3.7 Adjusting Lean Bar, page 24. Otherwise, proceed as follows:
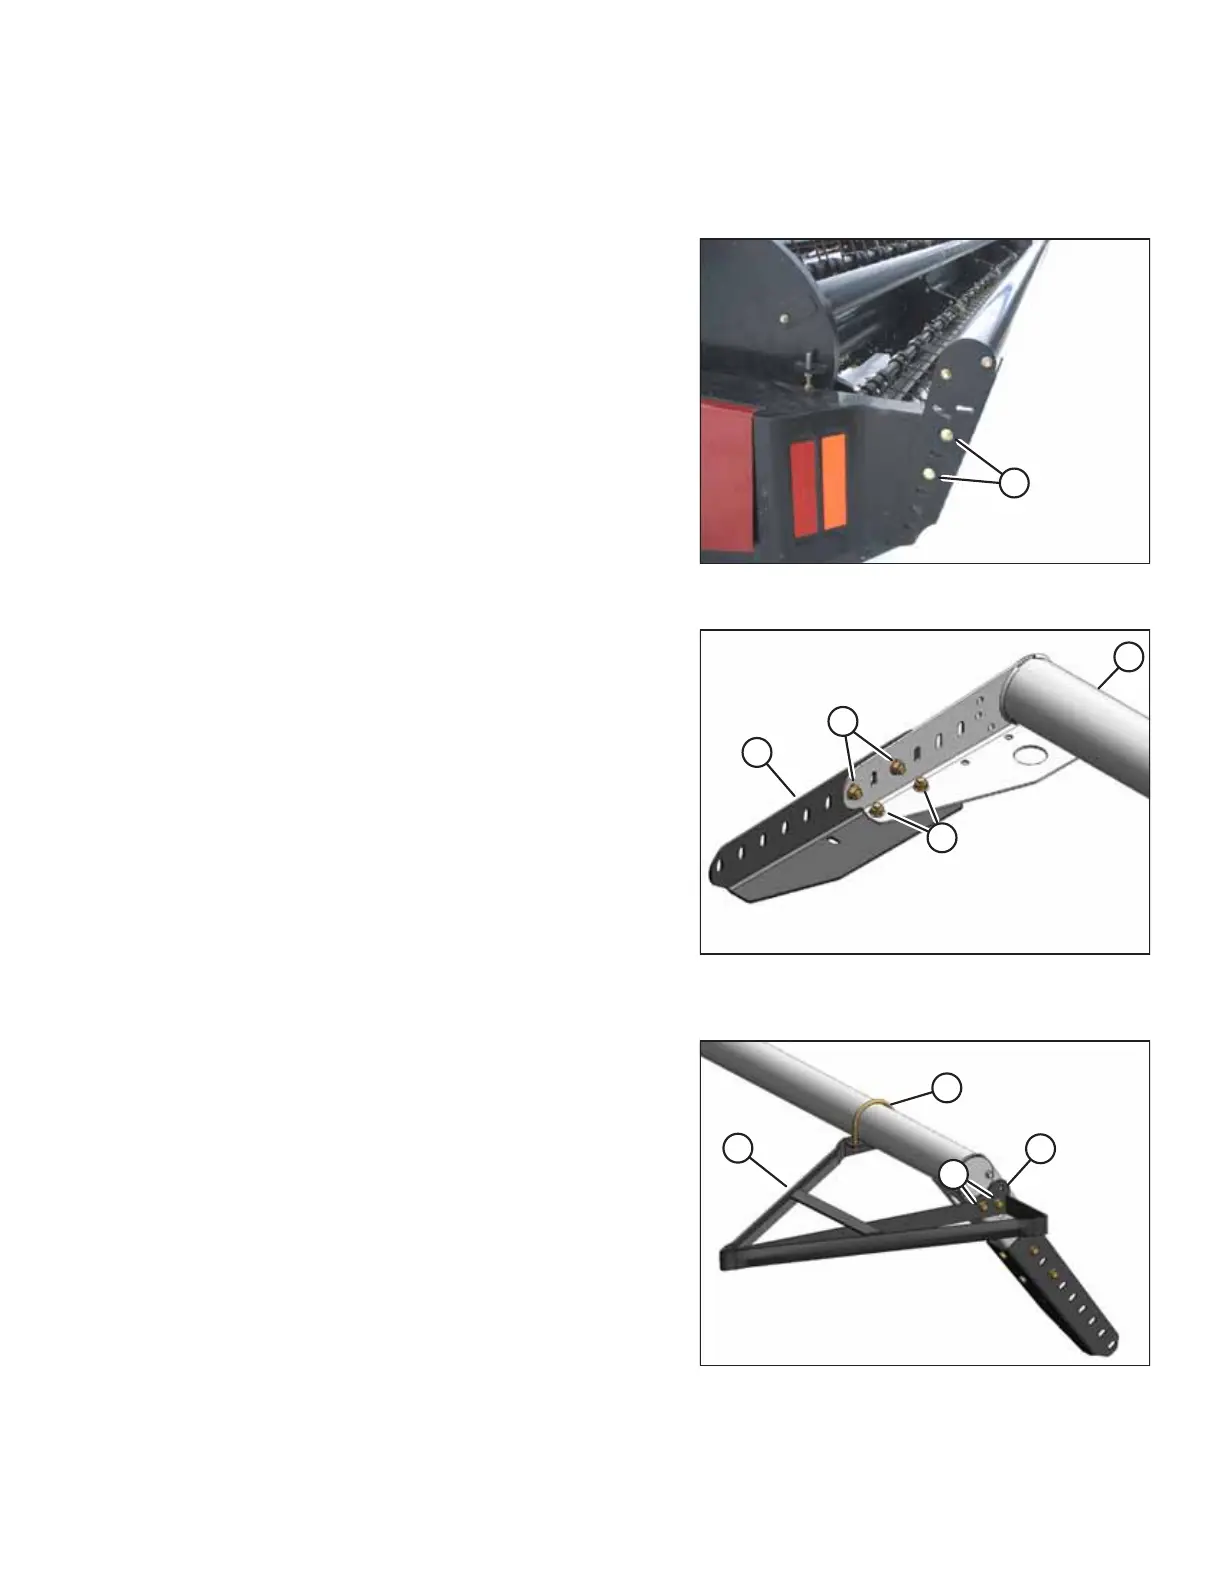
Figure 3.22: Lean Bar
1. Unpack the kit and disassemble hardware from the divider.
NOTE:
If tall crop extension angles are not required, proceed to
Step 5, page 23.
2. Remove hardware (A) on both sides of the lean bar, and
then remove the lean bar from the auger header.
Figure 3.23: Extension Angles Attached to Ends of
Lean Bar
3. Attach extension angles (A) to each end of lean bar (B) with
four 1/2 x 1.0 in. hex bolts (C) and nuts provided.
4. Reinstall the lean bar on the header with the existing
hardware. Tighten bolts.
Figure 3.24: Tall Crop Divider Installed
5. Position left divider (C) at left side of the lean bar and
attach with U-bolt (A), two 3/8 in. nuts, and two 1/2 x 1.0
in. hex bolts (B) and nuts provided.
NOTE:
The divider may be positioned as shown or using the
optional mounting hole (D).
6. Adjust to desired position and tighten the hardware.
7. Repeat the previous two steps for the right side.
ASSEMBLING THE MACHINE