262335 86 Revision A
Figure 3.160: Multicoupler
6. Insert hose support (B) into hole (A) in the windrower’s left
leg. Route header hose bundle (C) under the windrower to
the hydraulic and electrical couplers.
Figure 3.161: Knife/Reel/Auger Drive Multicoupler
7. Clean the multicouplers and receptacles to prevent
contamination of the hydraulic system.
8. Push button (A) on the rear multicoupler receptacle and
rotate handle (B) away from the windrower.
9. Open cover (C). Position multicoupler (D) onto the
receptacle. Align the pins in the coupler with the slots in
handle (B) and rotate the handle toward the windrower so
that the coupler is locked onto the receptacle and
button (A) pops out.
10. Push button (E) on the front multicoupler receptacle and
rotate handle (F) away from the windrower.
11. Open cover (G) and position multicoupler (H) onto the
receptacle. Align the pins in the coupler with the slots in
the handle, and rotate the handle toward the windrower so
that the coupler is locked onto the receptacle and
button (E) snaps out.
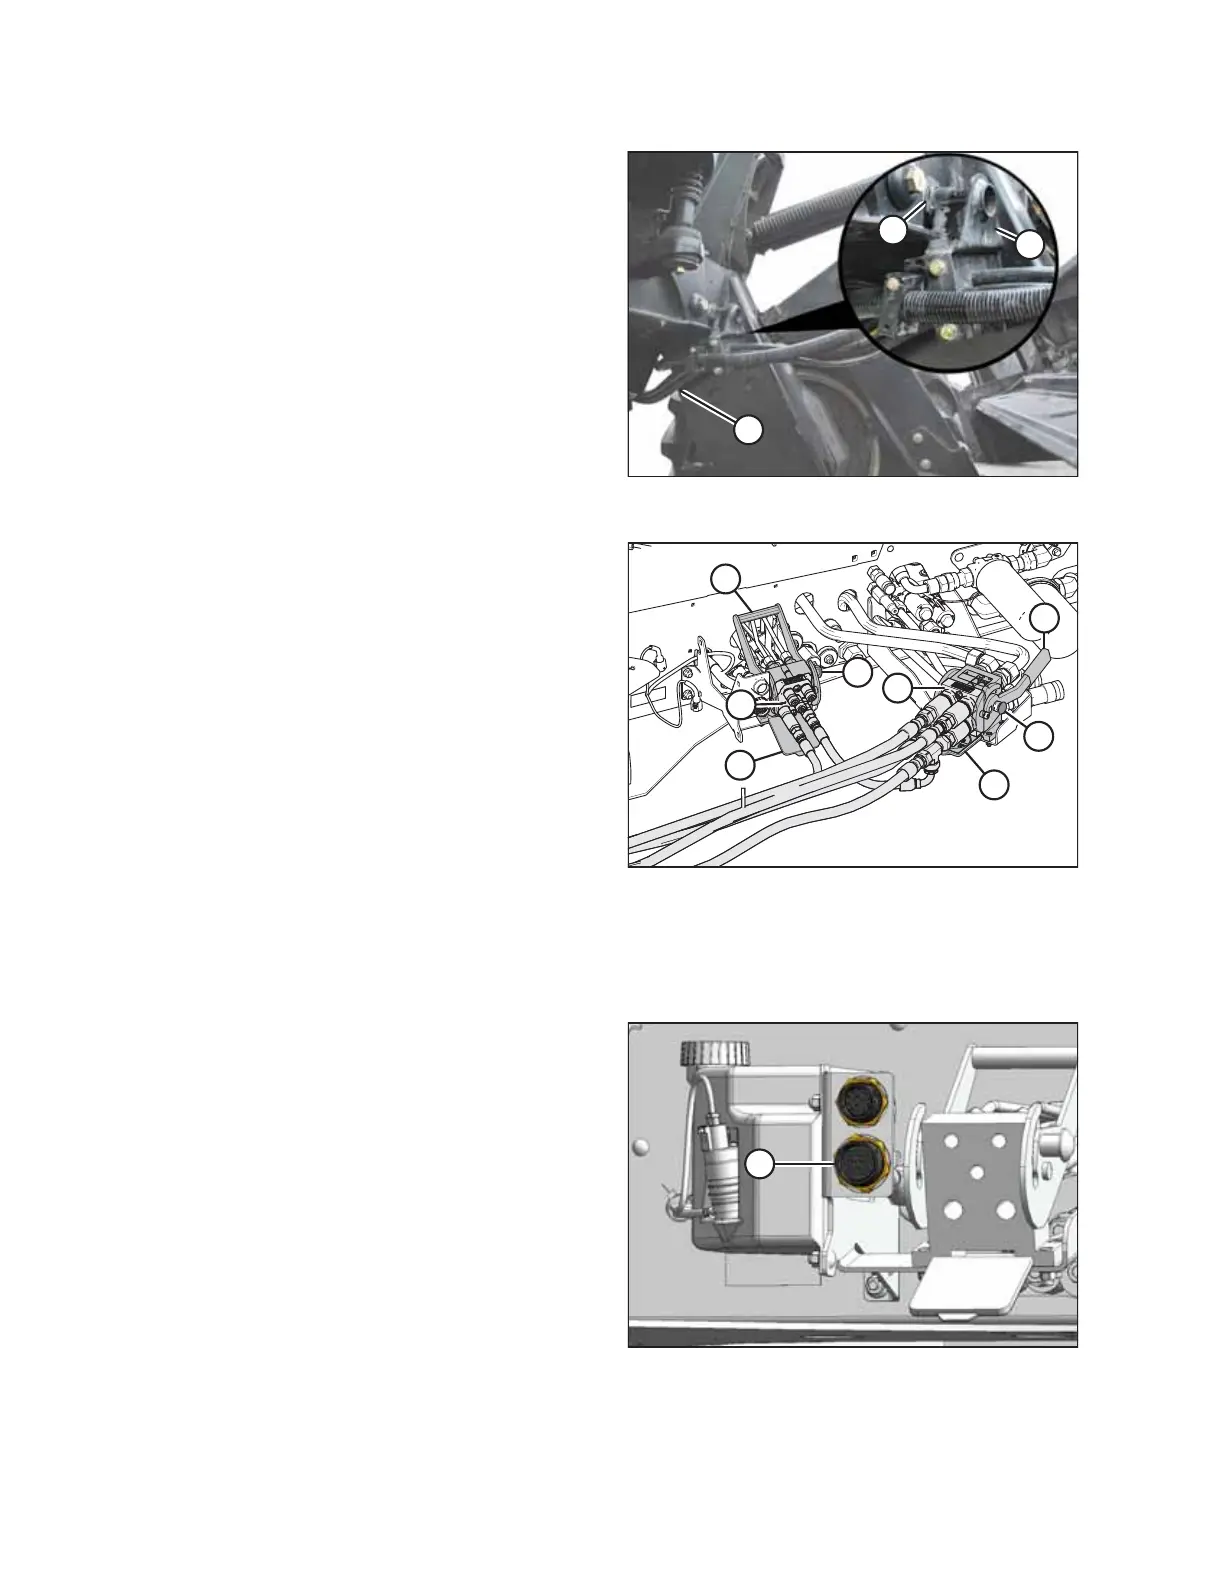
Figure 3.162: Electrical Connectors
12. Remove the cover from receptacle (A). Connect the
header’s electrical harness to the receptacle.
ASSEMBLING THE MACHINE