OMNIScanner User Guide
2 - 4
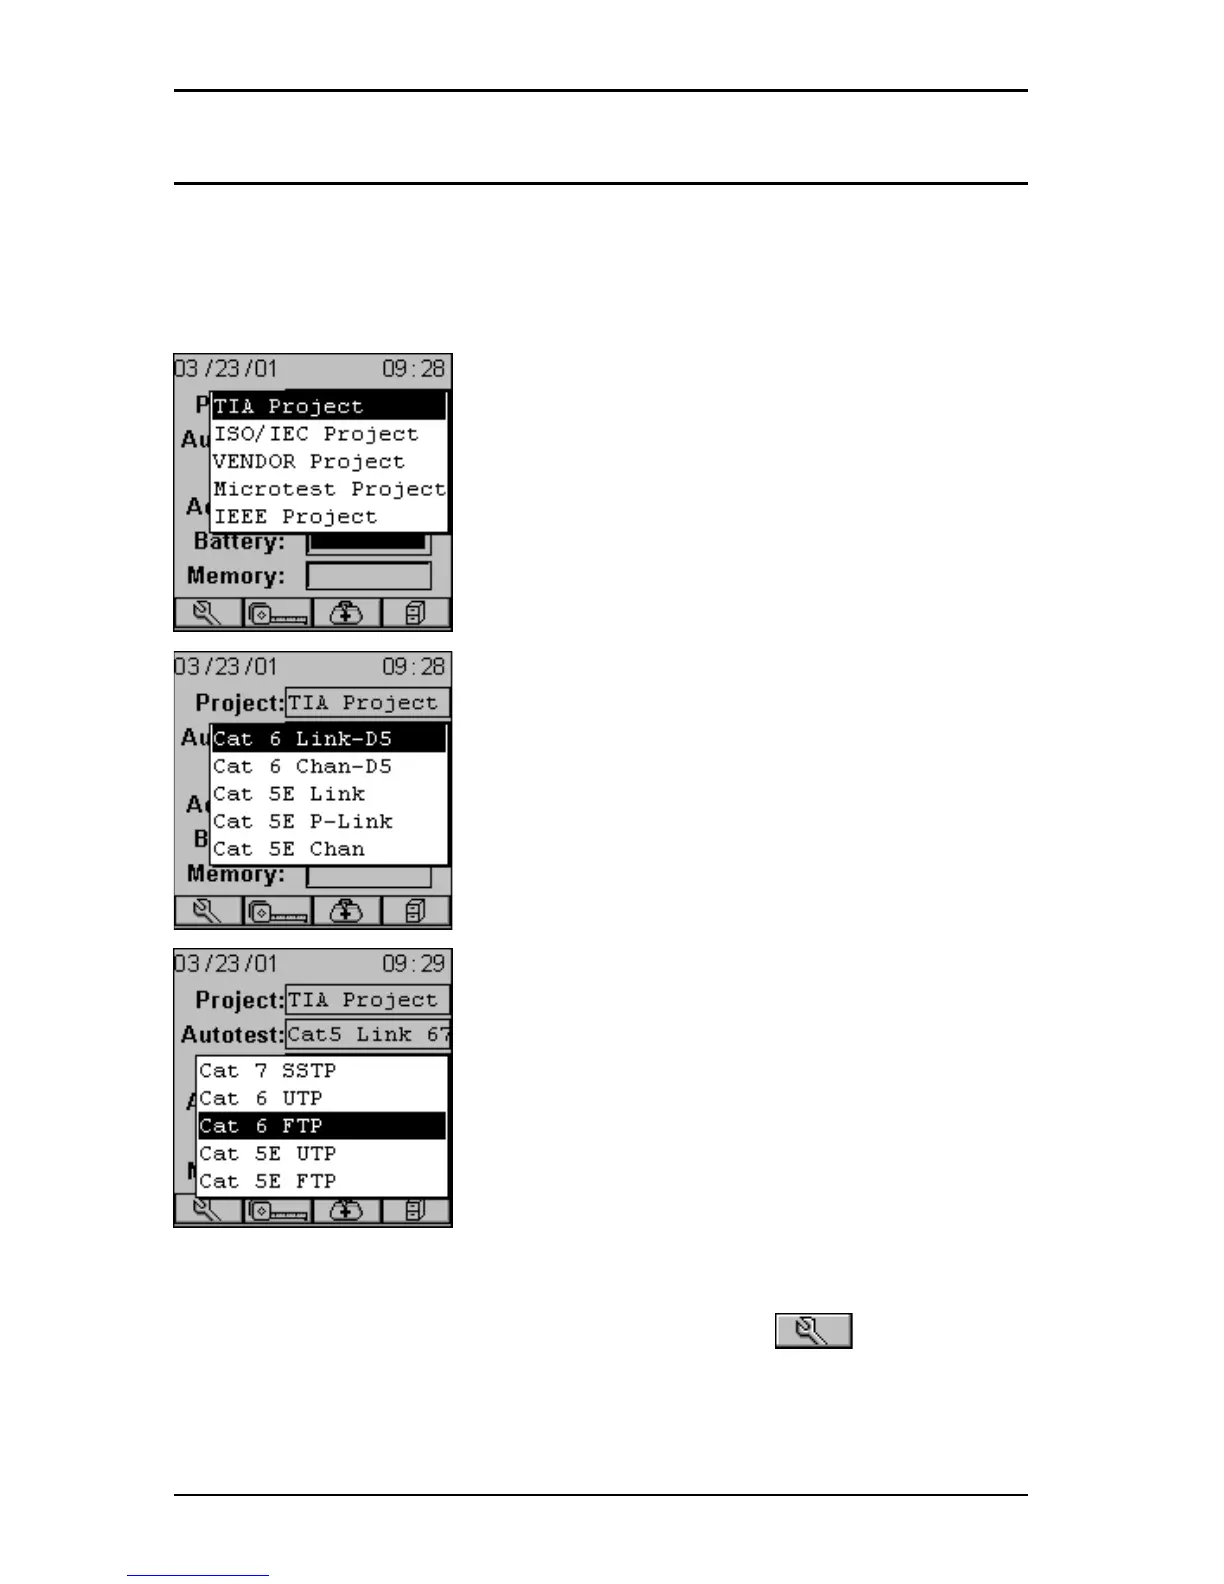
Project Selection
A project name must be selected for test result management. Autotests
and Cables were previously assigned to a specific project through the use
of the OMNI
Scanner
Configuration utility.
(See Chapter 9 - Uploading and
Printing for further information about OMNIScanner Configuration.)
The Project feature is very useful for grouping
test results and eases uploading and sorting of
Autotests stored in the scanner.
1. Use the é or ê to highlight Project: and
press ENTER.
2. Select the appropriate Project from the pop-
up list and press ENTER.
3. Use the é or ê to highlight Autotest: and
press ENTER.
4. Select the appropriate Autotest from the pop-
up list and press ENTER.
5. Use the é or ê to highlight Cable: and press
ENTER.
6. Select the cable type to be tested from the
pop-up list and press ENTER.
OMNIScanner auto-senses the adapter and the
Adapter: field changes to reflect the adapter
that is currently attached. If the adapter is
changed, OMNIScanner will automatically adjust
the content in the fields Autotest: and Cable: to
reflect the new setup.
Every Project has certain Autotests and cables assigned already. These
associated lists will appear in the pop-up lists for each item. If the Autotest
or Cable you want to use is not in a pop-up list, open (Setup) to
select the appropriate item.
(See Chapter 4 - Setup: Autotest, Cable, or
Project for further information.)