3 - 3
OMNIScanner User Guide
Scanlink Tools
support the following:
• Upload test results
• Storage of test results to files (Scanlink proprietary format)
• Print test reports
• Export results in CSV format
• Setup Projects
• Edit Autotest Information
Setting the Reference for Fiber Optic Cabling
Note: To ensure consistent accurate measurements, the reference value
must be set each time the connector adapter or the test configuration is
changed. Since the reference value expires each day at midnight, a refer-
ence must be established least once each calendar day that the OMNI-
Fiber is used.
1. Attach the Microtest connector adapters to each
of the OMNIFiber RX ports.
2. To set the reference value, connect the OMNI-
Fiber
Main and OMNI
Fiber
Remote using launch
cables (jumpers) and couplers.
See Chapter 8 -
Fiber Optic Reference Methods for further informa-
tion.
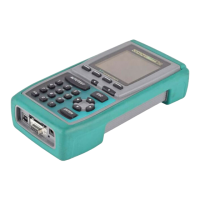
3. Press (Setup) and then select Set
Reference.
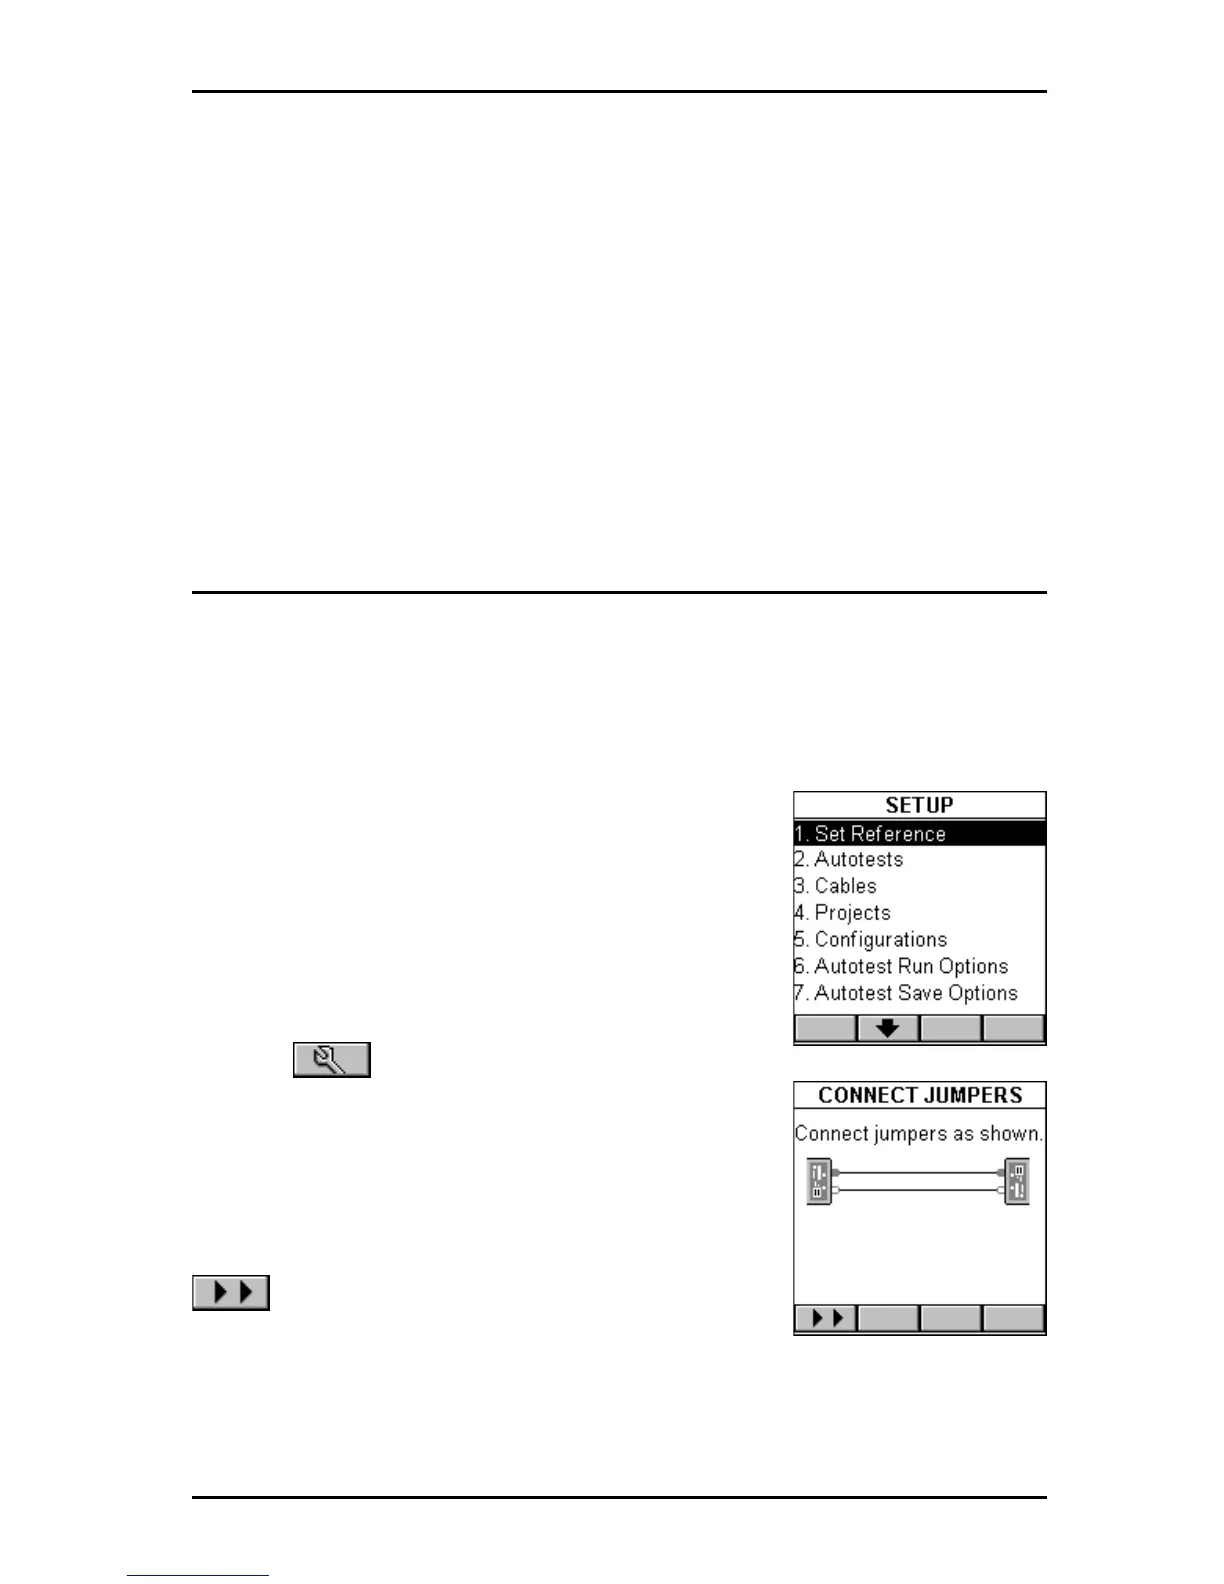
4. The CONNECT JUMPERS screen will display
how the jumpers need to be connected so that the
reference value can be recorded.
5. Connect the jumpers as shown and press
(Continue) to collect the reference data
while the SET REFERENCE screen is displayed.
OMNI
Scanner
will store a separate reference value for each wavelength.
OMNI
Scanner
will store reference data for up to 5 OMNI
Fiber
pairs.
Note: Once the reference value has been set, ensure that both launch