4 - 7
OMNIScanner User Guide
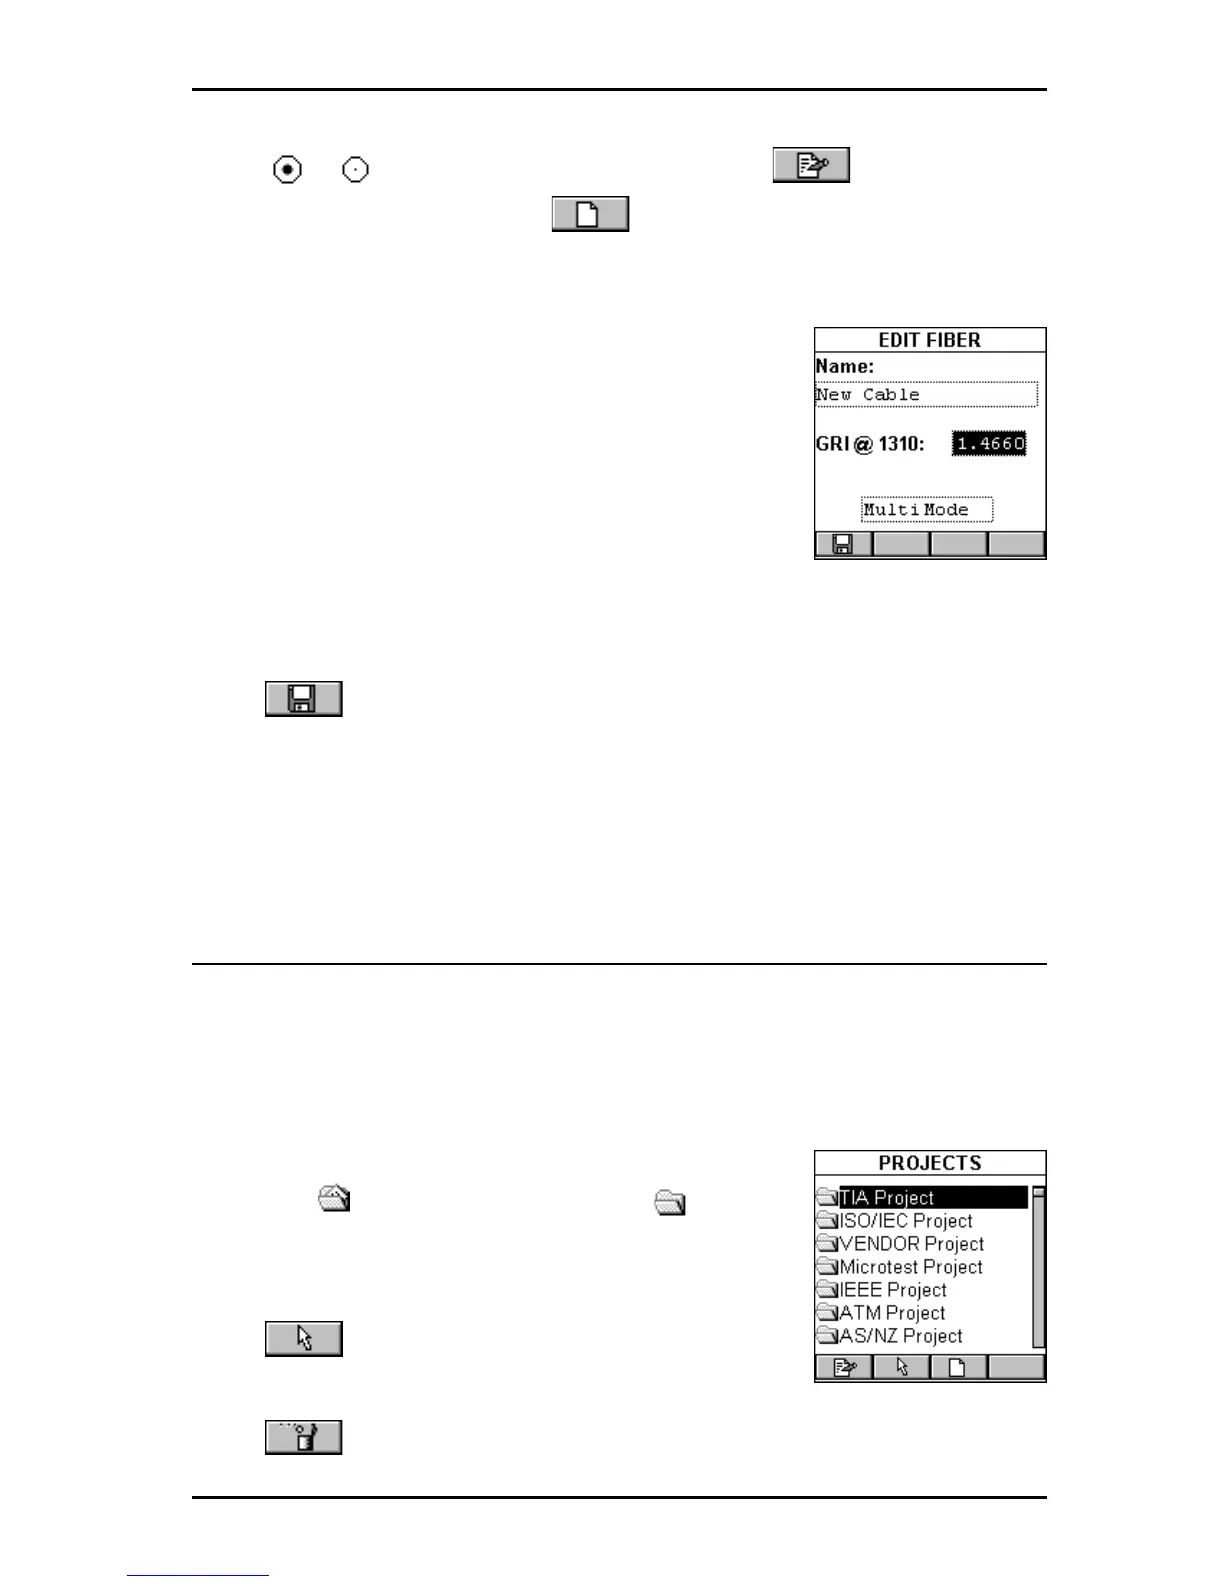
With a or fiber optic cable highlighted, press (Edit) to edit an
existing custom cable, or press (New) to create a new fiber based
on the GRI values of the highlighted cable. Cable Name and GRI @ 1300
(multimode) or 1310 (single-mode) can be viewed and changed.
Note: Default fibers cannot be edited.
A fiber cable’s Graded Refractive Index (GRI) differs
depending on the supplier. To receive accurate
length results, OMNIScanner allows you to define
the GRI values for both wavelengths.
To change the fiber’s mode, use the é or ê arrow
key to highlight the mode. Press Enter to select
Multimode 62.2
µµ
µµ
µm, Multimode 50
µµ
µµ
µm or Single-mode.
Press (Save) to save the edited cable into the Custom Cable folder.
Press ESC to return to the CABLES screen.
Projects
Select Projects to display the PROJECTS screen. It contains a list of all
projects that are currently stored in OMNI
Scanner
. Predefined default
projects are: TIA, ISO/IEC, VENDOR, Microtest, IEEE, ATM, AS/NZ, ANSI.
OMNI
Scanner
’s project feature allows you to organize test specifications,
cables types, and test results into Projects.
If there are tests stored in a project the folder will
appear full , otherwise it will be empty .
Use the é or ê arrow key to highlight a specific
Project.
Press (Set Default) to select it as the Project
to be used and to return to the SETUP screen.
Press (Delete) to permanently remove a project.