12 - 1
OMNIScanner User Guide
Chapter 12 - Universal Serial Bus
Port
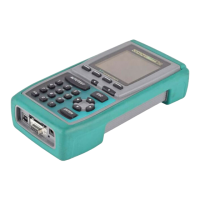
USB allows you to instantly connect OMNI
Scanner
2 to your computer
running Windows
®
98 (2nd Edition) or Windows
®
2000.
A standardized plug and port replaces all the different kinds of serial and
parallel port connectors and combinations.
When using a USB-compliant PC, you just turn on your PC, attach OMNI-
Scanner2
to the USB port, and turn on the scanner. USB makes the
connection process automatic and hassle free. Up
to 10 OMNI
Scanner2s
can be connected simulta-
neously.
Note: Most PCs, including many note-
books, on the market today are fully USB-ready.
The “Hot-swapping” feature allows you to attach or
remove OMNI
Scanner2
on the fly, without having
to shut down and restart your PC. OMNIS
canner2
will be detected automatically. This feature is
especially useful when uploading results from several scanners.
Of course the USB works with Scanlink Upload Utility, OMNI
Scanner
Configuration and OMNIScanner Remote Control.
(See Chapter 9 -
Uploading and Printing for more information.)
Installing the USB Driver
Note: OMNIScanner2 supports high speed USB connections. Please use
only high-speed USB cables. Make sure the length of the cable does not
exceed 5 meters (1m recommended).
To install the USB driver on your PC proceed as follows:
Note: Make sure that you are running Windows
®
98 (2nd Edition) or
Windows
®
2000.
1. Turn your PC on.