OM-267357 Page 13
! Keep fingers away from pinch
points on positioning arm.
! Before removing positioning
arm extension:
w Remove weld coupon from
clamp assembly.
w Remove clamp assembly.
w Place clamp assembly in
storage holster.
Stabilize weld table by adjusting
leveling feet.
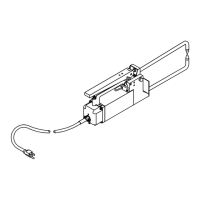
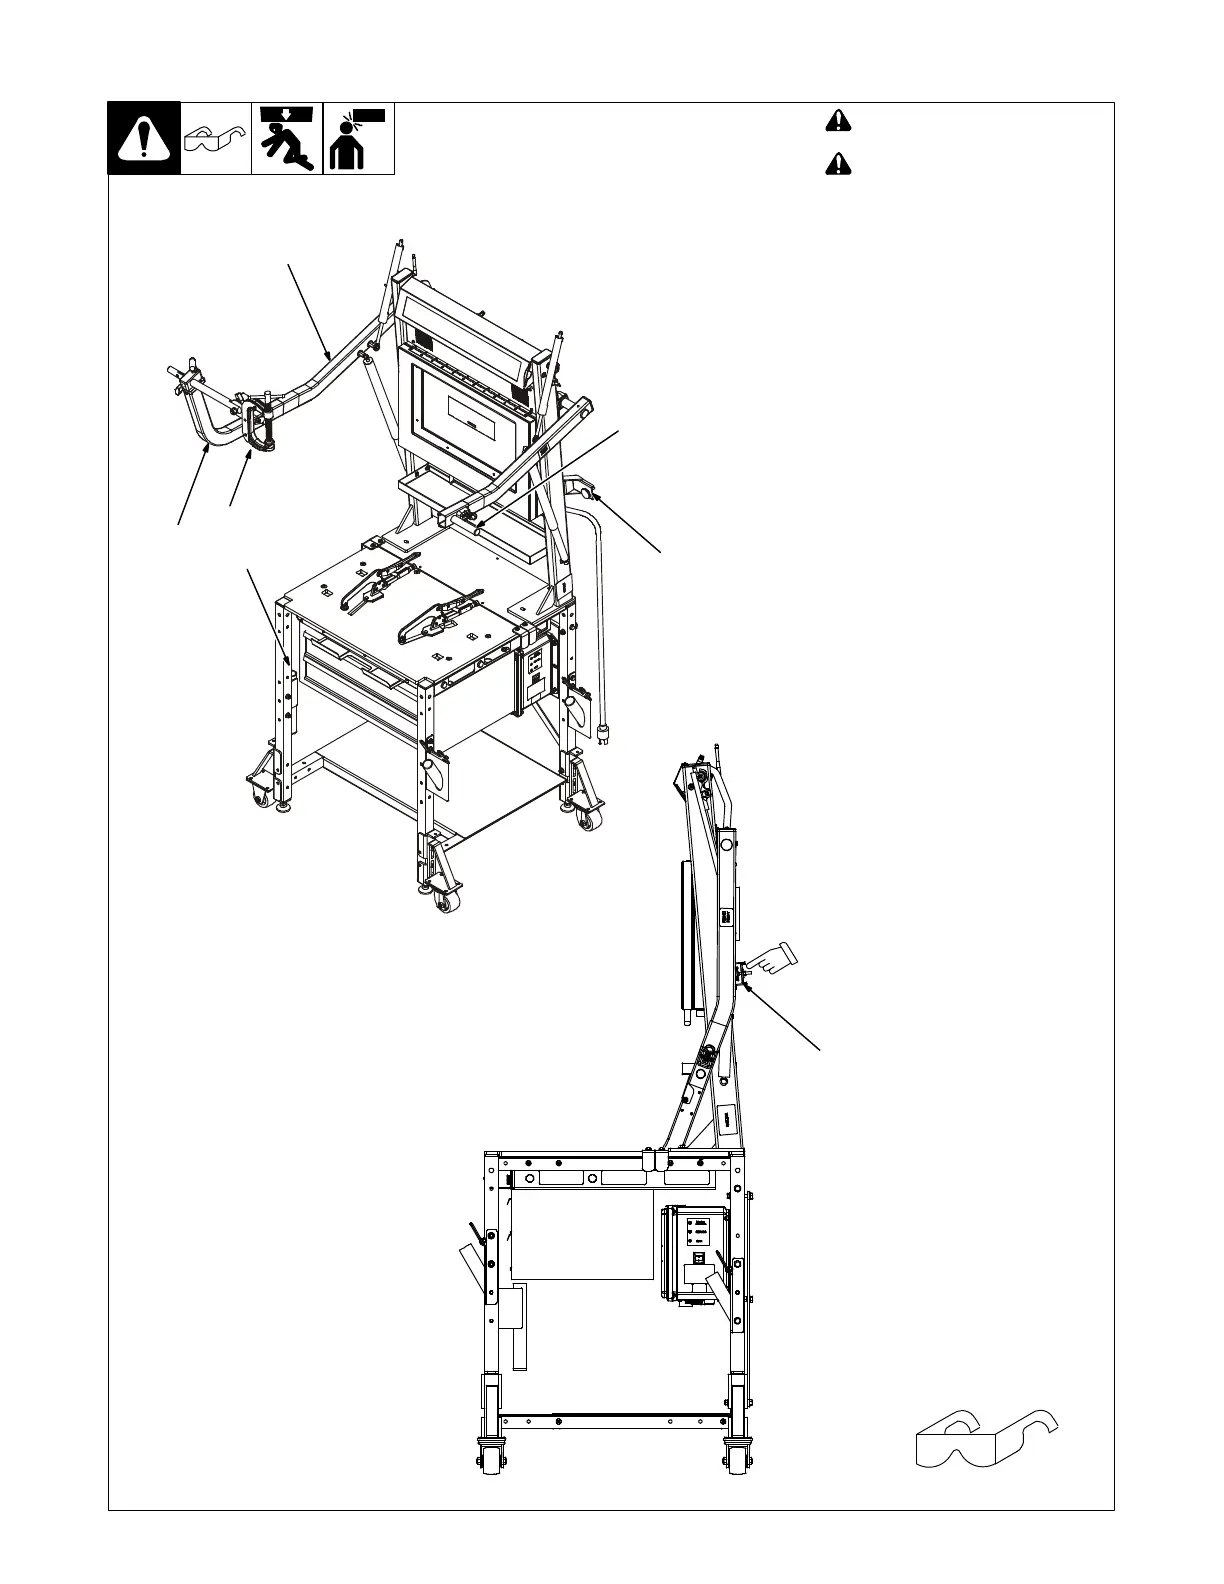
1 Positioning Arm
2 Clamp Assembly
3 Extension Arm (Section 5-4)
4 Adjustment Lever (Above
Handle)
5 Arm Stop
6 Clamp Storage Holster
Use the positioning arm to hold the
coupons for horizontal, vertical or over-
head welding at a variety of heights.
The arm accommodates both right and
left-handed welders.
Press lever to release control arm so it
can be raised or lowered. When posi-
tioning arm is not in use, lower arm so
it rests against arm stop.
See Section 5-4 for information on us-
ing the extension arm and clamp as-
sembly.
5-3. Positioning Arm
Tools Needed:
5
When positioning arm is not
being used, lower arm so it
rests against stop.
Ref. 268609-C
1
2
3
4
6
5