OM-267357 Page 14
! Keep fingers away from
pinch points on position-
ing arm.
! Do not use extension arm
and clamp to support ob-
jects weighing more than
25 lb (11 kg).
! Before removing position-
ing arm extension:
w Remove weld coupon
from clamp assembly.
w Remove clamp as-
sembly.
w Place clamp assembly
in storage holster.
NOTICE − When welding out of
position, position clamp screw on
opposite side of weld joint to pro-
tect screw from spatter.
Stabilize weld table by ad-
justing leveling feet.
Extension arm and clamp as-
sembly may be installed on
either positioning arm.
Use extension arm and clamp as-
sembly for out-of-position weld
assignments.
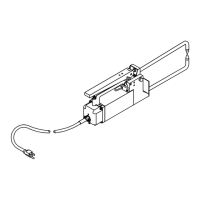
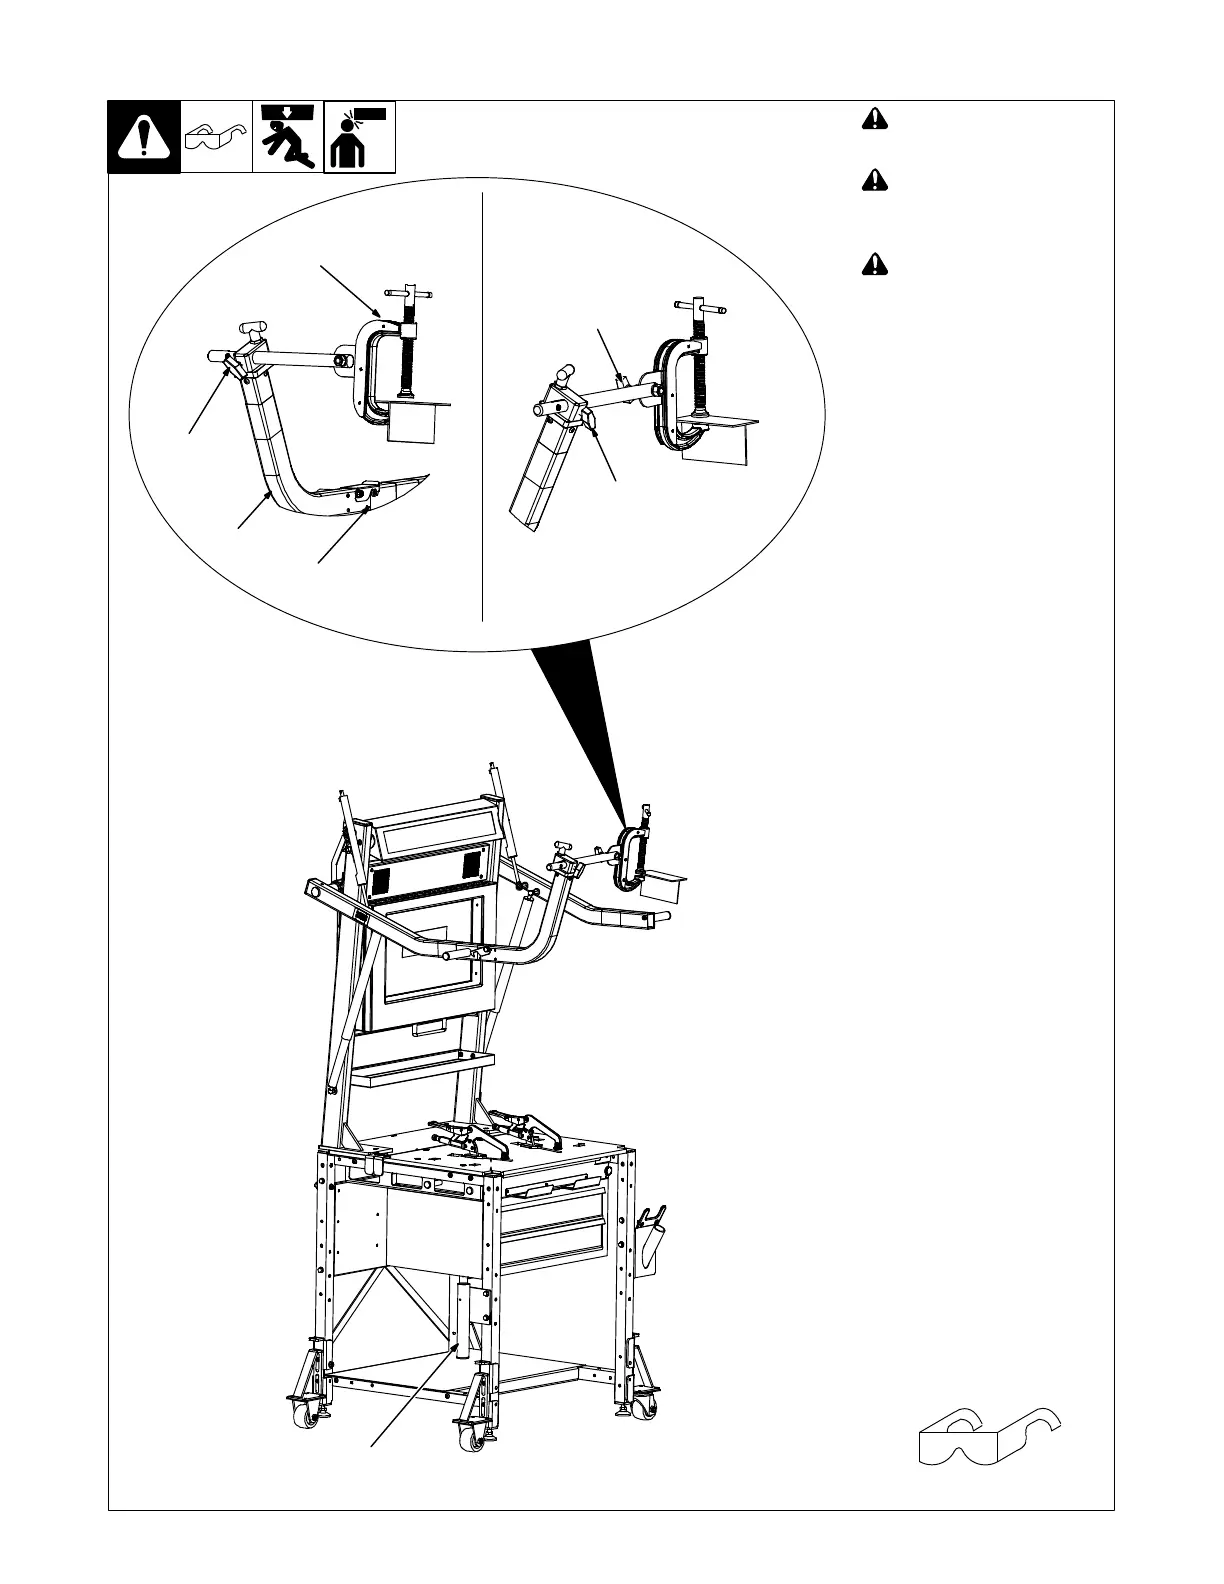
1 Extension Arm
2 Locking Bracket
3 Clamp Assembly
4 Pivot Rod T-Handle
5 Clamp T-Handle
6 Holster
Slide extension arm into opening
in positioning arm until locking
bracket snaps into place.
Slide clamp assembly shaft
through hole in extension arm un-
til latch engages. Rotate clamp
assembly to position as instruct-
ed on the monitor and tighten
T-handle on extension arm.
Lower positioning arm and install
weld coupon in clamp. Loosen
clamp T-handle and rotate
coupon to desired position. Tight-
en T−handle. Raise positioning
arm to desired height.
Place clamp assembly in holster
when not in use.
5-4. Extension Arm And
lamp Assembly
Tools Needed:
1
2
3
4
4
6
Ref. 268609-C
5
H