OM-267357 Page 59
SECTION 14 − TROUBLESHOOTING
Welding-related hazards are present when using the welding training system. Read the welding power source and wire feeder Owner’s
Manuals and labels carefully for more information on arc welding hazards. Also read American National Standard Z49.1, Safety in
Welding, Cutting, and Allied Processes, from American Welding Society (www.aws.org). Operators must be trained on the proper use
of this equipment before using the equipment to train others.
14-1. Troubleshooting Table
Trouble Remedy
Monitor does not turn on.
Monitor screensaver appears after
four hours of inactivity. SmartGun
screensaver appears after five min-
utes of inactivity.
Press Input Power switch. Place monitor On−Off switch in the On position (see Section 6-1)
Check input power connections at AC receptacle and monitor (see Section 5-11).
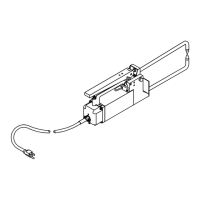
Check fuses F1 and F2, and replace fuse if open (see Section 13-3).
Have Factory Authorized Service Agent check monitor power supply.
Monitor touchscreen does not operate. Remove dirt and debris from touchscreen.
Have Factory Authorized Service Agent check monitor.
Table does not calibrate. Remove tools and debris from marker openings on weld table.
Remove dirt and spatter from table markers and protective covers (under the table surface) with
clean, damp cloth. Do not use any chemicals.
Clean camera lens cover.
Recalibrate table (see Section 8-7).
Workpiece does not calibrate. Remove objects blocking camera view of joint calibration tool.
Clean or replace joint calibration tool. If there are scratches near internal markers, rotate the tool so
the scratches are not facing the camera. Replacement joint calibration tools are available for pur-
chase (part no. 266768).
Properly position joint calibration tool on workpiece. Tool must be held in position for at least one sec-
ond on both ends of workpiece.
Verify joint calibration tool dimensions (see Section 8-6).
Cameras do not track SmartGun or
SmartStinger
.
Be sure hands, tools, or debris are not blocking markers on SmartGun or SmartStinger.
Clean camera lens cover.
System does not enter weld mode. Press mode button on SmartGun until system enters weld mode (about two seconds).
No weld output.
Check SmartGun connections at wire feeder.
Check connections at router box, if equipped.
Check connections and control settings at welding power source. Also check for proper input power
connections.
Close monitor screen cover.
Verify work clamp is properly attached.
Verify Weld mode is enabled.
Allow overheated SmartGun to cool. SmartGun disables welding and displays an internal error when
gun internal temperature is 185°F (85°C) or above. Welding can resume when gun internal tempera-
ture drops below 176°F (80°C).
Monitor screensaver does not display
after periods of inactivity.
Screensaver displays after four hours of inactivity only if the on-screen application contains no video
or animations. (Video and animations prevent screensaver from displaying.)