OM-267357 Page 51
Keep cameras and sensors free
of weld spatter and other debris.
The SmartStinger LEDs may
cause auto-darkening welding
helmets to turn on (darken) be-
fore welding starts. Set lens sen-
sitivity to a level that prevents
premature darkening of the lens
(see helmet owner’s manual).
The SmartStinger will occasion-
ally switch between LED sets,
which may cause auto-darken-
ing helmets to blink momentarily.
Use screen to calibrate a new
SmartStinger
, or recalibrate an
existing stinger.
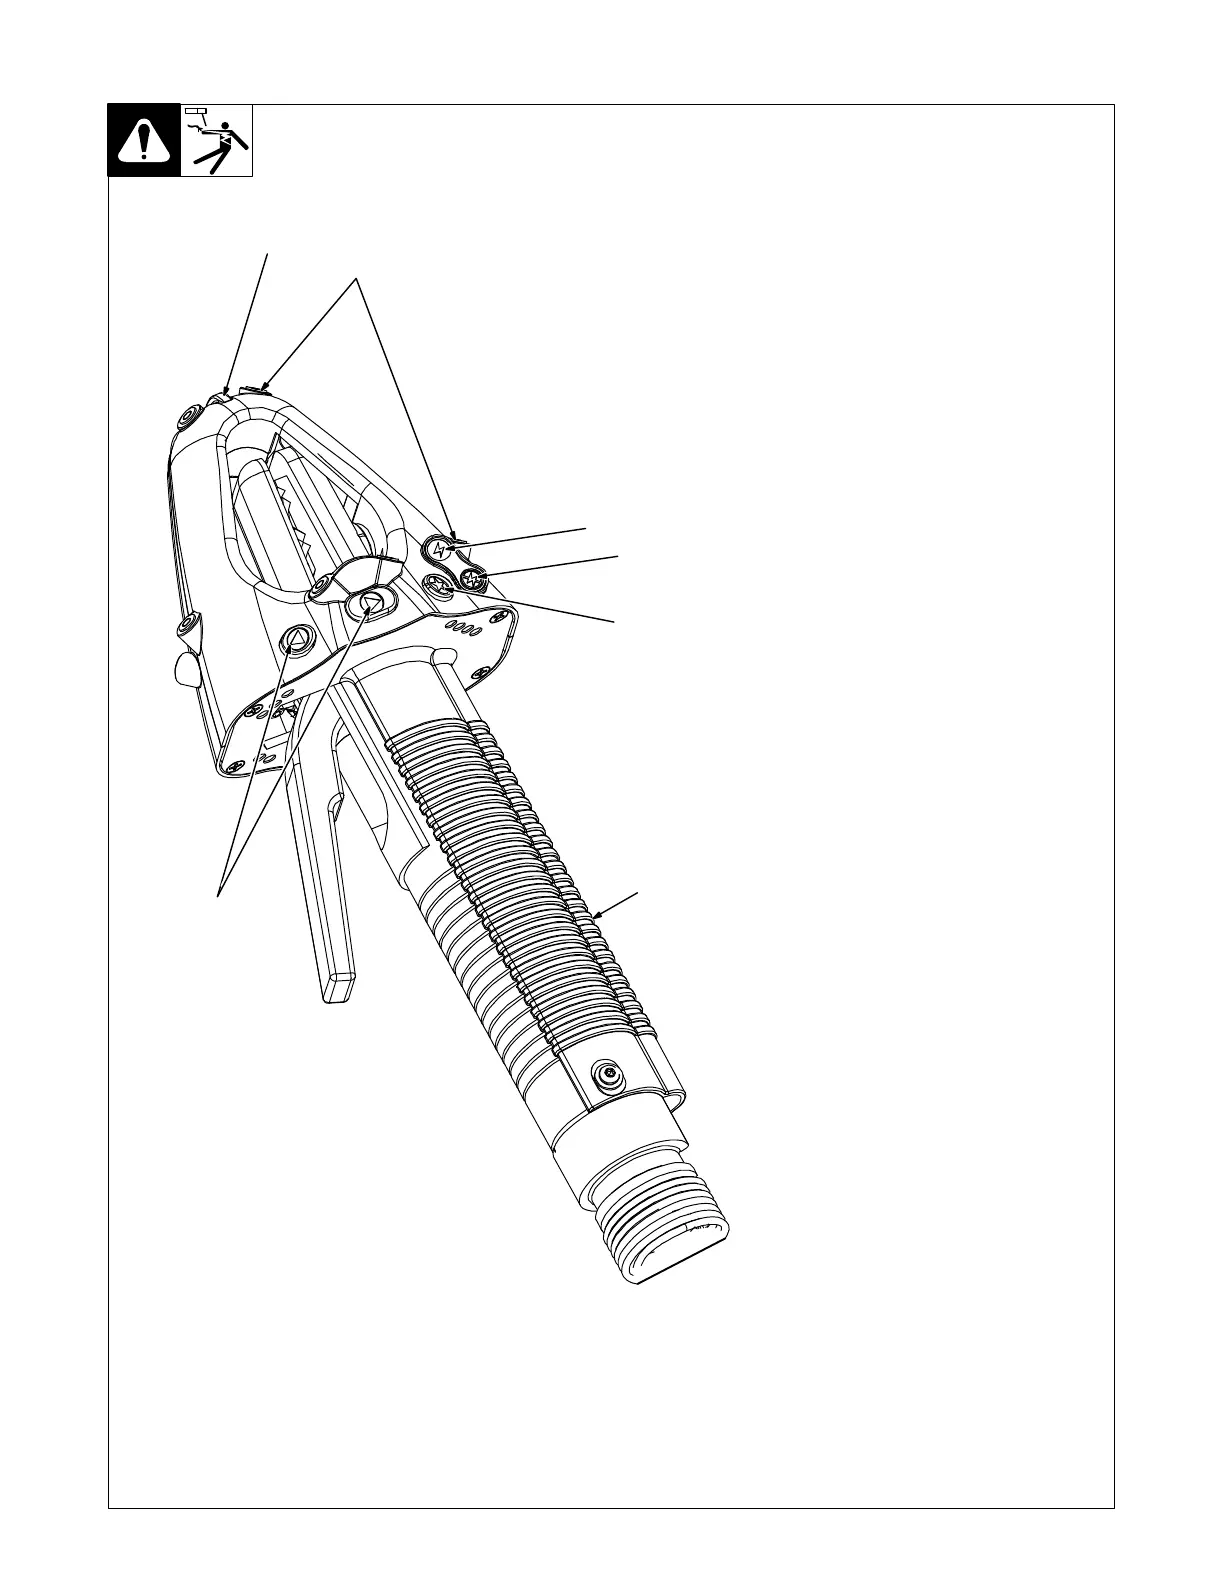
1 Stinger Status Light
The status light turns green to indi-
cate both work and travel angles are
correct. When the camera sensors
cannot see the stinger, the status
light blinks red. The status light is off
when the camera is tracking the
stinger but the work and travel angles
are not both correct.
2 SmartStinger LEDs (12)
LEDs on the SmartStinger allow the
monitor−mounted cameras to track
stinger speed, stinger angles, stinger
direction, and other data.
3 SETUP Mode Indicator
4 WELD Mode Indicator
5 Star (★) Button
6 Left And Right Arrow Naviga-
tion Buttons
The main LiveArc display screen
helps the user navigate through the
user interface. The screen displays
warning statements, indicates the
training mode (SETUP or WELD)
and helps the user position the
stinger properly.
Use the Star (★) button to select the
training mode (SETUP or WELD).
Use the left and right arrow naviga-
tion buttons to navigate through set-
up screens, enable real-time vibra-
tion and audio, and modify other weld
parameters.
7 Internal Vibrator
Use the right arrow button to select
parameter for real-time vibration
feedback. Real-time audio feedback
for selected guide parameter may al-
so be enabled (see Section 8-2).
The SmartStinger internal vibrator
provides the user with real-time feed-
back for the parameter selected.
1
2
3
12-4. SmartStinger Controls
Ref. 275089-A
4
5
6
7