OM-267357 Page 23
Keep cameras and sensors free
of weld spatter and other debris.
The SmartGun LEDs may cause
auto-darkening welding helmets
to turn on (darken) before weld-
ing starts. Set lens sensitivity to
a level that prevents premature
darkening of the lens (see hel-
met owner’s manual).
The SmartGun will occasionally
switch between LED sets, which
may cause auto-darkening hel-
mets to blink momentarily.
See Section 8-5 for SmartGun
calibration procedure.
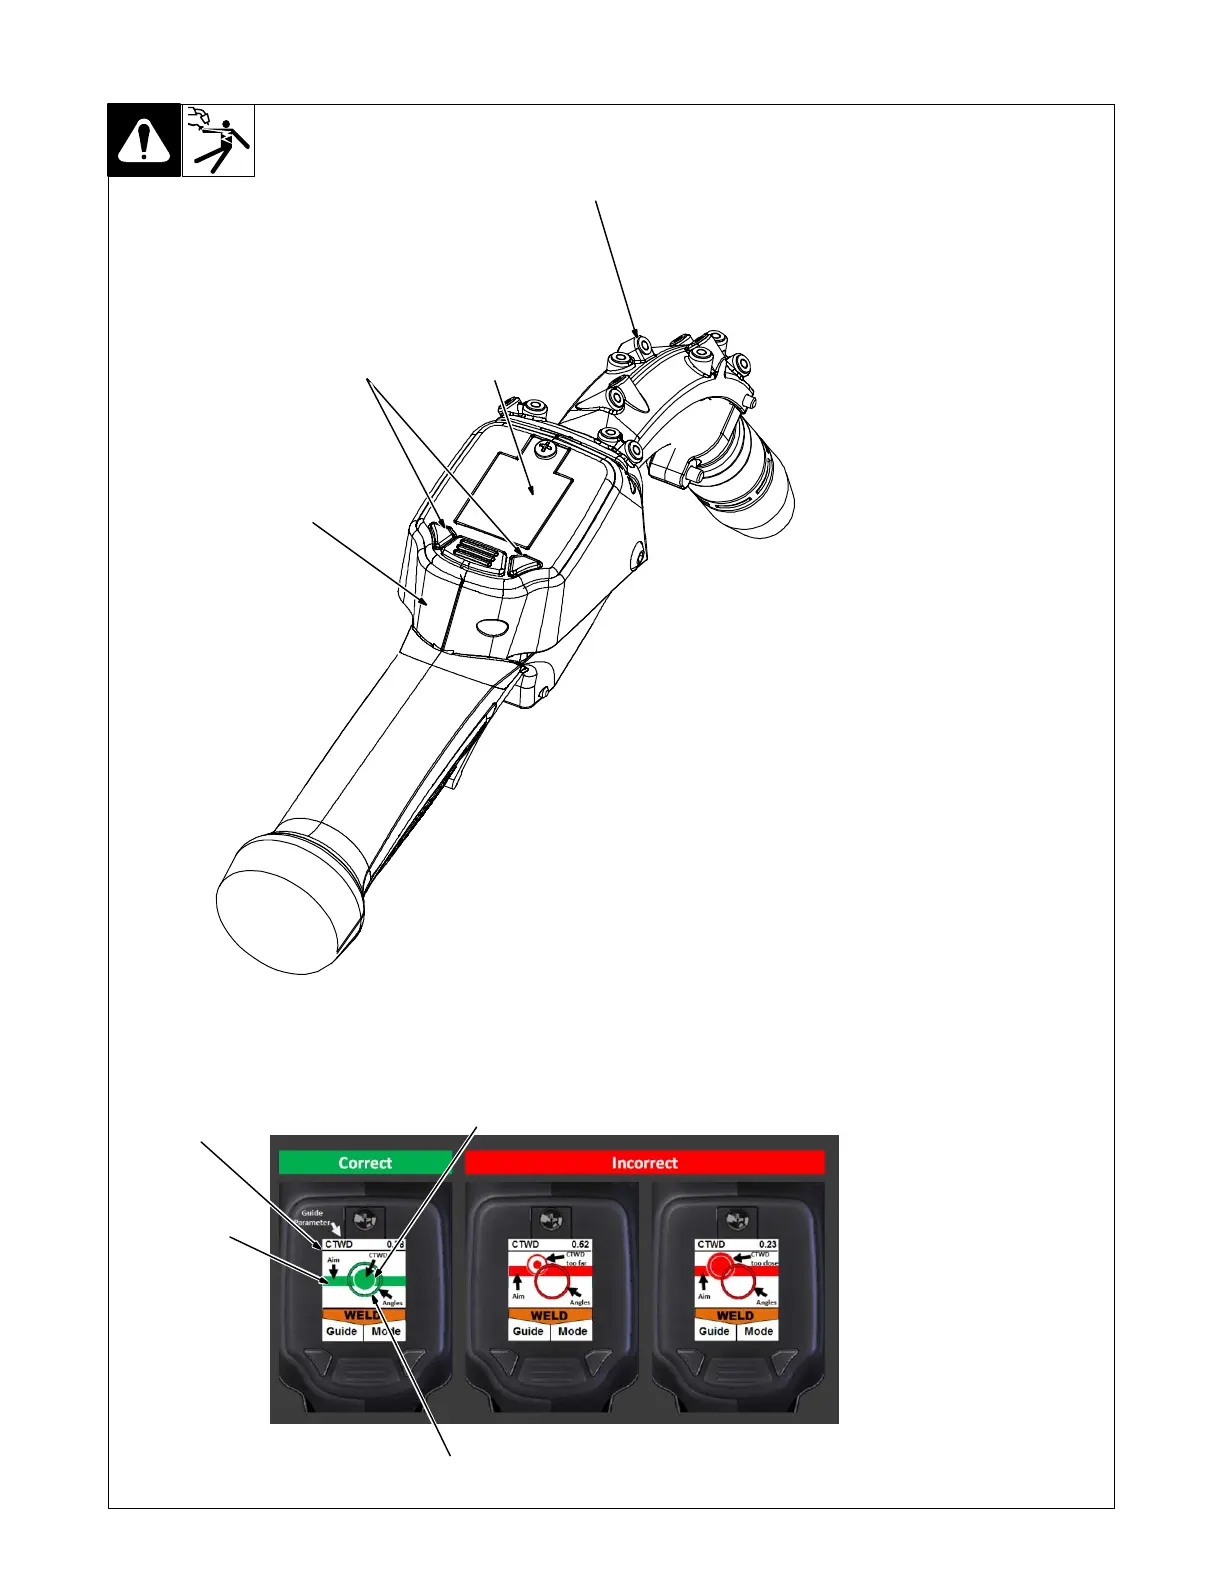
1 SmartGun LEDs
2 Display Screen
3 Control Buttons
4 Internal Vibrator
LEDs on the SmartGun allow the
monitor−mounted cameras to track
gun speed, gun angles, gun direc-
tion, and other data.
The display screen helps the user
navigate through the user interface.
The screen displays warning state-
ments, indicates the training mode
(simulation
or live arc) and helps the
user position the gun properly (see
examples below),
Use the Mode selection button to se-
lect the training mode (simulation or
weld), navigate through setup
screens, enable real-time vibration
and audio, and modify other weld pa-
rameters.
• Weld Mode − arc−on weld tests
• SIM (Simulation) Mode − arc-off
simulation
tests
Use the guide button to change gun
positioning
data being displayed and
select parameter for real-time vibra-
tion feedback. Real-time audio feed-
back for selected guide parameter
may also be enabled (see Section
8-2).
The SmartGun internal vibrator pro-
vides the user with real-time feed-
back for the parameter selected.
SmartGun screensaver appears
after five minutes of inactivity.
Move SmartGun or press button
to restore interface screen.
1
2
Aim Guide
CTWD Guide
(Circle changes in size to indicate CTWD.)
Angle Guide
Press Guide button to
change gun positioning
data being displayed
and to select parameter
for real-time vibration
feedback.
3
4
268609-C
6-3. SmartGun Controls