OM-267357 Page 58
13-5. SmartGun Quick Load Liner Replacement
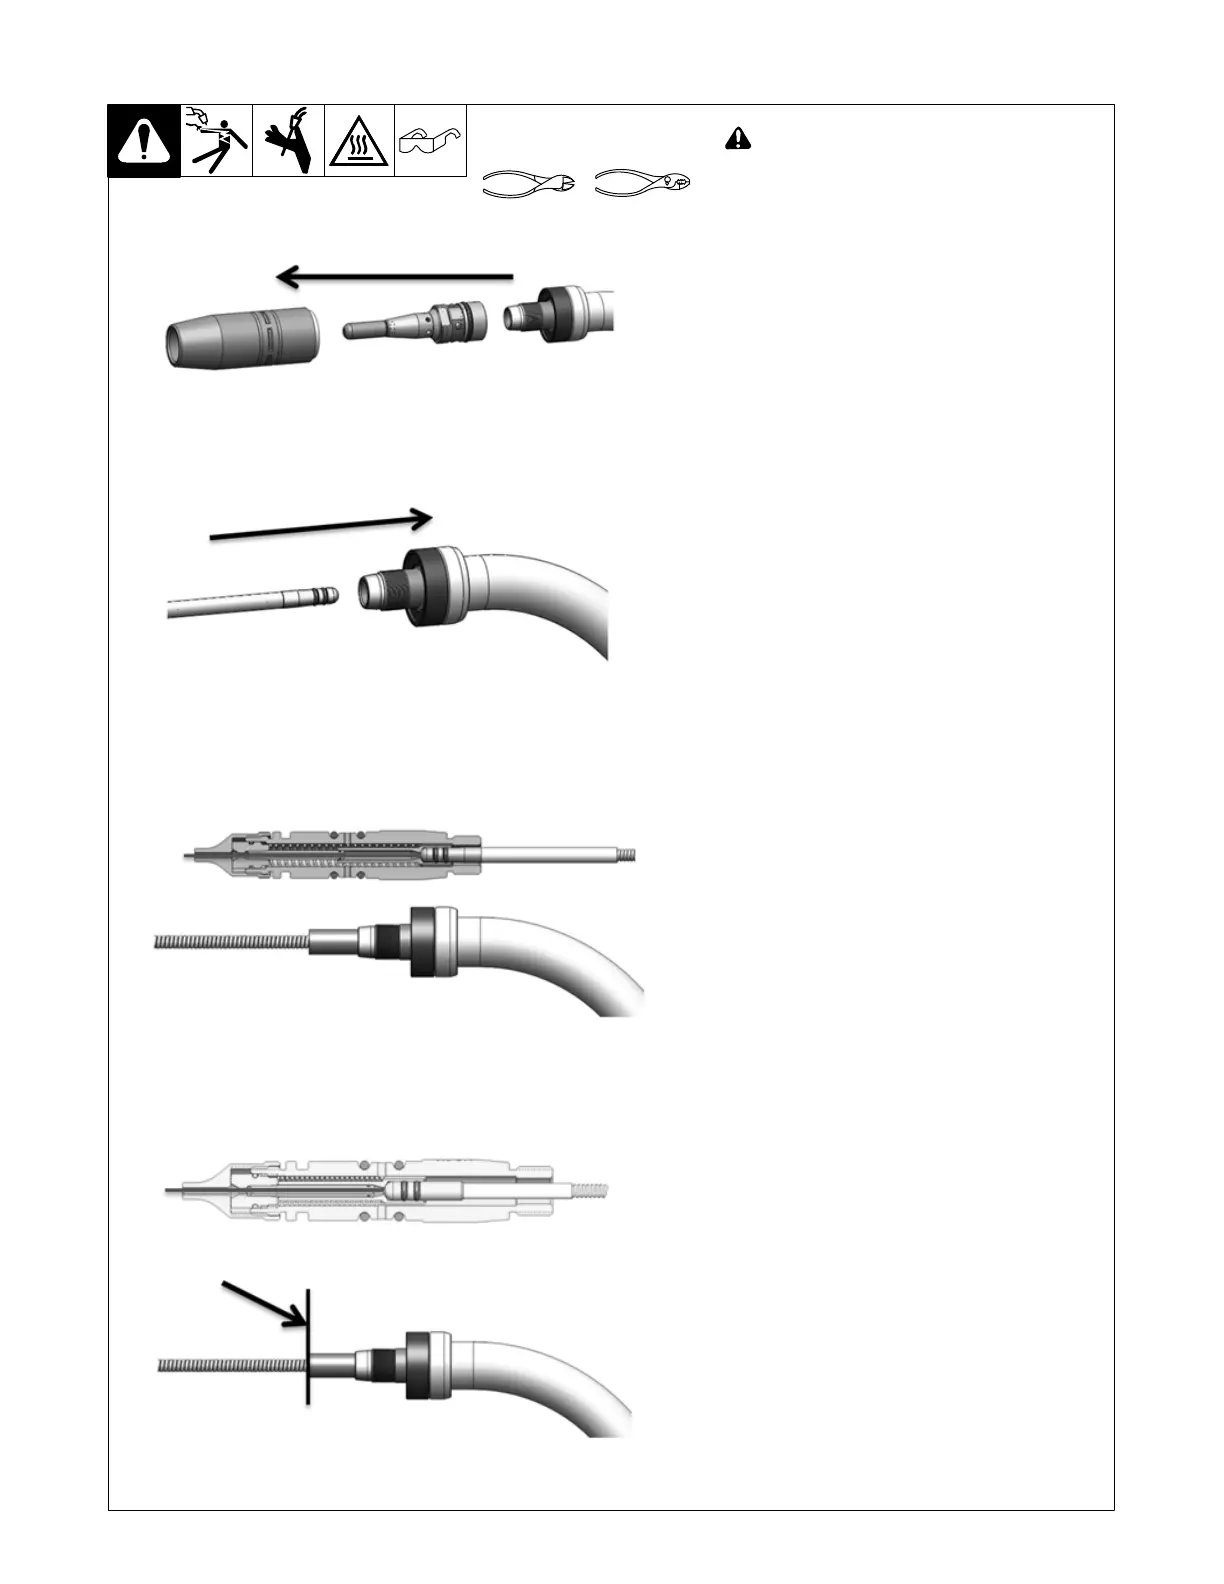
Push the Quick Load liner into the gun until liner will
not go forward any further. Liner will be pushed in by
approximately 1 in. (25 mm). Trim liner flush with
gauge. After trimming, liner will stick out of neck by
approximately 1−3/4 in (44 mm). This is normal, as
liner will be pushed into neck when consumables
are installed.
Reinstall consumables. Turn on welding pow-
er supply.
NOTICE − Liners trimmed too long or too short can
cause serious wire feeding problems. Be sure to
use your liner gauge as instructed to trim the liner
to the correct stick out.
Trim wire to remove any ball present on tip. Remove
nozzle, contact tip, and retaining head.
Straighten gun cable. Remove existing Quick Load
liner by pulling it out of the neck with pliers.
Remove the protective cap from the new Quick
Load liner and insert it through the gun neck, over
wire. Use short strokes to prevent liner from kink-
ing. Feed liner into gun until it engages with retainer
inside the AutoLength pin.
Push liner into gun neck as far as possible. Re-
lease. Repeat several times to ensure liner springs
back freely.
Slide liner trim gauge over the end of the Quick Load
liner and press flush with the end of the neck.
Tools Needed:
! Turn Off welding power source and
wire feeder.
Quick Load liners feed from the front of the GMAW
gun. There is no need to disconnect the SmartGun
from the welding power source when changing liners.
See Section 16 for lists of liner part numbers.
Ref. Bernard 156 207





 To Next Page