7-1
7 Troubleshooting
7.1 Precautions
Before disassembling the machine for internal testing and maintenance, disconnect the power
supply and all gas supplies, and shut down the anesthesia machine.
Before connecting or disconnecting cables or probes inside the machine after disassembly, turn
off the system power supply to prevent safety risks and damage to the machine.
7.2 Power-On Troubleshooting
7.2.1 Power-On and Display Failures
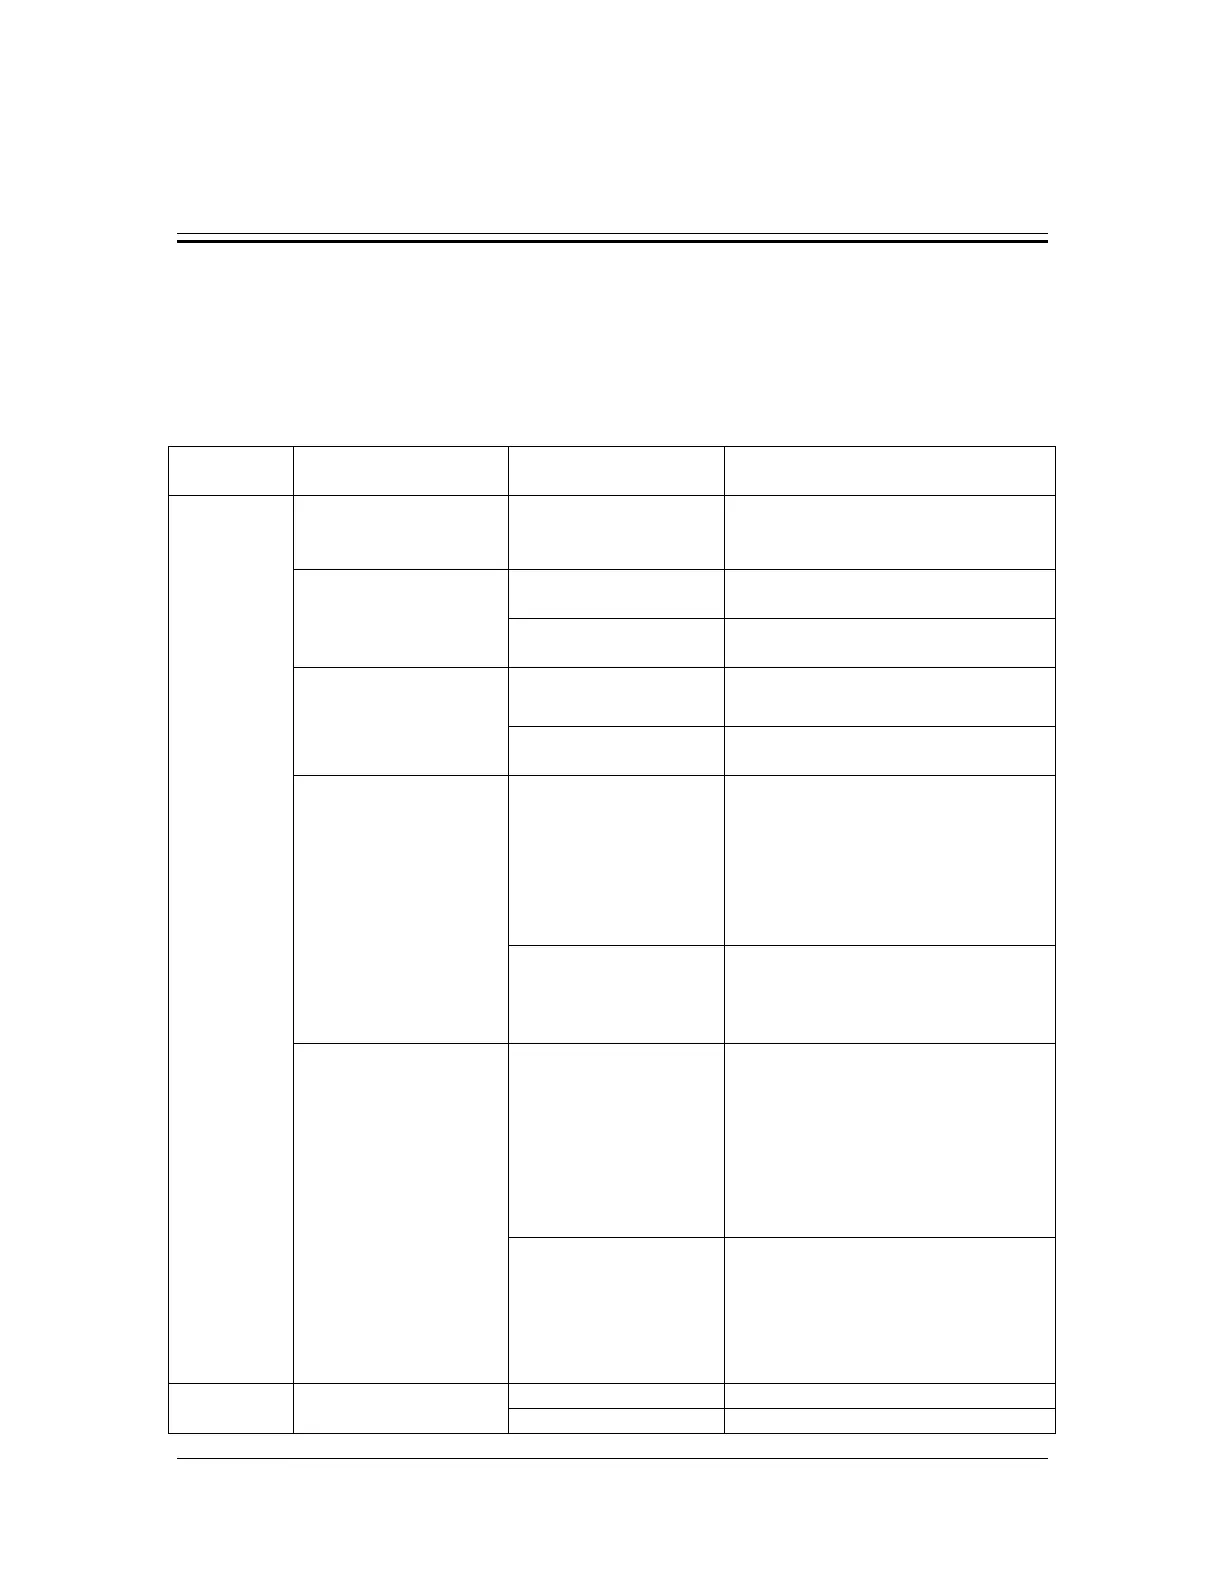
Cause Confirmation Confirmation Result Solution
When the
switch is
turned to
the ON
position,
the main
screen is
off.
AC power supply is
The AC power supply
is not connected.
Connect the AC power supply
properly.
2. Check whether the
AC and battery
indicators are on.
Continue checking according to step
3.
Continue checking according to step
5.
4. Check whether the
small display
functions properly.
The small display is
off.
Continue checking according to step
5.
The small display
functions properly.
Continue checking according to step
6.
5. Check whether the
HFNC module can be
started.
The HFNC module
can be started.
(1) Replace the system switch (refer
to 11.1.3).
(2) If the problem persists, replace
the DC-DC power board (refer to
11.1.11).
(3) If the problem persists, replace
the backplane (refer to 11.1.11).
The HFNC module
cannot be started.
(1) Replace the DC-DC board (refer
to 11.1.11).
(2) If the problem persists, replace
the backplane (refer to 11.1.11).
6. Observe whether
the alarm light blinks,
whether alarm sound
is generated, and
whether the buzzer is
ringing.
The alarm light does
not blink, and no
alarm sound is
generated, but the
buzzer is ringing.
(1) Remove the rear housing of the
display by referring to 8.1.7, open
the service door by referring to
8.1.1, and reconnect or replace the
cable between the backplane and the
display.
(2) Replace the main board (refer to
The alarm light blinks,
and alarm sound is
generated.
(1) Remove the rear housing of the
display by referring to 8.1.7, and
reconnect the LCD cable or replace
the LCD assembly (refer to 11.1.1).
(2) If the problem persists, replace
the CPU board (refer to 11.1.1).
Reconnect the display
cable and LCD cable
Replace the display (refer to 11.1.1).