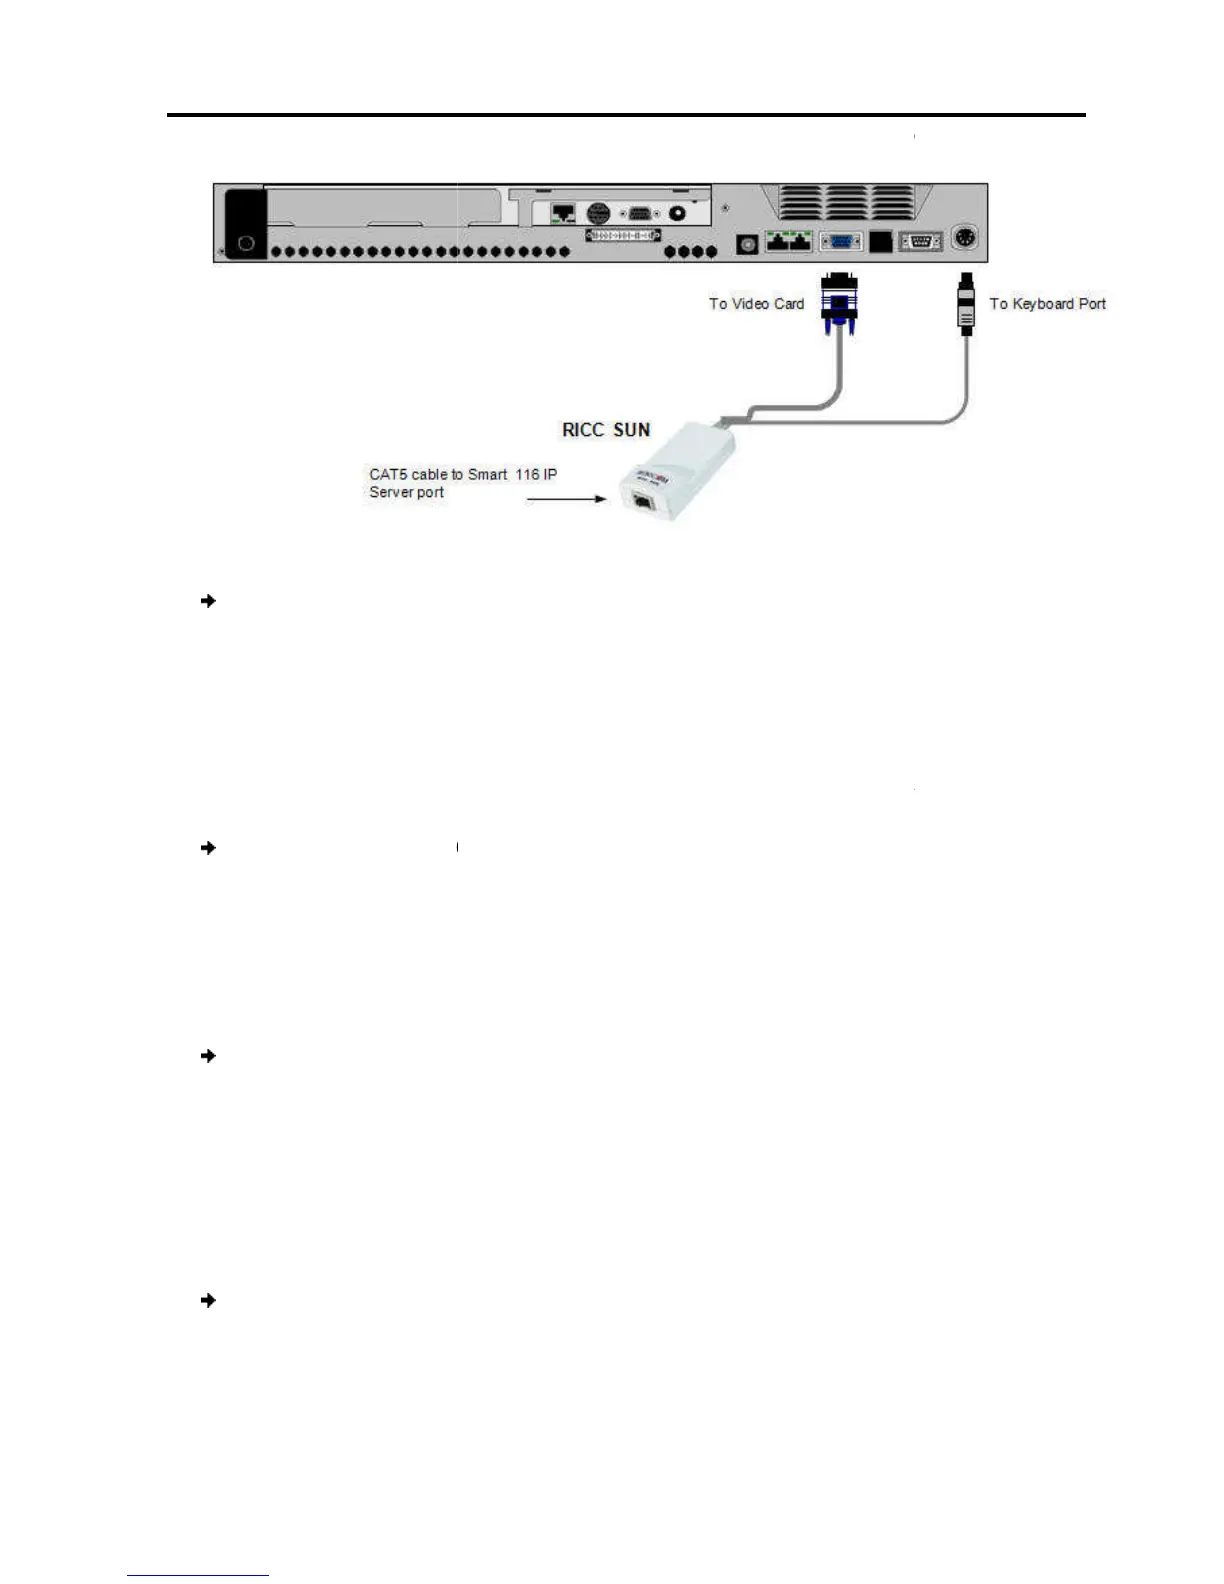
To connect
1.
Connect the Screen connector to the computer’s video card.
2.
Connect the Keyboard connector to the computer’s Keyboard port
2.7
Connecting to the Network
B
efore powering on Smart 108/116 IP
network.
To connect the
1. C
onnect the network cable to the LAN port of
2.8
Perform the following procedure for each computer to which you want to connect
CAT5 cables.
To connect the
1. Connec
t one connector to the RICC/ROC
2.
Connect the other connector to one of the Smart 108/116 IP
2.9
You can connect a KVM console to Smart 108/116 IP
locally.
To connect
a KVM console to Smart 108/116 IP
1.
Connect the monitor’s connector to the Smart 108/116 IP’s Monitor por
2.
Connect the keyboard’s connector to the Smart 108/116 IP’s Keyboard port.
3.
Connect the mouse’s connector to the Smart 108/116 IP’s Mouse port.
Figure 10 – RICC SUN
:
Connect the Screen connector to the computer’s video card.
Connect the Keyboard connector to the computer’s Keyboard port
.
Connecting to the Network
efore powering on Smart 108/116 IP
, you can c
onnect the Smart 108/116 IP
to the network:
onnect the network cable to the LAN port of
the
Cables
Perform the following procedure for each computer to which you want to connect
:
t one connector to the RICC/ROC
RJ45 port.
Connect the other connector to one of the Smart 108/116 IP
c
KVM Console
You can connect a KVM console to Smart 108/116 IP
, in order to
a KVM console to Smart 108/116 IP
:
Connect the monitor’s connector to the Smart 108/116 IP’s Monitor por
Connect the keyboard’s connector to the Smart 108/116 IP’s Keyboard port.
Connect the mouse’s connector to the Smart 108/116 IP’s Mouse port.
Installation
to the Network
User Guide | 21
onnect the Smart 108/116 IP
to the
.
Perform the following procedure for each computer to which you want to connect
.
Connect the monitor’s connector to the Smart 108/116 IP’s Monitor por
t.
Connect the keyboard’s connector to the Smart 108/116 IP’s Keyboard port.
Connect the mouse’s connector to the Smart 108/116 IP’s Mouse port.
 Loading...