6802800U74-AN
Chapter 15: Expansion Options
15.8.1
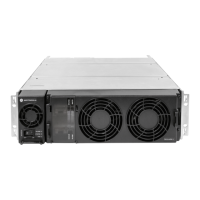
Adding a Redundant XHUB Controller
Procedure:
1 Wear an ESD strap and connect its cable to a verified good ground. This strap must be worn to
prevent ESD damage to any components.
2 Remove XHUB Controller blind plate if such exist in the upper module cage of the MTS 4
Expansion Cabinet.
3 Label the cables with labels included in the expansion kit.
4 Connect the Ethernet cables to the Base Radio(s) according to the scheme below:
NOTICE:
Ethernet cables stated above derives from the Base Radio(s) in the MTS 4 Expansion
Cabinet.
At this stage only connect the cables to the Base Radio(s).
5 Strap the cables.
6 Install the additional XHUB Controller. Use handle to slide the unit into the chassis.
IMPORTANT: Connect the ribbon cables at the rear before sliding the unit in to the
chassis.
7 Secure the XHUB Controller in the chassis with two M4X10 captive screws.
8 Connect the Ethernet cables to the unit as tagged earlier.
9 Connect the 3066544B12 cable that derives from the upper Site Controller in the MTS 4 Prime
Cabinet (Exp Cab connector).
10 Reconnect the power cables to the MTS Power Supply Units.
NOTICE: If prime MTS4 is configured with Ethernet site link (Link1 Link2 RJ45 connector
at prime rack junction panel are assy), connect cable 30015009004 (black plug) to lower
XHUB connector ‘AUX1’. Use the RJ45 coupler 3066562B01 to connect the other side of
30015009004 cable from MTS4 Expansion to MTS4 prime cable 30015009003 (going to
‘Link2’ junction panel connector).
15.8.2
Configuration
No configuration is needed.
 Loading...