Home
NEC
Server
express5800 A2010b
Page 226
NEC express5800 A2010b - Page 226
491 pages
Manual
To Next Page
To Next Page
To Previous Page
To Previous Page
Loading...
2
.
Installation and Co
nnection
Chapter
2 Preparations
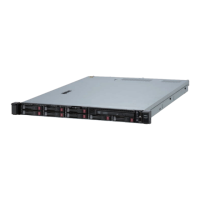
Installing server in rack
1.
Pull out
the slide rail fr
om outer rail until
it is locked.
2.
Insert t
he server along the s
lide rail.
Slide rail
Express580
0/
A1040b, A204
0b, A2020b, A20
10b
Us
er's
Guide
226
225
227
Table of Contents
Main Page
Default Chapter
2
Documents Provided with this Product
2
Table of Contents
3
Contents
3
Notations Used in this Document
9
Notations Used in the Text
9
Optical Disk Drives
9
Hard Disk Drives
9
Removable Media
9
Abbreviations of Operating Systems (Windows)
10
Abbreviations of Operating Systems (Linux)
10
Post
10
Bmc
10
Web Console
10
Trademarks
11
License Notification
17
Regulatory Notices
20
Warnings and Additions to this Document
23
Latest Editions
23
Precautions for Use (be Sure to Read)
24
Safety Precautions
24
Symbols Used in this Document and on Warning Labels
26
Safety Notes
27
General
27
Precauciones de Seguridad
40
Rack Installation
48
Power Supply and Power Cord Use
54
Installation, Relocation, Storage, and Connection
66
Cleaning and Working with Internal Devices
72
During Operation
78
Warning Labels
84
External View
85
Handling Precautions (for Proper Operations)
86
Handling Precautions (for Anti-Static Measures)
87
Chapter 1 General Description
106
Introduction
107
Accessories
108
Standard Features
109
Feature of each Model
112
A1040B Model, A2040B Model
112
A2020B Model
113
A2010B Model
114
Checking Model Name
115
Introducing the Server
116
Important Points for System Configuration
116
Operation Procedures
116
Operation Status/Failure Monitoring and Maintenance
117
Notes on Configuring and Operating the System
118
Check the Shipped Status
118
Check the Setup Procedure
118
Using Operation Management Features
120
Management Features
121
Server Management
121
Storage Management
123
Power Management
125
Network Management
125
Remote Management
125
Firmware and Software Version Management
126
Names and Functions of Components
127
Front View (with Front Bezel Mounted)
127
Front View (with Front Bezel Removed)
128
Rear View
130
External View
131
Internal View
132
LED Indications
133
System Power Led ( )
133
Uid Led
133
System Status Led
134
Disk Access Led ( )
134
Fru (Cpu, Mem, Pci, Psu/Fan, Next, Misc) Led
135
Cnfg Led
135
Vlt/Tmp Led
135
Location LED
137
Leds on RCB (Rear Connector Board)
138
LED on Hard Disk Drive
140
LED on Optical Disk Drive
141
Power Unit LED
141
Cooling Fan LED
142
Chapter 2 Preparations
143
Installing / Removing Internal Options
144
Safety Precautions
145
Anti-Static Measures
151
Parts Able to be Added/Replaced by Customers
157
Overview of Installation and Removal
159
Confirming Servers (UID Switch)
163
Removing Front Bezel
164
Optical Disk Drive
165
Installation
165
Removal
166
Hard Disk Drive
168
Installation
169
Removal
171
Use of Internal Hard Disk Drives in the RAID System
172
Replacing a Hard Disk Drive in the RAID System (Auto Rebuild)
173
Power Supply Unit
175
Installation
176
Removal
177
Cooling Fan
180
Replacement
180
Internal Flash Memory
187
Installation
187
Processor (CPU)
188
Installation
188
Setting Required after Installation
188
Memory Riser (MR)
189
Installation
189
DIMM
190
Maximum Supported Memory Size
190
Memory Clock
191
Memory RAS Feature
192
Installation
193
Setting Required after Installation
193
Using Memory RAS Feature
194
Extra Battery for RAID Controller
202
Handling Precautions
202
Installation
202
PCI Card
203
Notes
203
Installation
203
Installing RAID Controller
204
Installing the Front Bezel
205
SUV Cable
206
Installation
206
Removal
208
Installation and Connection
209
Installation
209
Installing Rack
209
Installing the Server to the Rack or Removing It from the Rack
216
Connection
237
Connecting Power Cable
245
Connecting to Uninterruptible Power Supply (UPS)
247
Chapter 3 Setup
248
Before Starting Setup
249
Service Pack Support
249
Option Boards Supported by EXPRESSBUILDER
249
Setup
250
Setup of Management PC
250
Setup of Hardware
250
Setup of Operating System
252
Setting up Windows Server 2012 / Windows Server 2008 R2
252
Setting up Redhat Enterprise Linux Version6
252
Setting up Other Type of os
252
Setup for Solving Problems
253
Setup for Memory Dump (Debug Information)
253
Acquiring User-Mode Process Dump
253
Installing Network Monitor
253
Setup for Alert Notification
253
Advanced Setup
254
Reinstallation When Multiple Logical Drives Exist
254
Turning on the Server
255
Post
256
POST Flow
256
POST Error Messages
257
BIOS Setup Utility (SETUP)
258
Overview
258
Starting and Exiting SETUP Utility
258
Starting SETUP
258
Exiting SETUP
258
Description on On-Screen Items and Key Usage
259
Cases that Require Configuration
261
EFI Shell
263
EFI Shell Command
264
EXPRESSSCOPE Engine SP3
266
Overview
266
Default Network Settings
266
A1040B
266
A2040B/A2020B/A2010B
267
Http/Https
267
Login Using Ldap/Active Directory
267
EXPRESSSCOPE Engine SP3 Network Configuration
268
Configuring from Web Console or SMASH-CLP Via Maintenance LAN
268
Configuring from Web Console or SMASH-CLP Via Management LAN
268
Configuring Using BMC Configuration in Off-Line TOOL of BIOS
269
Settings on Remote Terminal
272
Port Number
274
Notes
275
Troubleshooting
283
Expressbuilder
286
Features of EXPRESSBUILDER
286
Starting EXPRESSBUILDER
286
Using Remote Management
287
Login and Logout
287
Login
287
Logout
289
Header Menu
290
Server Panel
291
System
293
Overview
293
Component
294
IPMI Information
300
Access Information
305
Remote Access
308
Power Control
308
System Operation
311
Session Management
312
Remote KVM
313
Configuration
316
Bmc
317
Systembios
374
Backup/Restore
377
Update
379
BMC Firmware
379
System BIOS
381
Maintenance
384
Hardware Log
384
Component Status
387
Device Online/Offline
390
Diagnostics
393
Bmc off
395
Capacity
396
Standby Web Console
400
Failover
400
MC Web Console Access Level
401
BMC Web Console Language/Help
403
Languages
403
Environment
404
About EXPRESSSCOPE Engine SP3
405
Help
406
Smash-Clp
408
Overview
408
Connecting to BMC
408
Login and Logout
409
Login
409
Logout
409
Basic Commands
410
Exit
411
Help
411
Reset
411
Set
412
Show
412
Start
412
Stop
413
Version
413
Remote Control
414
Power on
414
Forced Power off
414
OS Shutdown
414
System Reset
414
Remote Console
415
UID Switch Control
417
System Event Log
418
Viewing System Event Log
418
Change Setting of System Event Log
419
Access Log
420
Viewing Access Log
421
Clearing Access Log
422
Setting Access Log
423
User Settings
424
Network Settings
425
Power Consumption Control
429
Confirming System Information
430
Special Extended Command
433
State Acquisition
433
Set Online/Offline
435
Firmware Update
436
SOL Log Display
437
Bmcoff
437
Viewing and Modifying Server Configuration Information
438
Command Line Interface of Standby BMC
442
Connecting to Standby BMC
442
Login and Logout
443
Basic Commands
444
Exit
444
Help
444
Reset
444
Set
445
Show
445
Version
446
Oemnecfailover
446
WS-Management
447
Overview
447
Power Control
448
Power on
449
Power off Immediate
450
OS Shutdown
451
Hard Reset
452
Force Dump
453
Power Cycle
454
Sensor Information
455
Enumuration
455
Displaying Specified Sensor
456
Installing Software Components
457
Turning off the Server
458
Chapter 4 Appendix
459
EXPRESS5800/ A1040B (1/2)
460
Specifications
460
EXPRESS5800/ A1040B (2/2)
462
EXPRESS5800/ A2040B (1/2)
464
EXPRESS5800/ A2040B (2/2)
466
EXPRESS5800/ A2020B (1/2)
468
EXPRESS5800/ A2020B (2/2)
468
EXPRESS5800/ A2020B (2/2)
470
EXPRESS5800/ A2010B (1/2)
472
EXPRESS5800/ A2010B (2/2)
472
EXPRESS5800/ A2010B (2/2)
474
Operation Mode
476
Settings for each os
490
Related product manuals
NEC Express5800 A2040b
6 pages
NEC Express5800
52 pages
NEC Express5800/T71f
141 pages
NEC Express5800 140He
398 pages
NEC Express5800 320La
206 pages
NEC Express5800 320Lb
82 pages
NEC Express5800 120Ld
167 pages
NEC Express5800 120Ed
29 pages
NEC Express5800 110Ej
357 pages
NEC Express5800 120Li
344 pages
NEC Express5800/GT110e-S
34 pages
NEC Express5800/R120h-1E
52 pages
 Loading...