EasyManuals Logo

Omega DP41-B User Manual

Omega DP41-B
132 pages
To Next Page IconTo Next Page
To Previous Page IconTo Previous Page
Page #32 background imageLoading...
Page #32 background image
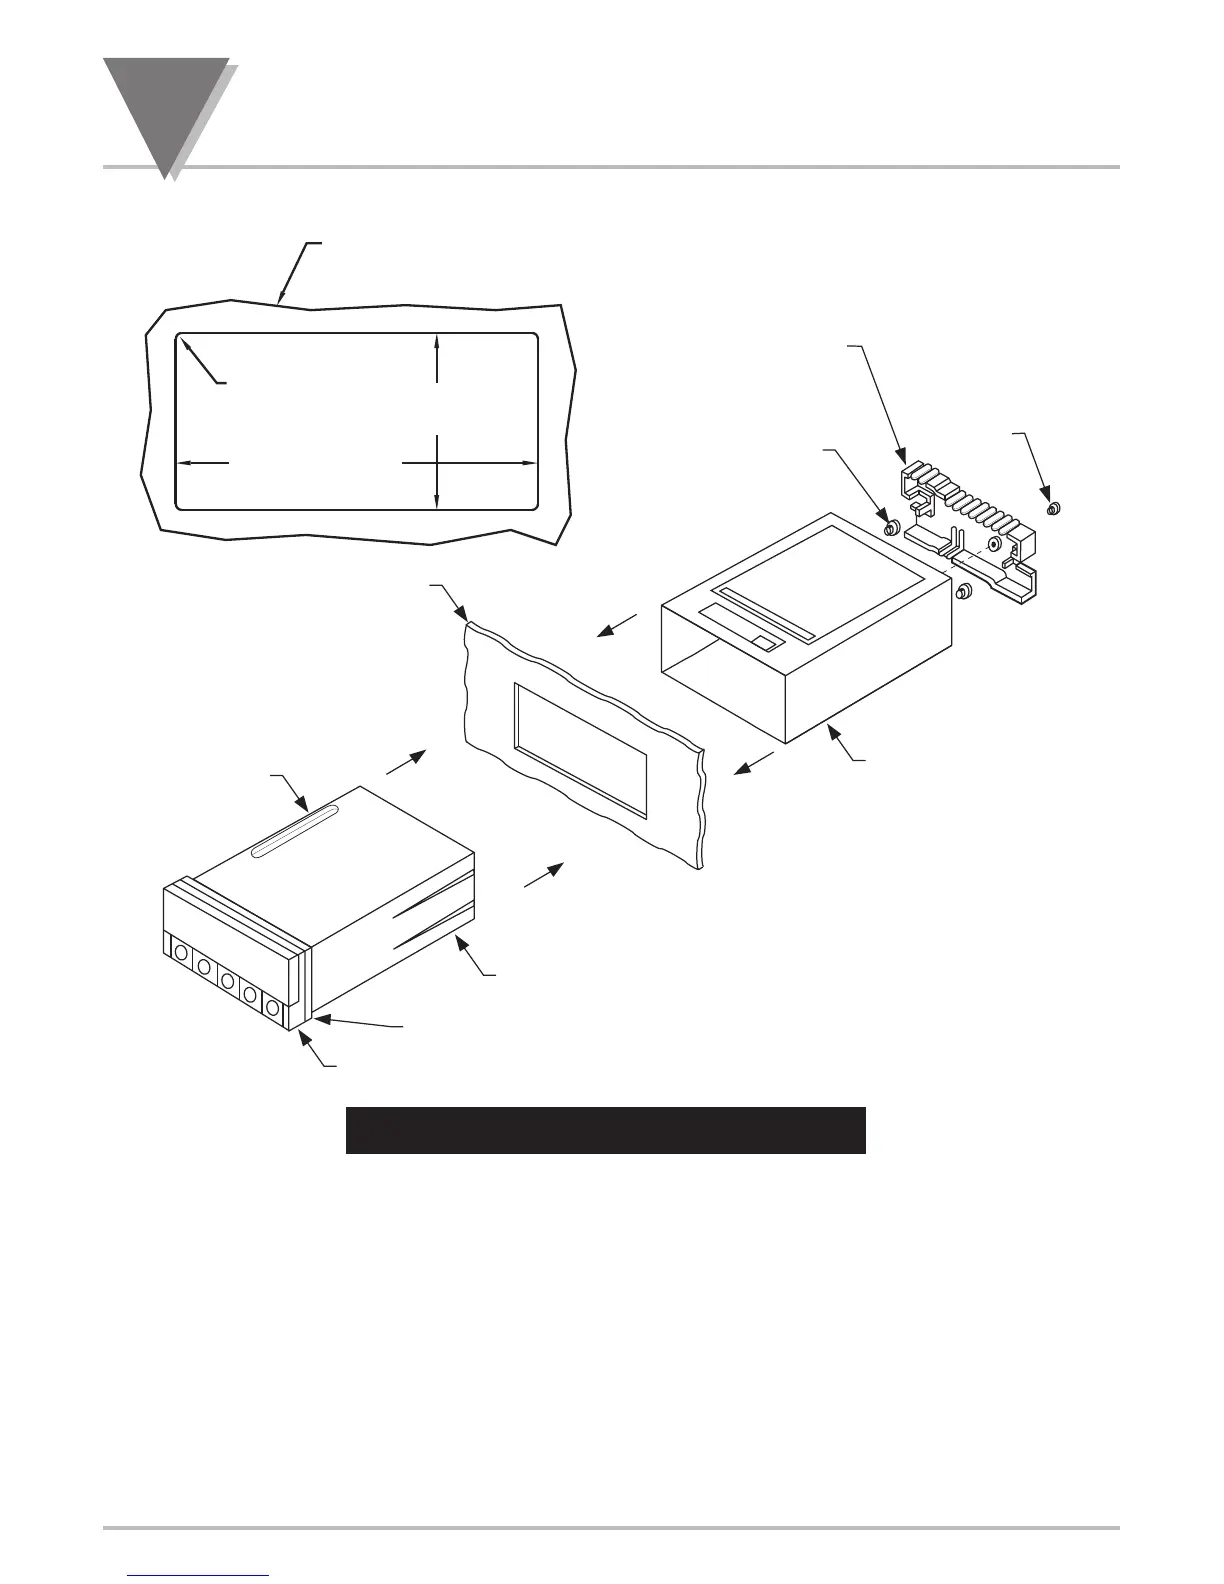
Figure 5-10. Panel Mounting Assembly
6. Punch or cut a hole in the panel using the panel cutout dimensions in Figure 5-10. Remove burrs
and paint the panel as required.
7. Insert the panel-mount gasket around the rear of the case and slide it forward to the bezel (if it’s
not already in place).
8. Working from the front of the panel, insert the case assembly, rear end first, all the way into the
panel cutout such that the gasket firmly backs the panel surface.
9. Working from the rear of the panel, slide the sleeve forward over the case and up to the panel
surface.
The panel should now be sandwiched between the bezel-backed gasket in front and the sleeve in back.
10. Replace the thumbnuts that secure the sleeve tabs to the case.
REAR
PROTECTIVE
COVER
COVER
MOUNTING
SCREW
THUMBNUTS
SLEEVE
GASKET
CASE
BEZEL
PANEL
METER
0.25 [6.4] MAX
0.03 [0.8] MIN
PANEL THICKNESS
3.622 +0.032/-.000
[92.00 +0.81/-0.00]
1.772 +0.024/-.000
[45.00 +0.61/-0.00]
0.06
[1.5]
4PLCS
R
5
Setup
22

Table of Contents

Other manuals for Omega DP41-B

Questions and Answers:

Question and Answer IconNeed help?

Do you have a question about the Omega DP41-B and is the answer not in the manual?

Omega DP41-B Specifications

General IconGeneral
BrandOmega
ModelDP41-B
CategoryMeasuring Instruments
LanguageEnglish

Related product manuals