Install a Disk Backplane Cable
1. Unpack the replacement disk backplane cable and place it on an antistatic mat.
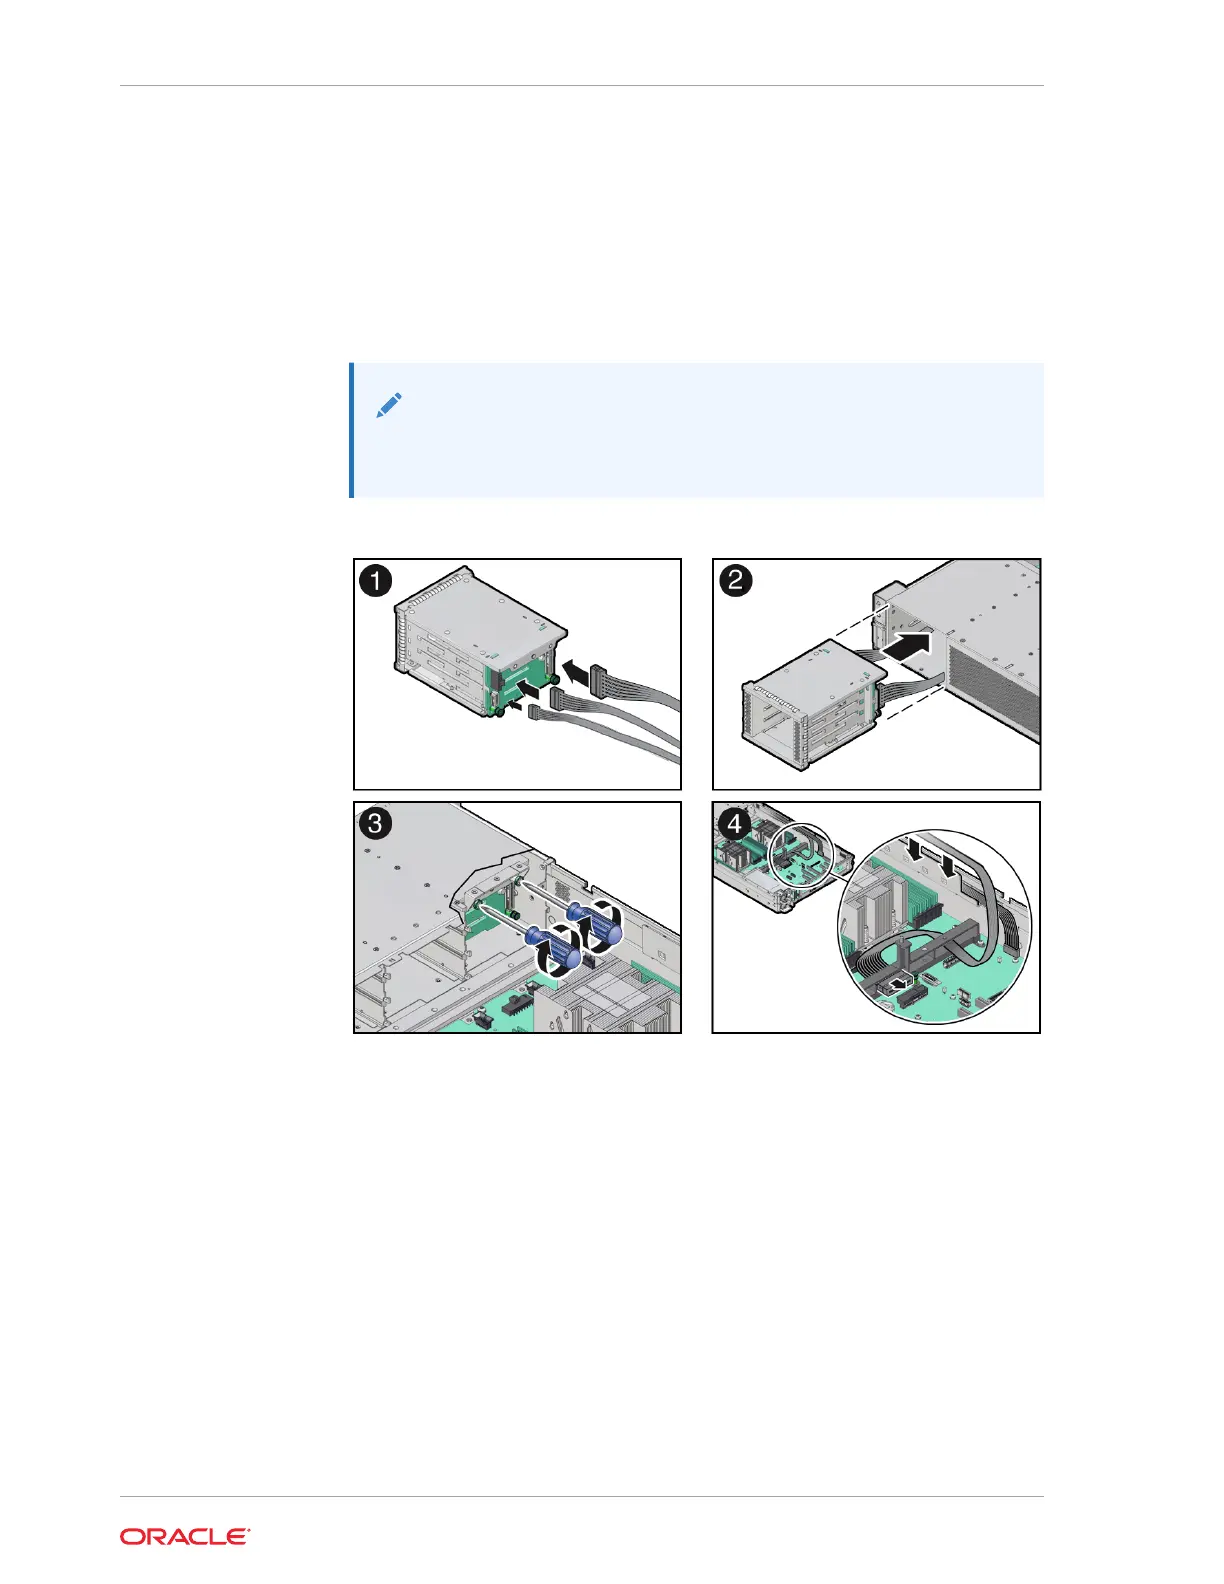
2. Connect the replacement cable the disk backplane and reinstall the storage drive
cage in to the chassis.
a. Connect the replacement cable to the disk backplane [1].
Note:
The disk backplane Aux Signal, Power and Retimer cables will only
fit into the connectors for which they are designed.
b. Align the storage drive cage with the opening in the front panel of the server.
Pull the attached cables through the opening while gently pushing the storage
drive cage in to the chassis until it is fully seated in the chassis [2].
c. Using a Torx T15 screwdriver, tighten the two spring-mounted screws to
secure the storage drive cage to the chassis [3].
d. Reconnect the disk backplane Aux Signal and Power cables to their
motherboard connectors [4].
e. Then reconnect the "Y" end of the Retimer cable to the Retimer card in PCIe
slot 6.
Chapter 5
Servicing the Disk Backplane (FRU)
5-32