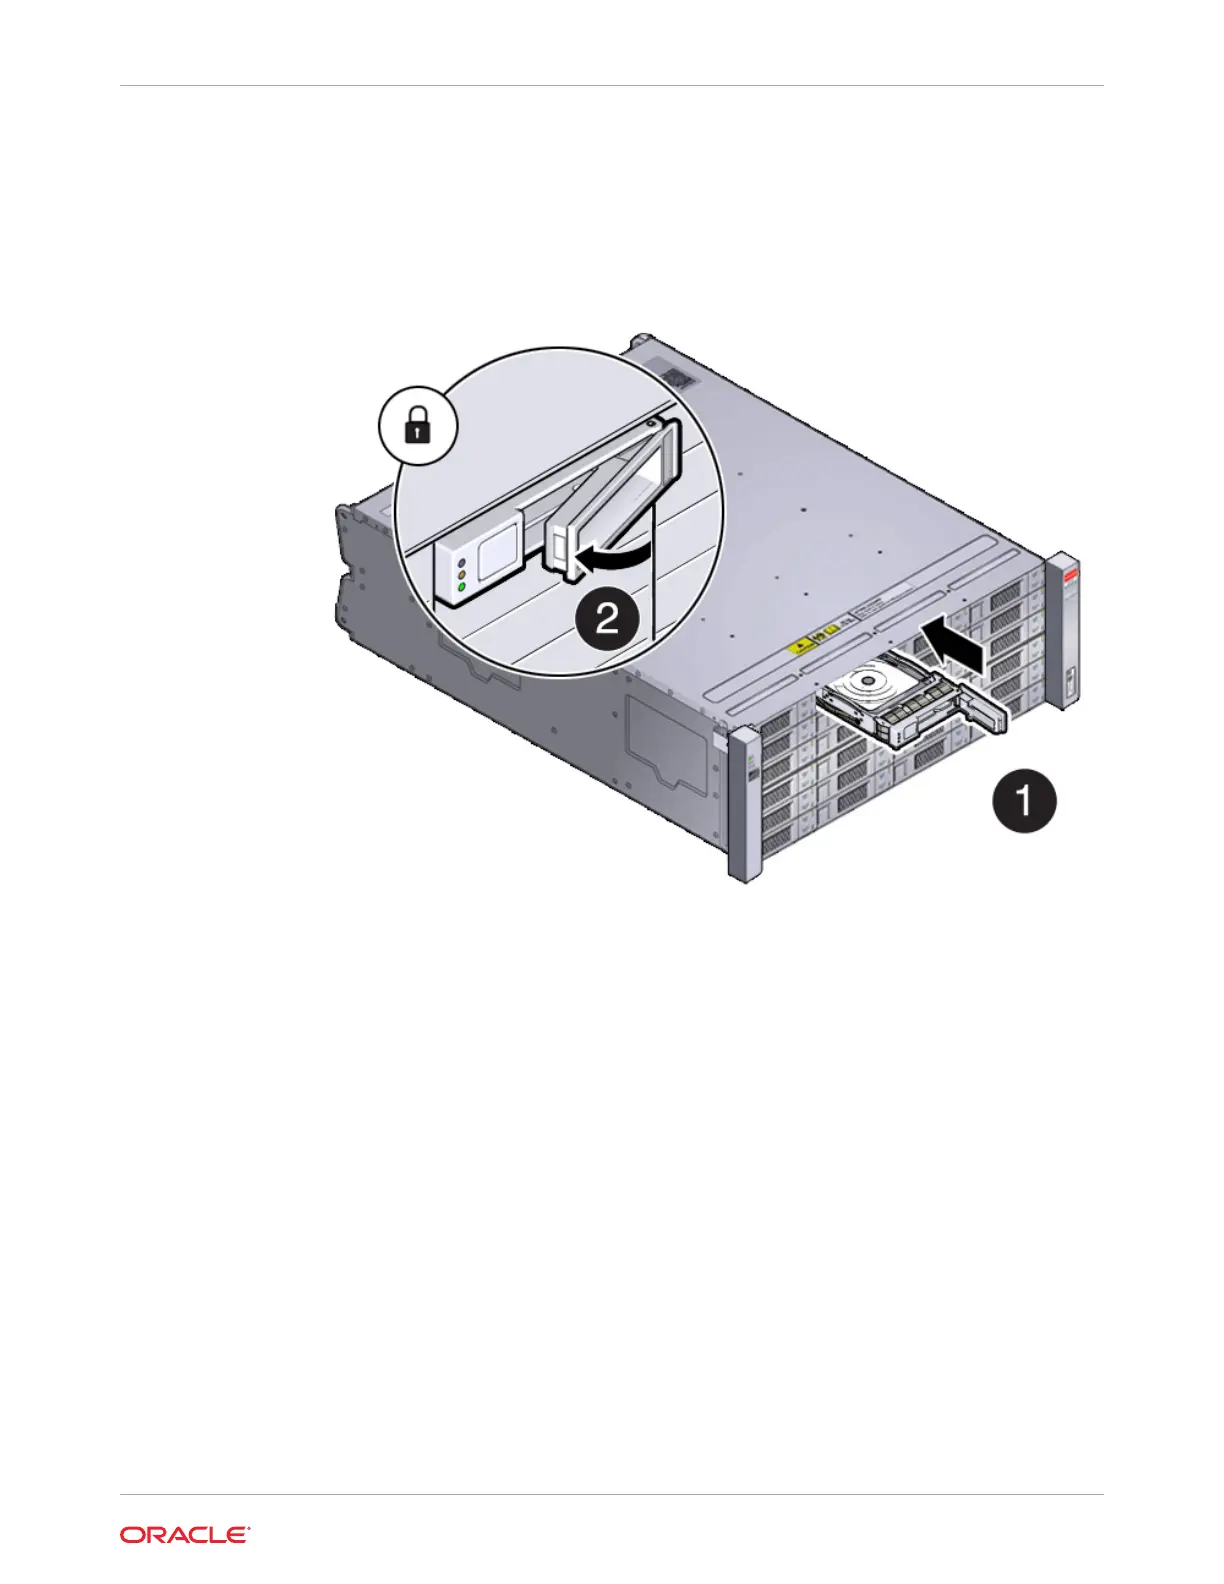
3. Install the replacement drive by opening the drive lever on the replacement drive. Slide
the new drive into the drive slot [1] until it engages with the backplane connector and then
close the lever to fully seat the drive and lock it into place [2] as shown in the following
figure.
Check that the drive is locked in place and flush with the other drives.
4. Once installed, the system should automatically detect and use the replacement drive.
Ensure that the green OK indicator for the replacement drive lights to show that the drive
is ready.
This can take a few minutes to complete.
Replace a Storage Shelf Power Supply (CRU)
Replace a power supply in an Oracle Database Appliance storage shelf.
The storage shelf and the storage expansion shelf each have two power supplies. Indicators
(LEDs) on the power supplies indicate their operation state.
The power supplies are redundant and one can be replaced while the appliance is running.
Example figure showing a DE3-24C power supply:
Chapter 3
Oracle Database Appliance X10-HA Storage Shelf Hot Pluggable Components
3-17