6. Power on and remount the replacement drive. Type the following command from
the host:
# odaadmcli power disk on pd_xx
Where
pd_xx
is the name of the disk being replaced as described in step 1.
It can take a few minutes for the power-on operation to complete. Once complete,
the drive's green OK indicator will light.
7. To check the status of the replacement disk, type the following command from the
host:
# odaadmcli show disk
For additional information, refer to the Oracle Database Appliance Deployment
and User's Guide.
Adding NVMe Expansion Storage
Add NVMe storage to an Oracle Database Appliance X10-L. Note that the Oracle
Database Appliance X10-S does not support additional storage.
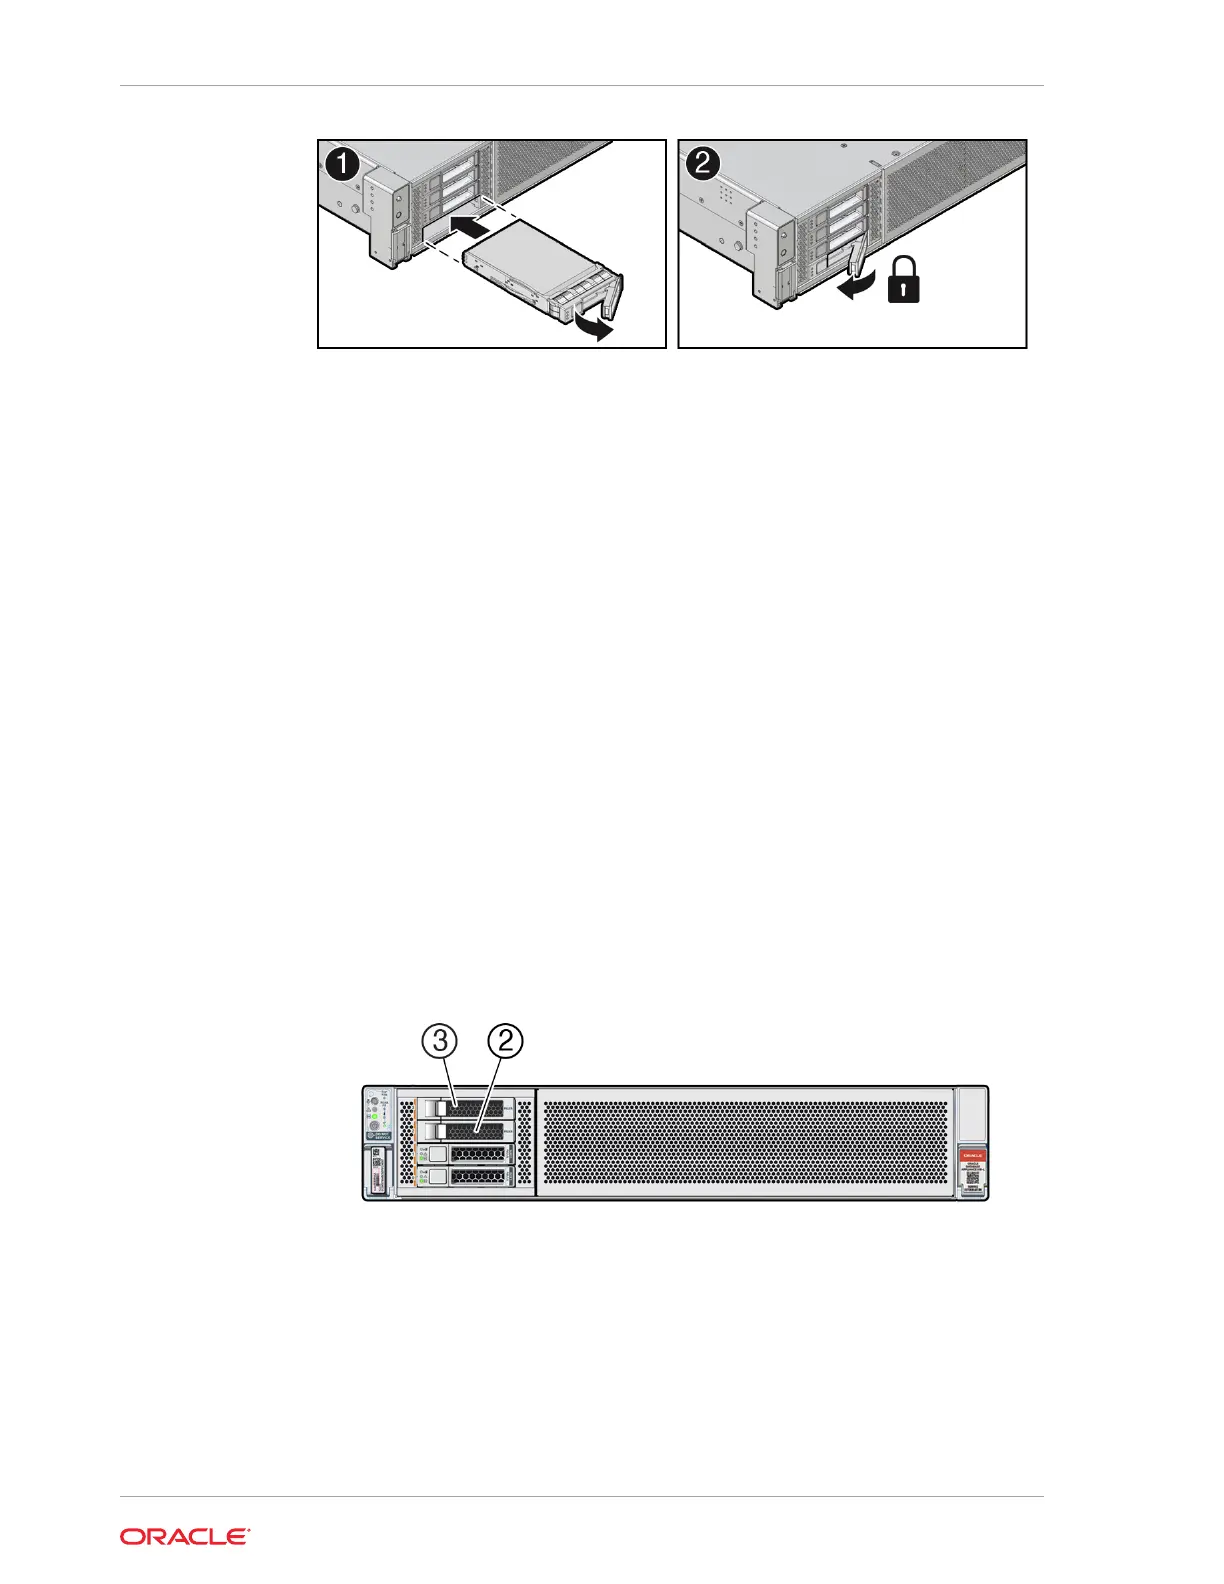
• The Oracle Database Appliance X10-L supports two expansion slots for NVMe
drives. These are slots labeled 2 through 3 as seen from the front of the system.
Storage drives can be added in sets of two. For information about supported
optional storage drives, refer to the Owner's Guide.
• When expanding storage, populate slots starting with the lowest numbered
available slot (for example, slot 2 as seen on the front panel).
• The drive power-up and storage expansion odaadmcli commands listed here
should only be run after all new disk drives have been physically installed. Once
you expand storage, you cannot revert to a previous storage configuration (for
example, the default installation with only two NVMe drives).
Chapter 3
Oracle Database Appliance X10 Server Hot-Pluggable Components
3-4