Replace a Storage Shelf HDD or SSD (CRU)
Replace a storage disk in an Oracle Database Appliance storage shelf.
Note:
After a physical insertion or removal action of a storage component (such as
a disk or SAS cable), you should wait before performing the next action to
allow the system software to fully process the event. This could take several
minutes to complete.
1. Locate the failed drive on the front of the storage shelf.
Look for the drive with its Service Required indicator and/or Ready-to-Remove
indicator lit.
Caution:
Equipment damage. Do not remove a drive unless you have an
immediate replacement.
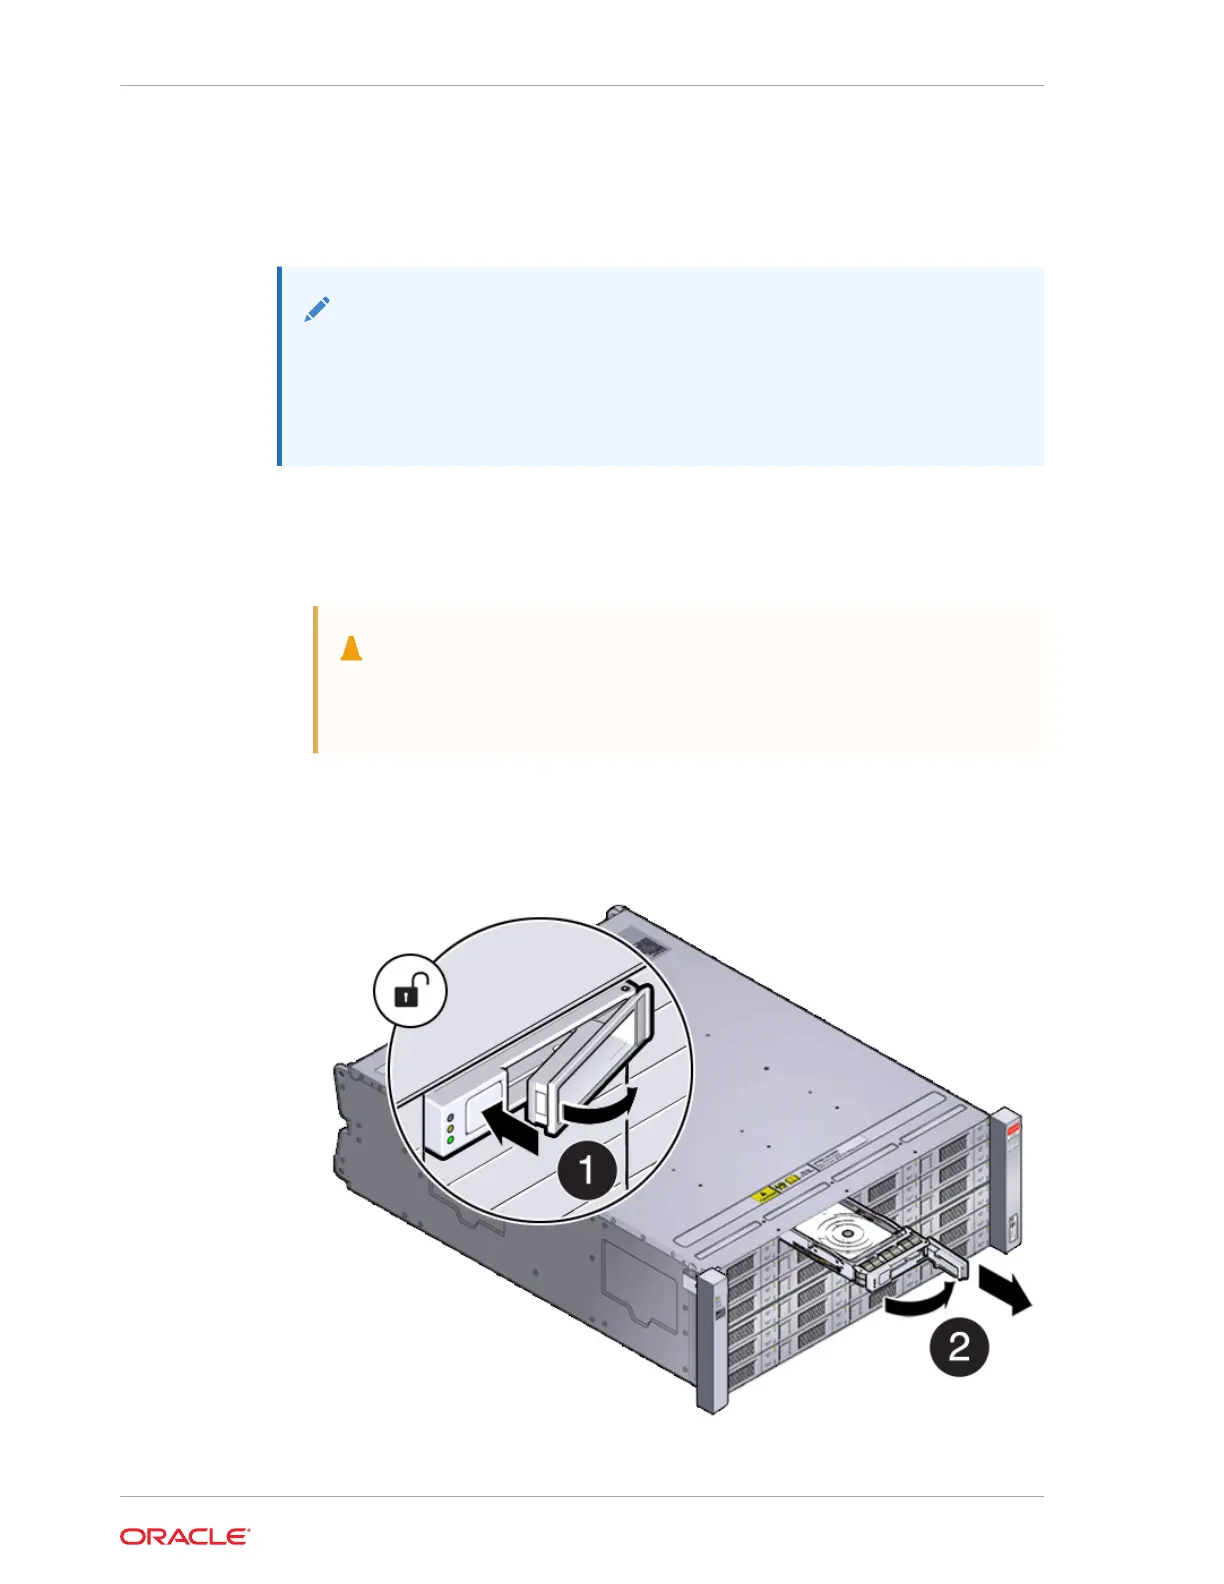
2. Remove the drive by pressing the release button [1] to release the drive lever and
then, rotate the lever open and, grasping the drive body, slide the drive out of the
storage shelf [2] as shown in the following figure.
Chapter 3
Oracle Database Appliance X10-HA Storage Shelf Hot Pluggable Components
3-16