Identify and Remove a DIMM
1. Prepare the server for service.
a. Power off the server.
See Powering Down the Server.
b. Disconnect the power cords from the power supplies.
See Disconnect Cables From the Server.
c. Extend the server into the maintenance position.
See Extend the Server to the Maintenance Position.
d. Attach an antistatic wrist strap to your wrist and then to a metal area on the chassis.
See Take Antistatic Measures.
e. Remove the server top cover.
See Remove the Server Top Cover.
f. Remove the air baffle.
See Remove the Air Baffle.
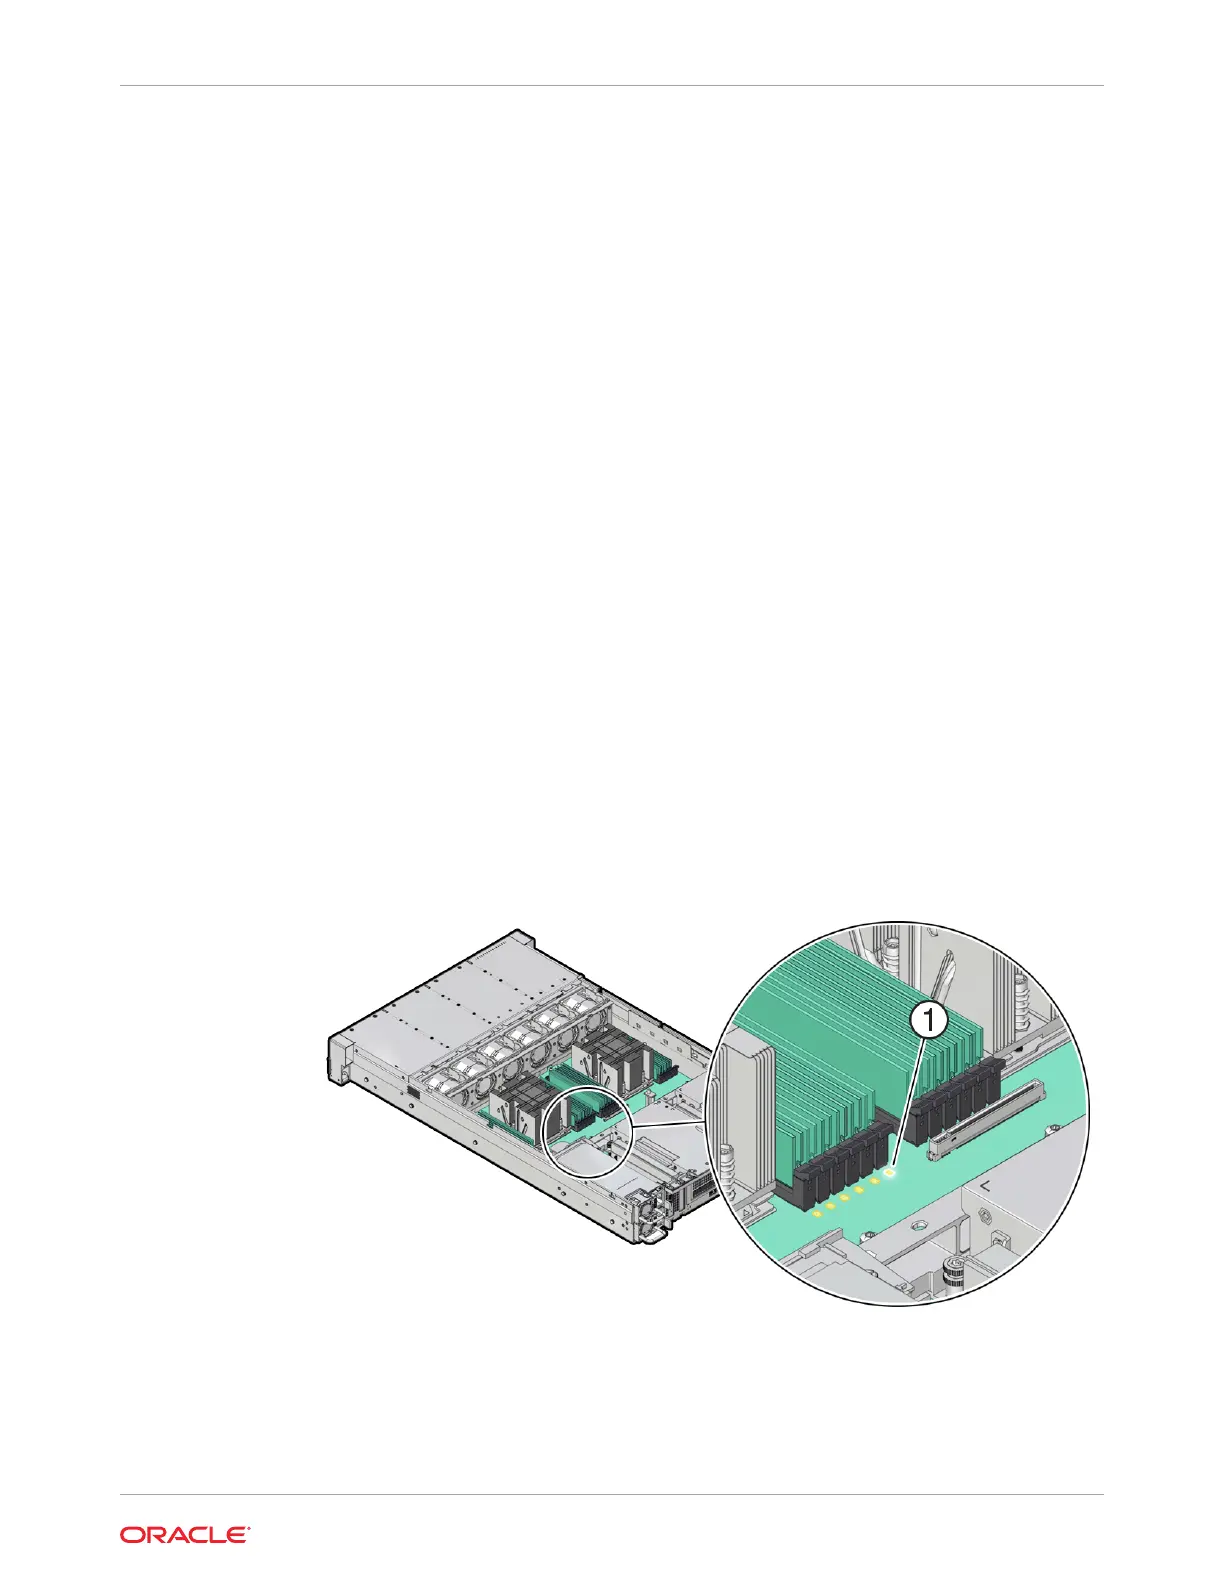
2. Identify and note the location of the failed DIMM by pressing the Fault Remind button on
the motherboard.
See Using the Server Fault Remind Button.
Failed DIMMs are identified with a corresponding amber LED on the motherboard.
• If the DIMM Fault LED is off, then the DIMM is operating properly.
• If the DIMM Fault LED is on (amber), then the DIMM is failed and must be replaced
[1].
3. To remove the failed DIMM, do the following:
a. Rotate both DIMM slot ejectors outward as far as they go.
The DIMM is partially ejected from the slot.
b. Carefully lift the DIMM straight up to remove it from the slot.
Chapter 4
Servicing DIMMs (CRU)
4-13