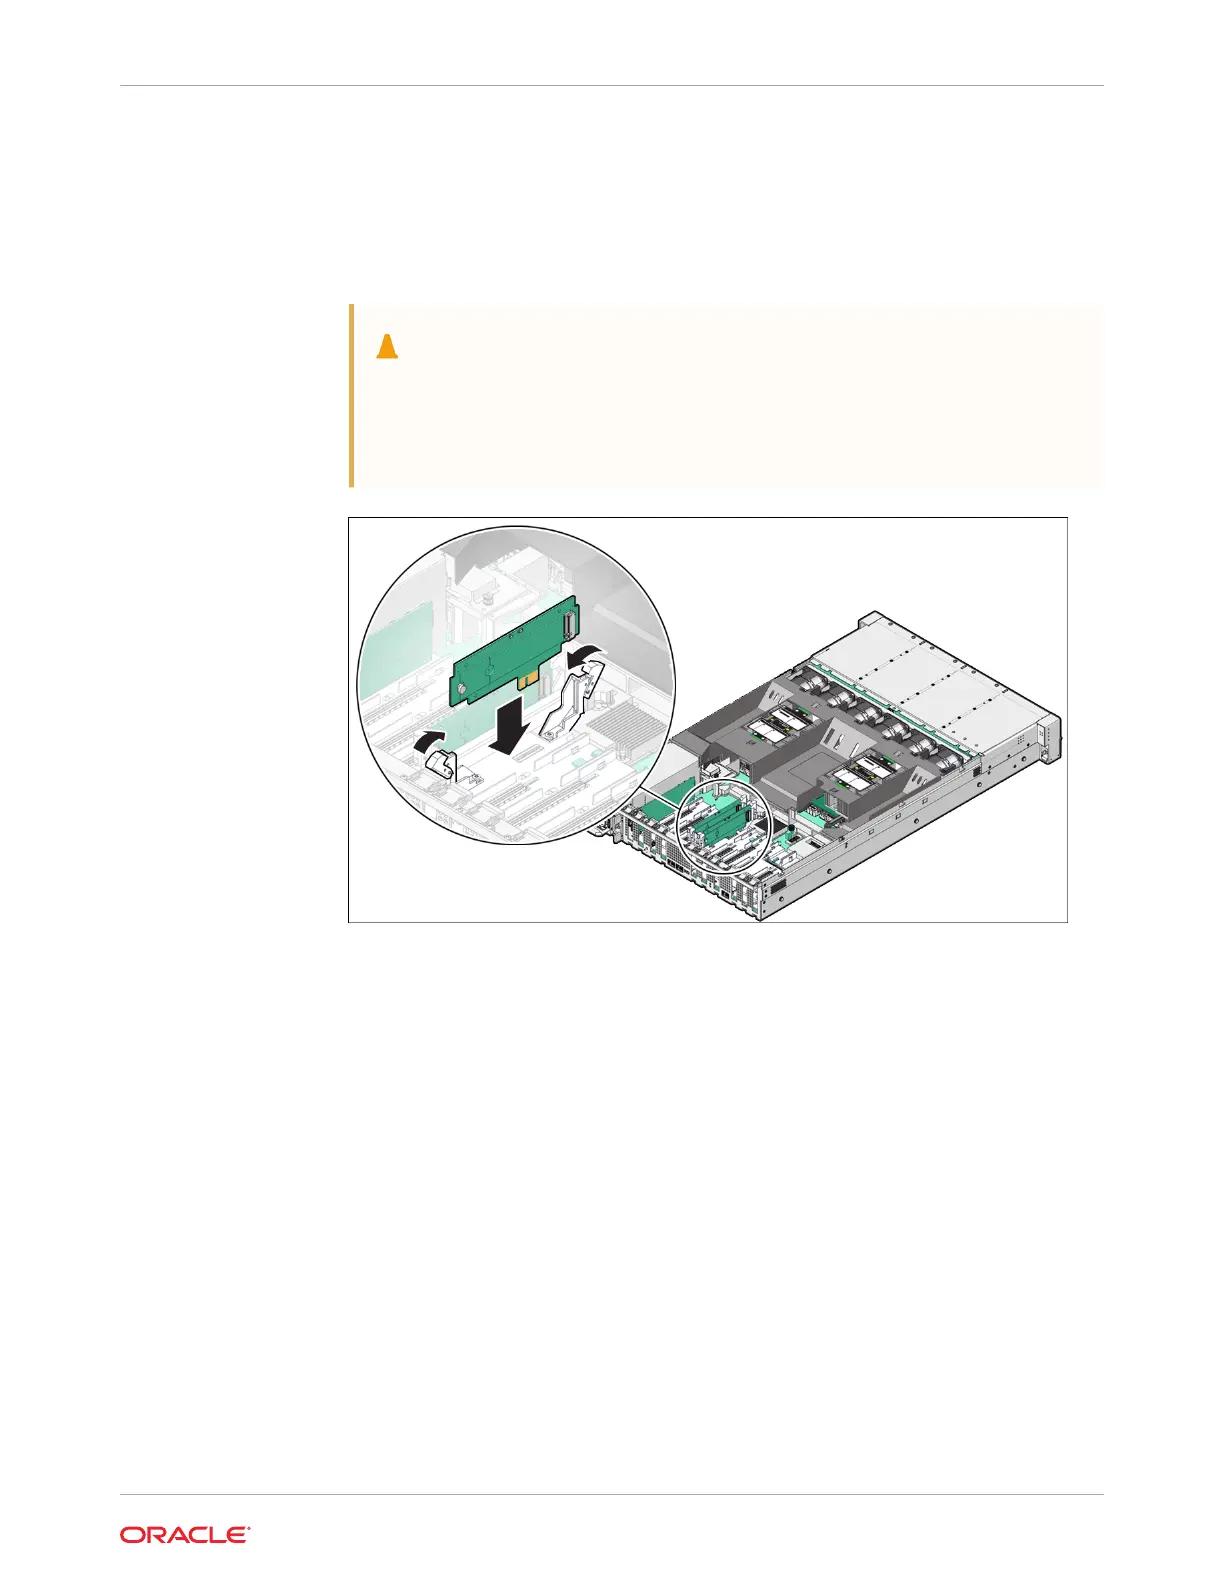
b. Align the notch in the replacement riser board with the connector key in the connector
socket.
The notch ensures that the riser board is oriented correctly.
c. Push the riser board into its connector socket on the motherboard until the riser
board is securely seated in the socket.
Caution:
If the riser board does not easily seat into the connector socket, verify that
the notch in the riser board is aligned with the connector key in the
connector socket. If the notch is not aligned, damage to the riser board
might occur.
d. Rotate the riser board securing levers inward until the riser board is secured in place.
4. Return the server to operation.
a. Install the server top cover.
See Install the Server Top Cover.
b. Return the server to the normal rack position.
See Return the Server to the Normal Rack Position.
c. Reconnect the power cords to the server power supplies, and power on the server.
See Powering On Oracle Database Appliance.
d. Verify that the System OK LED indicator is lit.
Remove a Flash Riser Board
Follow the instructions in this section if you need to replace a flash riser board.
The server includes two flash riser boards (SSDR0, SSDR1). Each flash riser board can
contain one M.2 flash SSD.
1. Prepare the server for service.
Chapter 4
Servicing Internal M.2 Flash SSDs (CRU)
4-5